Web Push Notifications on Magento
Magento is one of the most popular open-source e-commerce platforms available today and it supports Web Push Notifications with PushAlert. The setup process is very easy with Magento, all you need is to add our code to the head section and instantly boost sales with targeted Push Notifications.
Using Magento Extension (Magento 1.x)
- Download the PushAlert Web Push Extension for Magento from here.
- Extract the extension and then copy the "app" folder and "package.xml" files to the root of your Magento 1.x installation. You can also choose to use Magento Connect to install the extension.
-
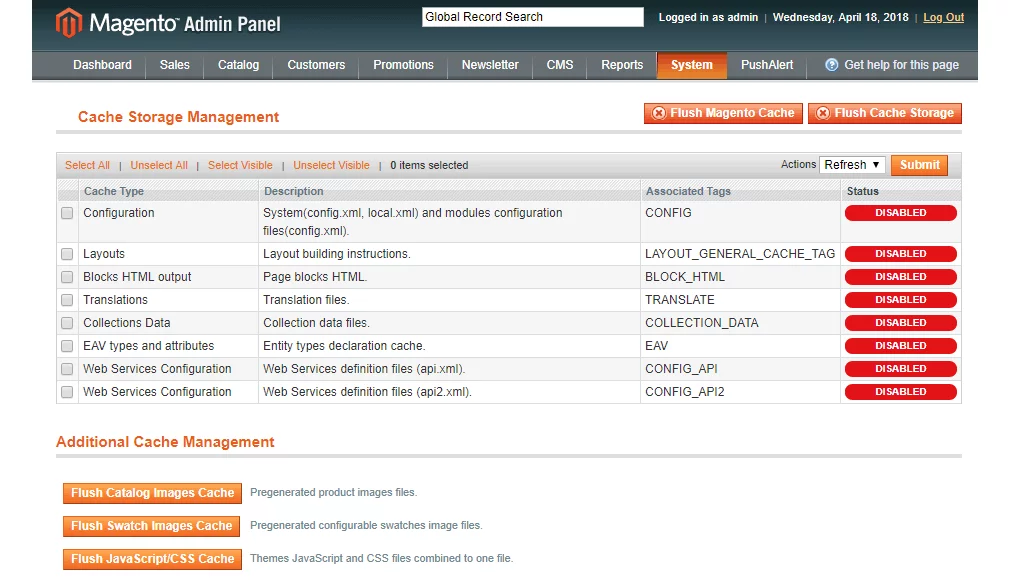
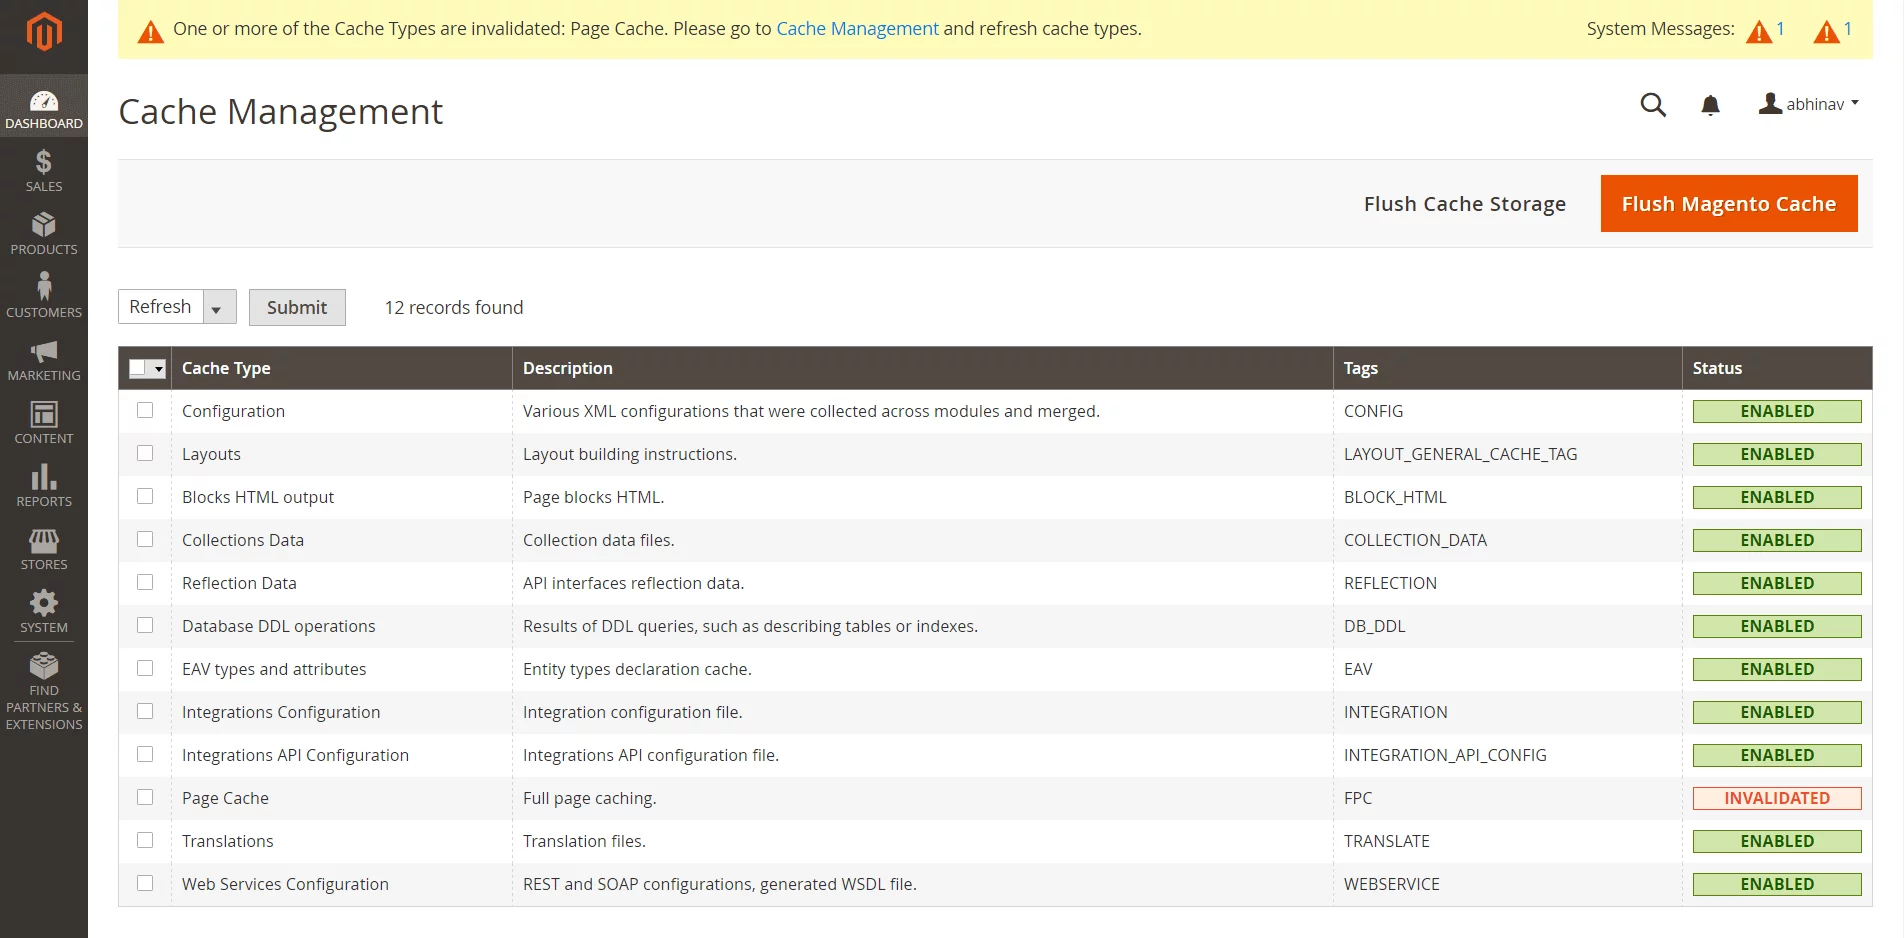
Now head back to the Magento Admin section. Click on System > Cache Management and then click on Flush Magento Cache as well as Flush Cache Storage. Then refresh the admin section.
- You will now be able to see PushAlert in the main top menu. Click on Configuration.
- At this point, you should be registered for an account on PushAlert.co. You would need the credentials available there to enable the extension here. Once you have logged into your PushAlert dashboard. Head into the Integrate section and click on Magento.
-
Now come back to the Magento admin section and PushAlert configuration. First, "Enable Web Push" must be selected, and then if your website runs on HTTPS, please select that. Do note that you should have selected HTTPS while setting up your account on PushAlert. If not, send an email to support@pushalert.co or start a chat to change your integration.
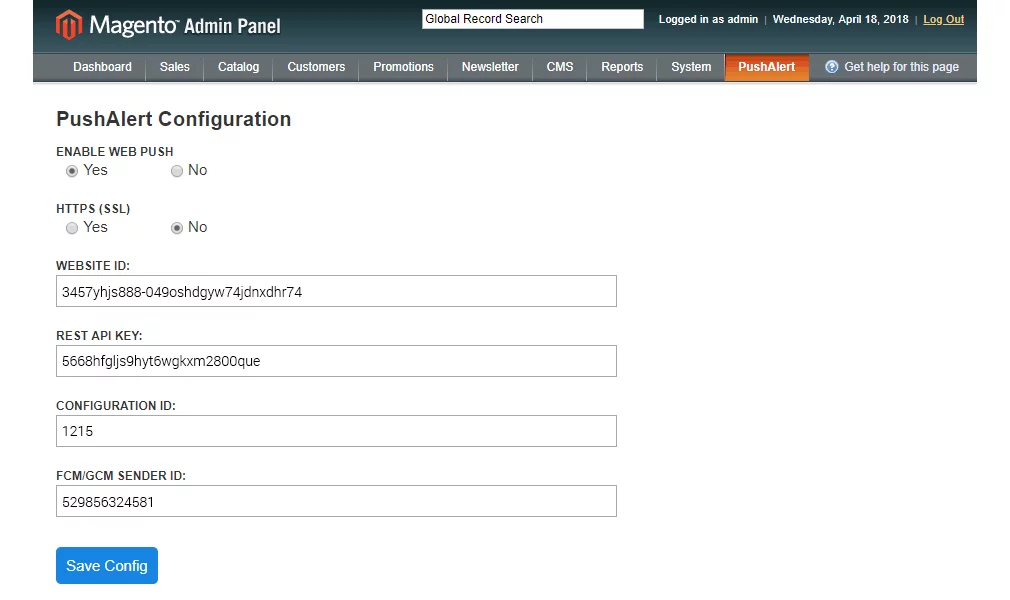
- You will find all the information required for the Configuration screen from the PushAlert Dashboard > Integrate section under Magento. Copy all the required information. Please do not edit the FCM/GCM Sender ID, if you have not made the same change on your PushAlert dashboard in Settings > Website.
- Click on Save config. Once again, head to System > Cache Management and flush both caches.
- That's it. The integration is complete, and you wil now be able to see the opt-in prompt on your website pages. The PushAlert Web Push Magento extension also helps in automating abandoned cart recovery, sending automated in-stock and price drop notifications, along with Shipment information (available based on plan chosen).
Without Using Magento Extension (Magento 1.x, Magento 2.x)
- Login to the Administrator panel of your store.
-
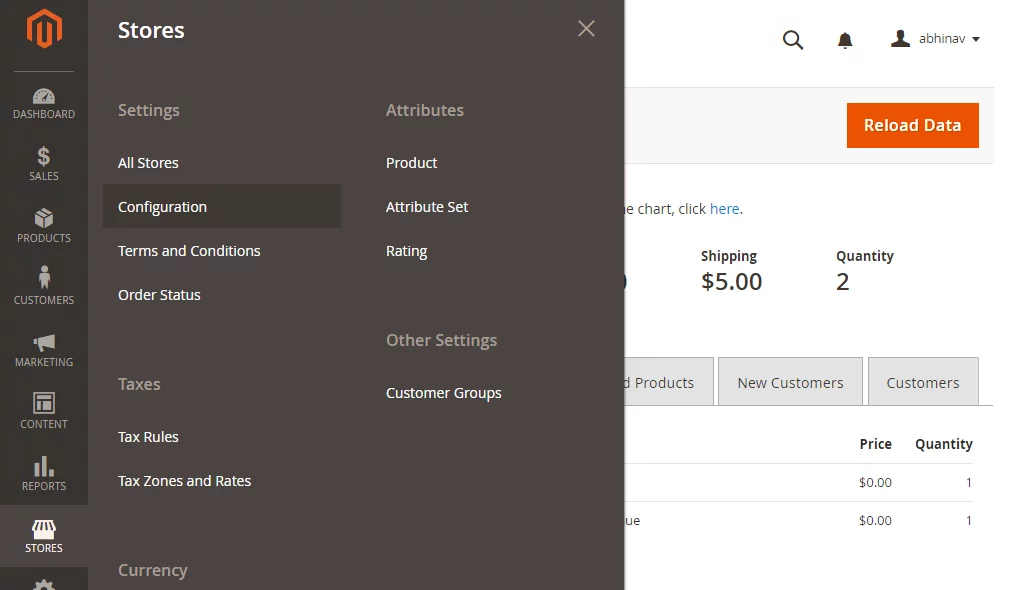
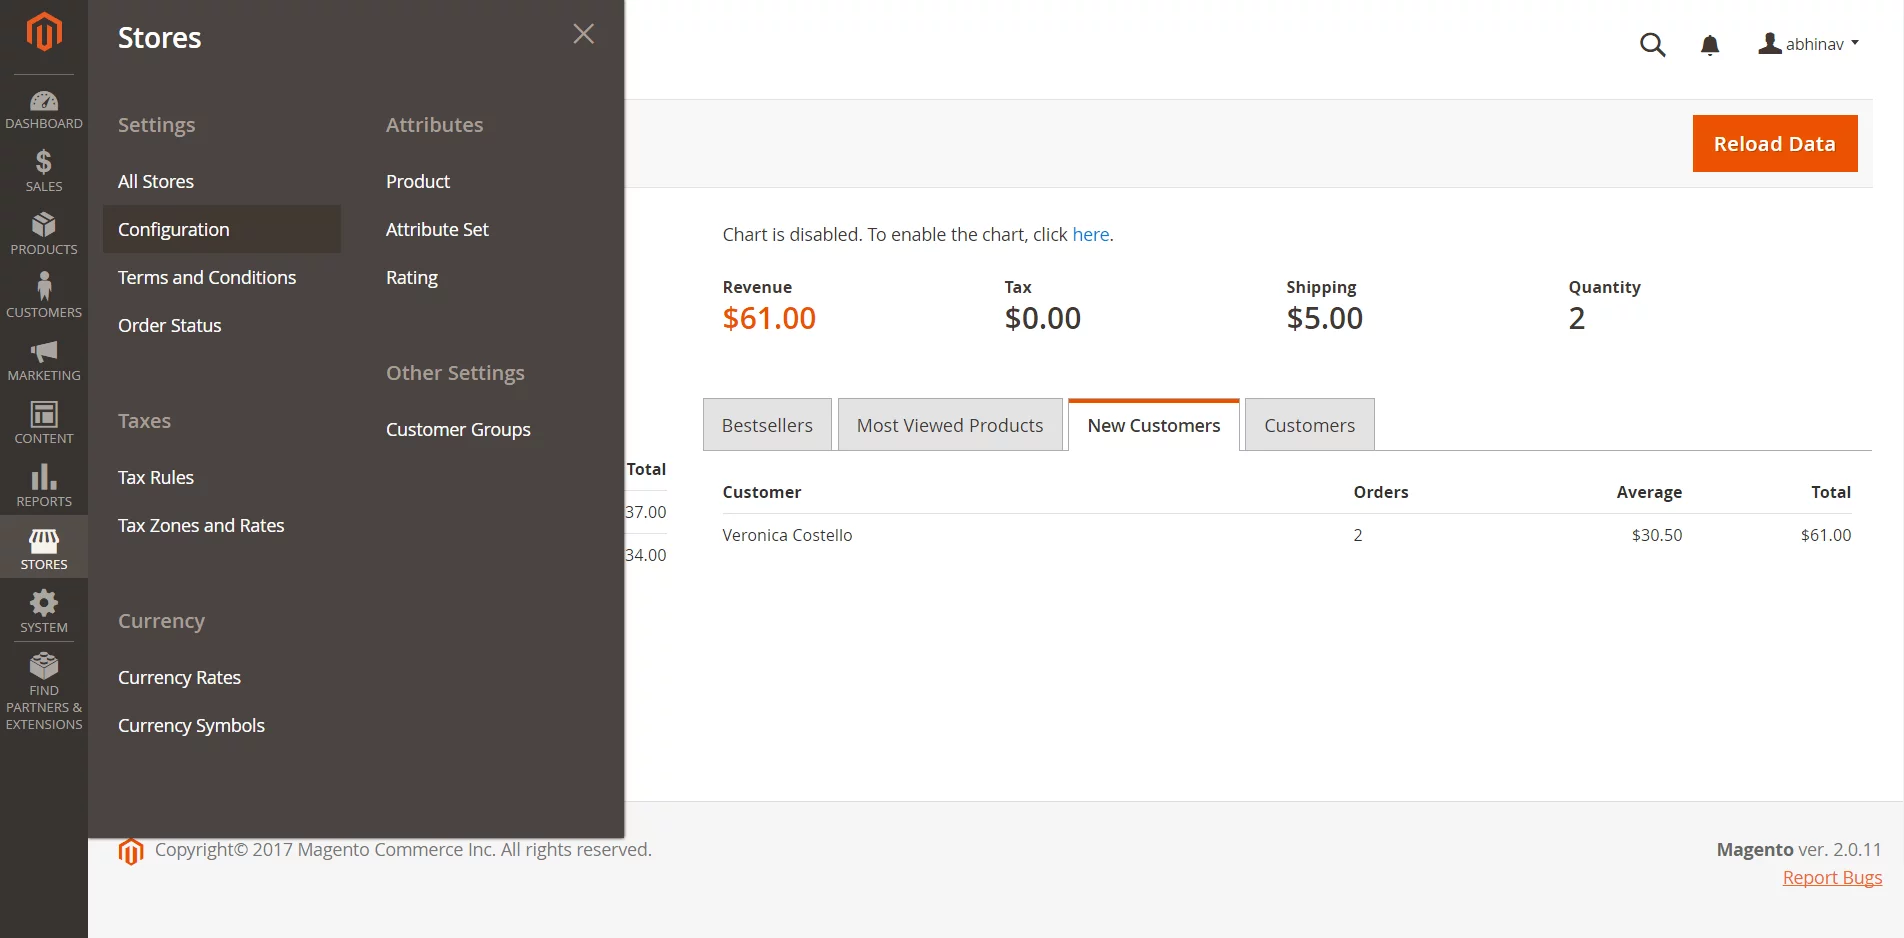
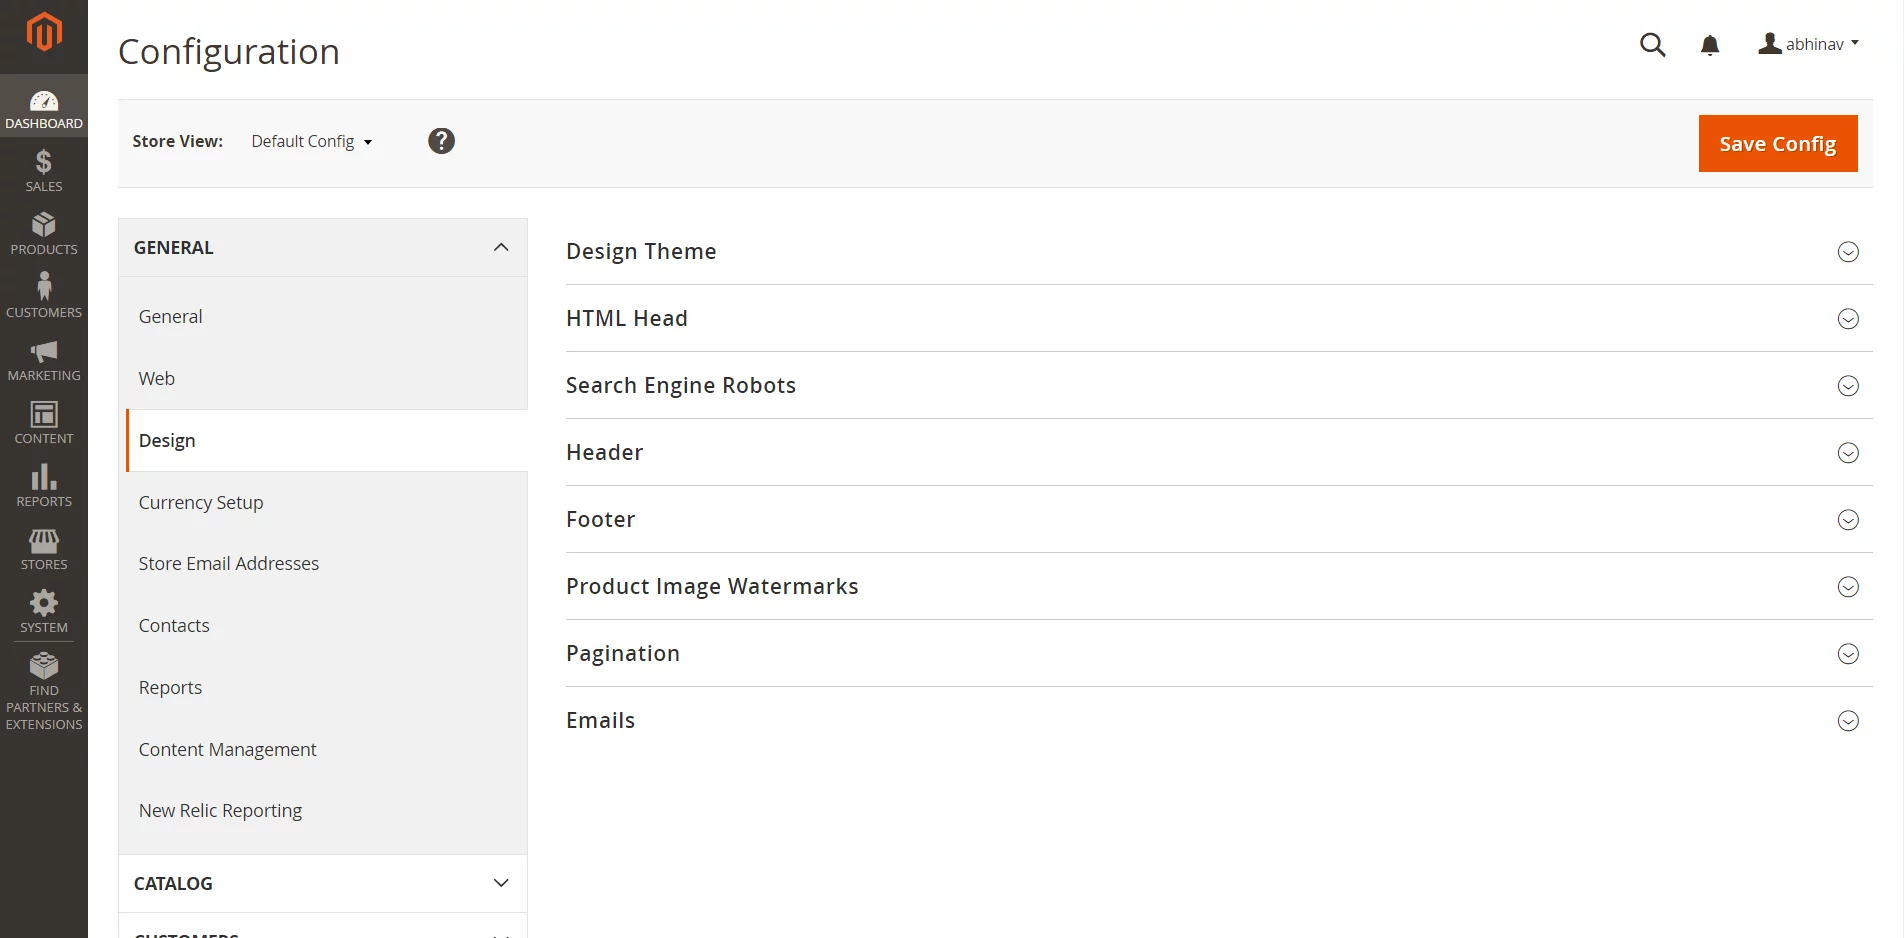
Click on side-menu option - STORES, followed by Configuration. For older versions, proceed to System > Configuration.
-
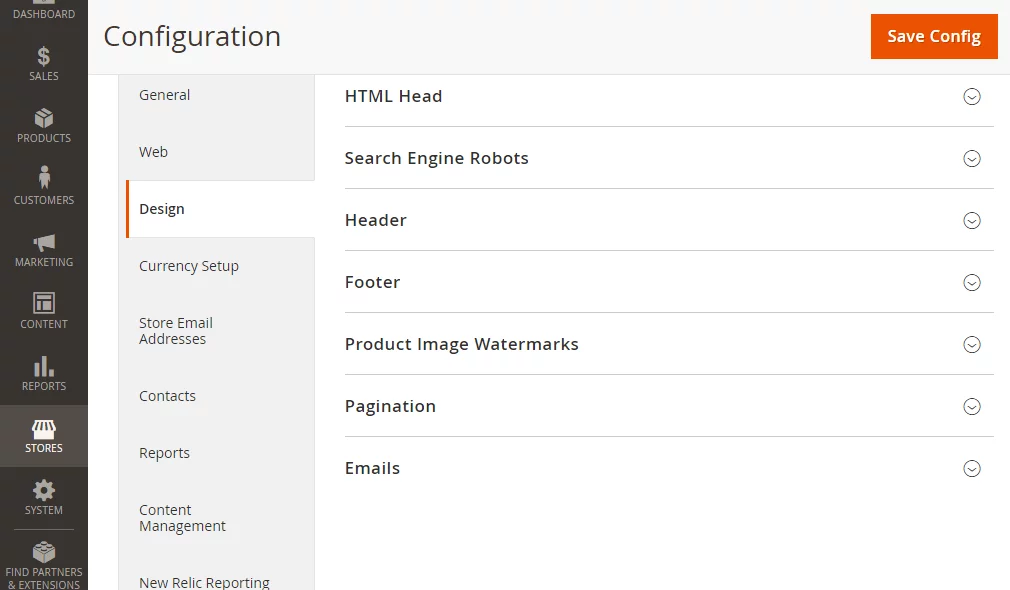
You will land in the Store configuration section. Click on Design in the left bar.
-
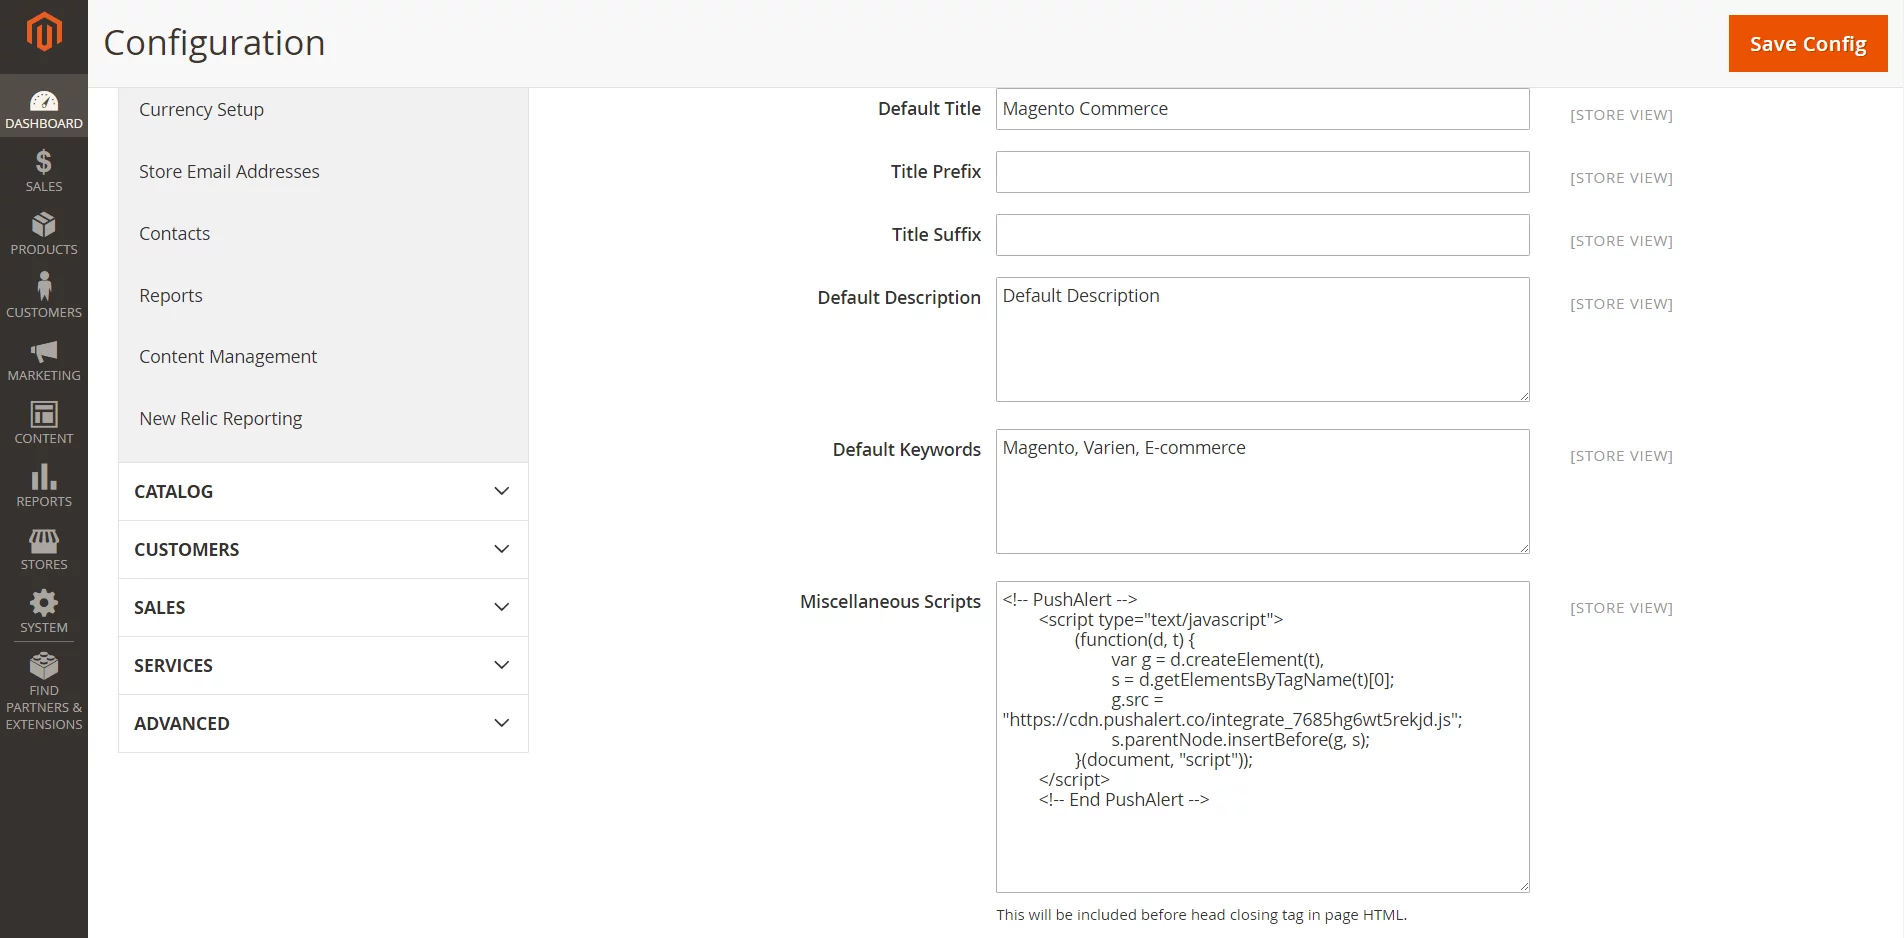
Navigate to HTML Head section. Just scroll down to Miscellaneous Scripts section and paste the integration code you got during initial setup or copy it from the Integrate section of the PushAlert Dashboard.
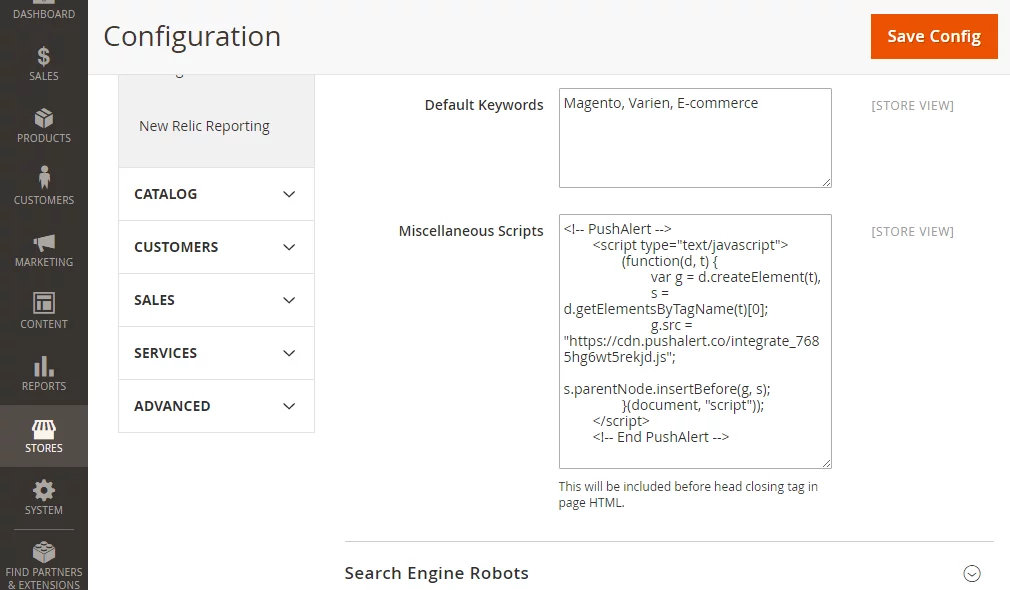
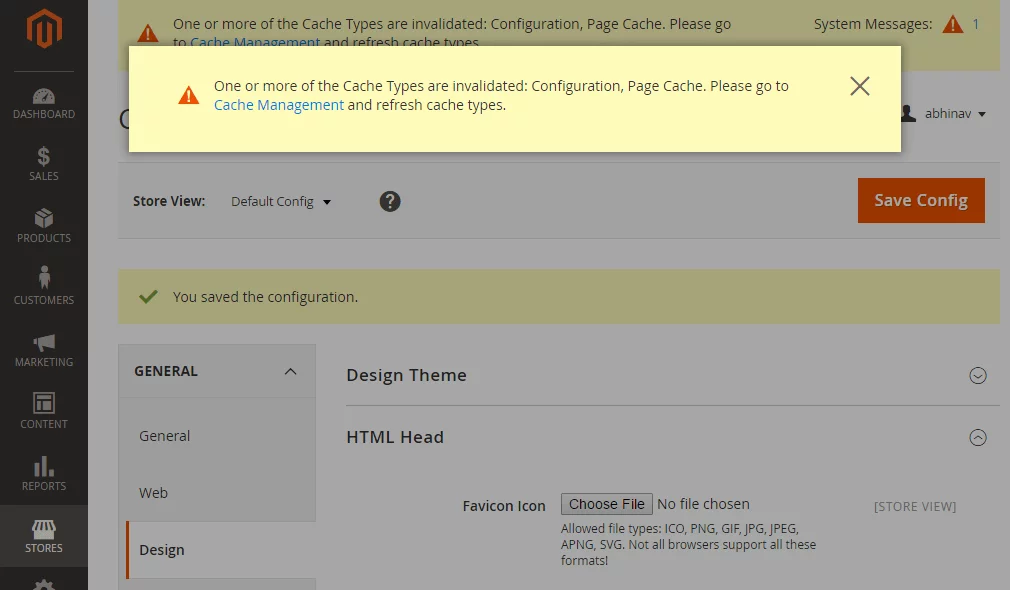
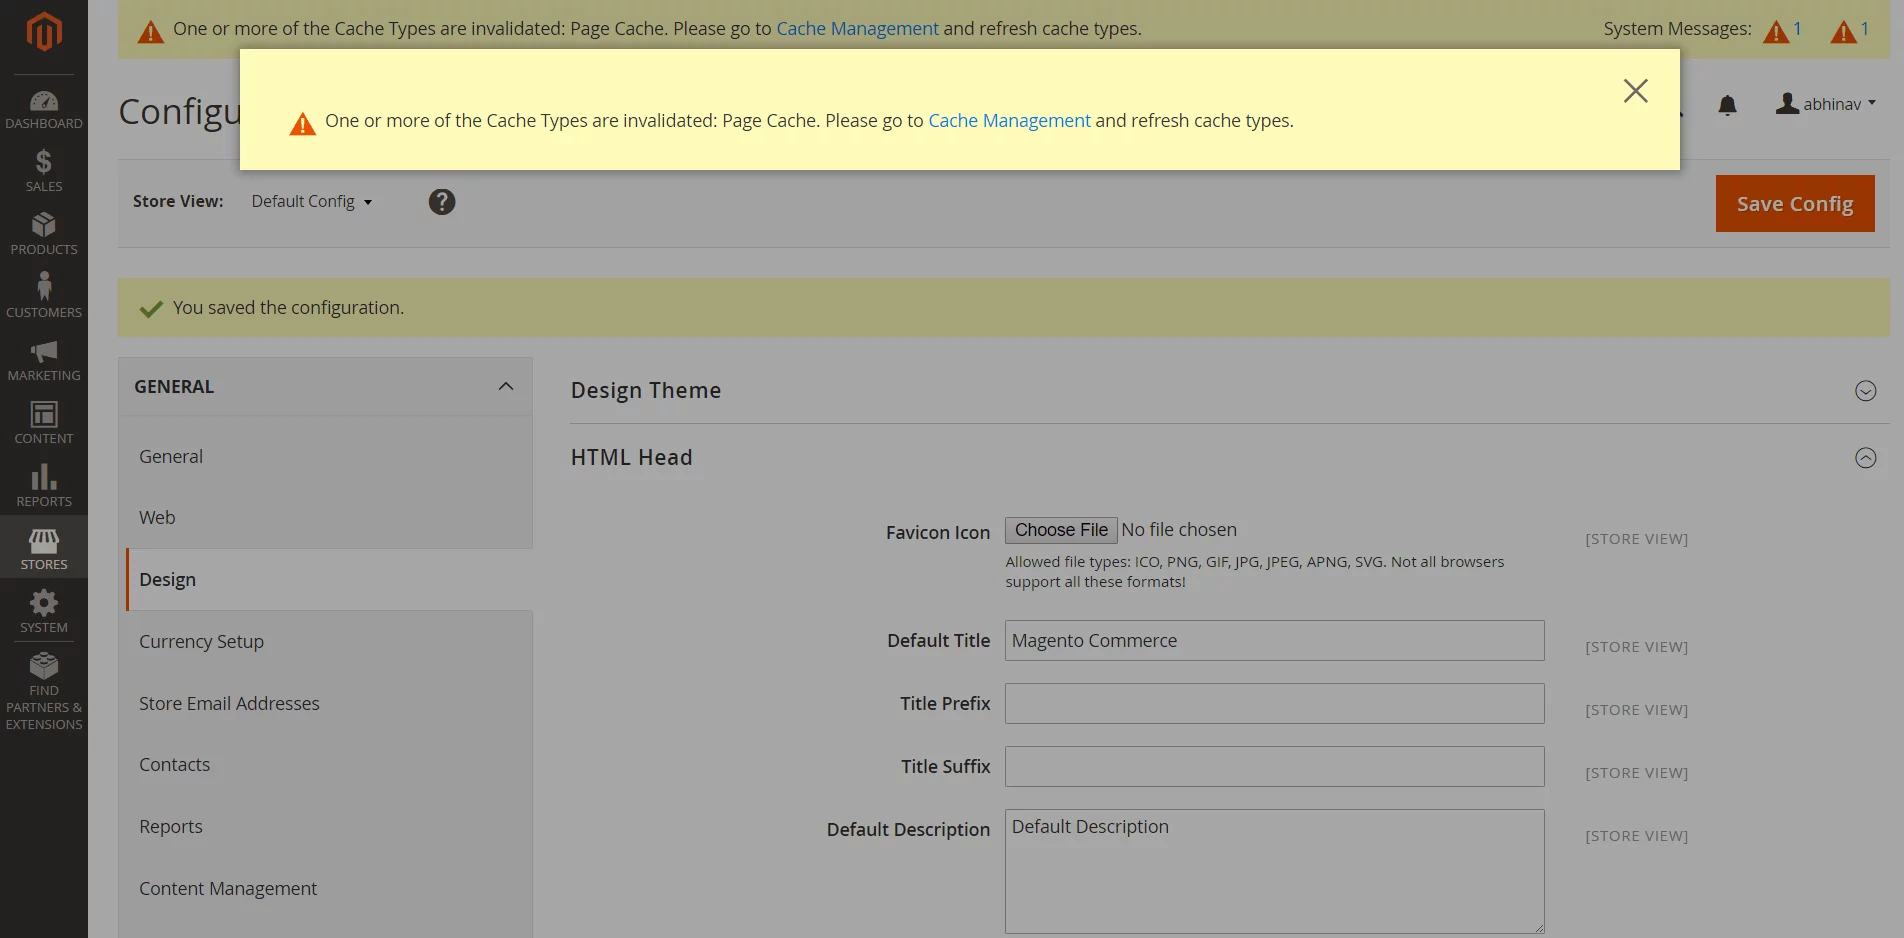
- After this click on Save Config to complete the process.
-
Once the changes are saved, you will be prompted to flush cache. Just click on Cache Management in the prompt.
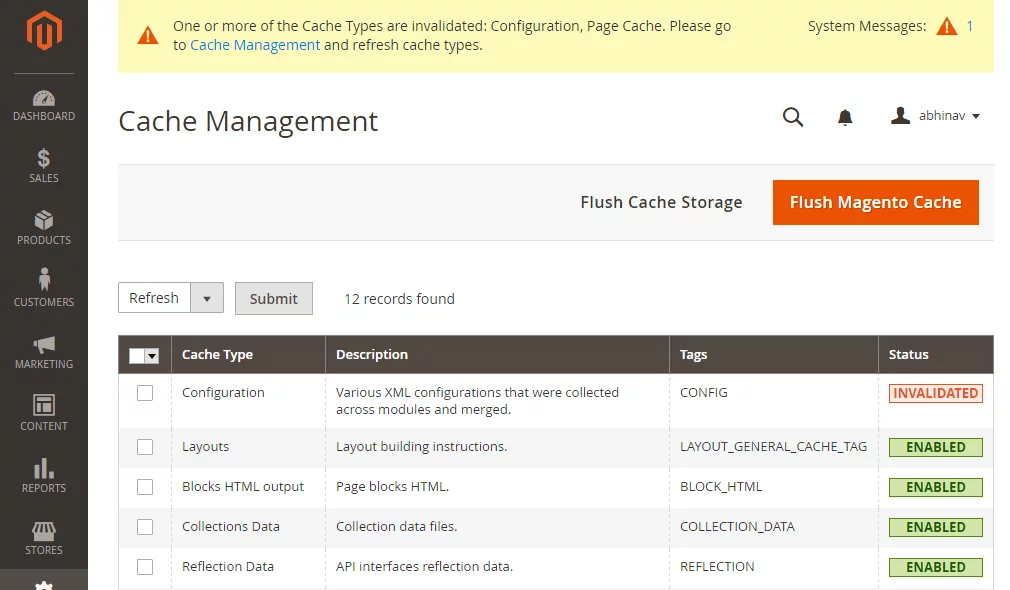
-
Now click on the Flush Magento Cache button, wait for some time while the cache is cleared and that's it. The integration is now complete.
If you have a HTTPS website or are using a separate HTTPS domain/subdomain with PushAlert then you also need to copy the files listed in the Integrate section to the root directory of your Magento Store. The opt-in prompt will be automatically shown to your visitors on both desktop and mobile devices, opening your store to potential leads just waiting to be converted.