PWA Push Notifications for iOS and Android
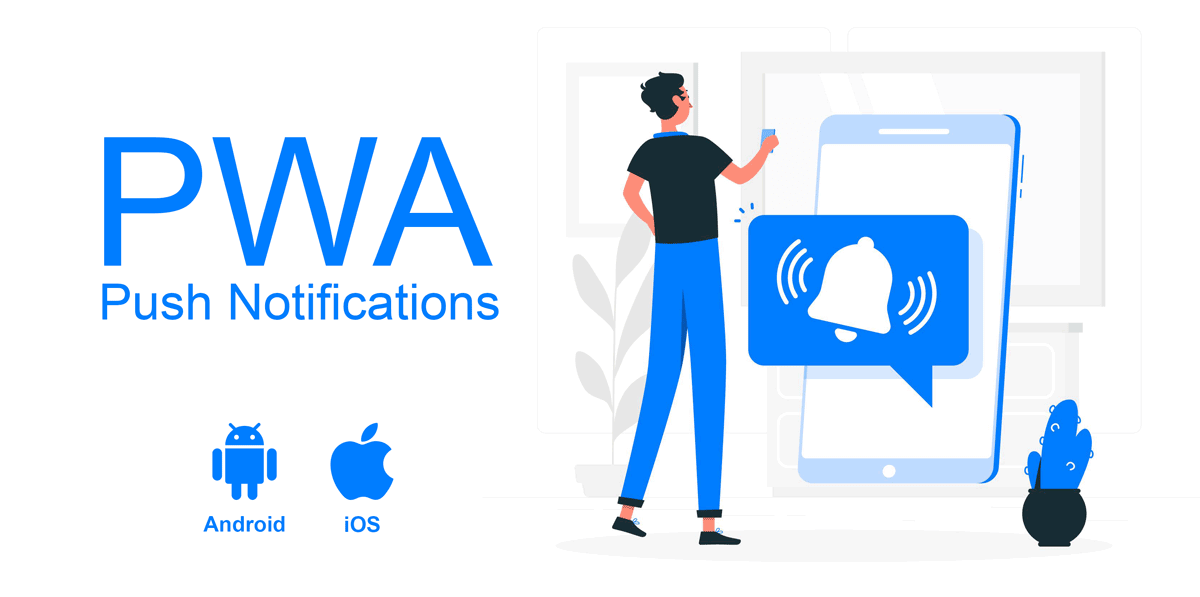
Looking for an easy way to enable web push notifications in your PWA for both iOS and Android?
In the ever-evolving landscape of web development, Progressive Web Apps (PWAs) have emerged as a game-changer, seamlessly blending the best of web and native app experiences. Pioneered by Google and championed by major tech players, PWAs offer a fresh approach to building web applications that are fast, reliable, and engaging. In this comprehensive guide, we’ll explore what exactly a PWA is, why they matter, and how you can engage your PWA users with web push notifications.
What is a Progressive Web App?
A Progressive Web App is a type of web application designed to provide users with a native app-like experience while harnessing the power of web technologies. PWAs aim to combine the best of both web and mobile app experiences, offering features such as offline access, push notifications, and a responsive design.
Key Characteristics of PWAs:
- Progressive Enhancement: PWAs are built with the principle of progressive enhancement. They work for all users but offer an enhanced experience for those with modern browsers and devices.
- Responsive Design: Responsive design ensures that PWAs adapt seamlessly to various screen sizes and orientations, providing a consistent and intuitive user experience.
- Connectivity Independence: PWAs are designed to function even in low or no network conditions, offering offline access to certain features and content.
- App-like Experience: PWAs provide an app-like feel with smooth animations, transitions, and gestures. They can be added to the home screen, making them easily accessible.
- Secure (HTTPS): To ensure data security and enable advanced features like service workers, PWAs must be served over HTTPS.
Key Components of a PWA:
- Web App Manifest: The web app manifest is a JSON file (manifest.json) that contains metadata about the app, such as its name, icons, and theme colors. It is crucial for enabling the “add to home screen” prompt.
- Service Workers: Service workers (sw.js) are scripts that run in the background, enabling features like push notifications, background sync, and caching for offline functionality.
Steps to Create a Progressive Web App from Scratch
Creating a Progressive Web App (PWA) involves a series of steps to ensure your web application meets the criteria for being considered a PWA. Below is a step-by-step guide to help you create a basic PWA:
1. Define Your App
Clearly define the purpose and functionality of your app. Identify the key features that will make your app valuable to users.
2. Set Up a Responsive Design
Design your app to be responsive, ensuring it looks good and functions well on various devices and screen sizes.
3. Ensure HTTPS
Host your PWA over HTTPS to meet security requirements. This is essential for service workers and other PWA features.
4. Create a Web App Manifest
Develop a manifest.json file that includes metadata about your app, such as the app’s name, icons, and display preferences. This file is crucial for enabling the “add to home screen” prompt.
// Example manifest.json
{
    "name": "Your App Name",
    "short_name": "Short Name",
    "description": "Your app description",
    "start_url": "/index.html",
    "id": "/index.html",
    "display": "standalone",
    "background_color": "#ffffff",
    "theme_color": "#000000",
    "icons": [
      {
         "src": "/icon.png",
         "sizes": "192x192",
         "type": "image/png"
      }
    ]
}
5. Implement a Service Worker
Create a service worker (sw.js), a script that runs in the background, enabling features like offline access and push notifications. The service worker intercepts network requests, allowing your app to cache resources and function offline.
// Example sw.js
self.addEventListener(‘install’, event => {
    event.waitUntil(
        caches.open(‘your - cache - name’).then(cache => {
            return cache.addAll([
                ‘/’,
                ‘/index.html’,
                ‘/styles.css’,
                ‘/script.js’
            ]);
        })
    );
});

self.addEventListener(‘fetch’, event => {
    event.respondWith(
        caches.match(event.request).then(response => {
            return response || fetch(event.request);
        })
    );
});
6. Make Your App Installable
Use the Web App Manifest and Service Worker to make your app installable. This allows users to add your PWA to their home screen, making it easily accessible.
7. Offline Functionality
Implement caching strategies in the service worker to enable offline functionality. This ensures that users can still use your app even when they are not connected to the internet.
8. Push Notifications
If desired, implement push notifications by using the Push API and integrating with a push service. Note that push notifications on iOS have specific requirements. Scroll down on how to enable web push notifications for your existing PWA on both iOS and Android.
9. Test Across Browsers
Test your PWA across different browsers and devices to ensure a consistent and reliable user experience.
10. Optimize Performance
Optimize your PWA for performance, focusing on fast load times and smooth interactions.
11. Continuous Improvement
Gather user feedback and analytics to identify areas for improvement. Iterate on your PWA to enhance its features and user experience.
Steps to enable web push notifications in your PWA on both iOS and Android
Step 1: Setup your PushAlert account
Head over to the PushAlert homepage and click on pricing. Choose a plan to get started and click on Start Free Trial. You can also try our free plan if you are just starting out, but if you want to boost engagement and sales, consider trying out the Premium plan for 15 days to take advantage of automations, drip campaigns, and lots of pre-built templates.
Once you have signed up, head to your PushAlert Dashboard and click on Settings > Website.
Here you will be able to add your website logo, badge icon and other details.
Step 2: Get the installation code from PushAlert
To add push notifications to your PWA, you need to first integrate the service on your website. For that you need to use our universal integration. Head to the Integrate section in the left menu on your dashboard and click on Universal.
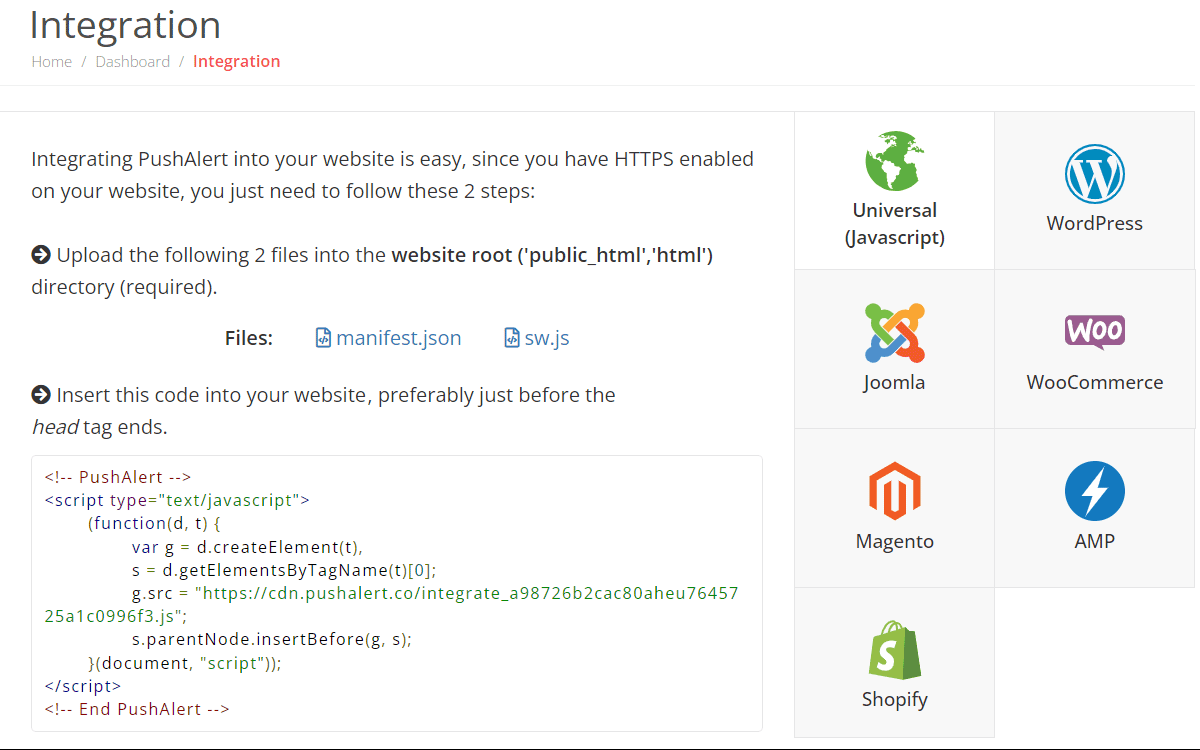
iOS Web Push Setup – PushAlert Integration
Copy the javascript to the head section of your website, preferably before the head tag ends. If you are using any of our plugins or extensions for WordPress, WooCommerce, Magento, Shopify, PrestaShop or Joomla, you do not need to add any code to your site. Just follow their specific instructions from the integrate section.
Step 3: Configure your PWAs Service Worker
Download the pushalert service worker (sw.js) and open it in an editor such as notepad. Copy the contents and paste it to your PWAs existing service worker. If you do not have a service worker and are building a PWA from scratch, then you can simply upload ours to your website.
This is a crucial step, without this service worker, you will not be able to collect web push subscribers.
Step 4: Configure the PushAlert Opt-in for your PWA
Head back to the PushAlert dashboard and go to Settings > Opt-in Box. You can configure your opt-in message for your PWA here.
We recommend giving users a reason to subscribe to notifications, this could be a reward in the form of a coupon, chance to get regular updates or any other benefit the user will get by allowing notifications from your website.
There are several themes to choose from along with customizable text and images. You can read more here on how you can improve your subscription rate and retain more web push subscribers.
Step 5: Configuring your manifest to enable web push notifications on iOS PWAs
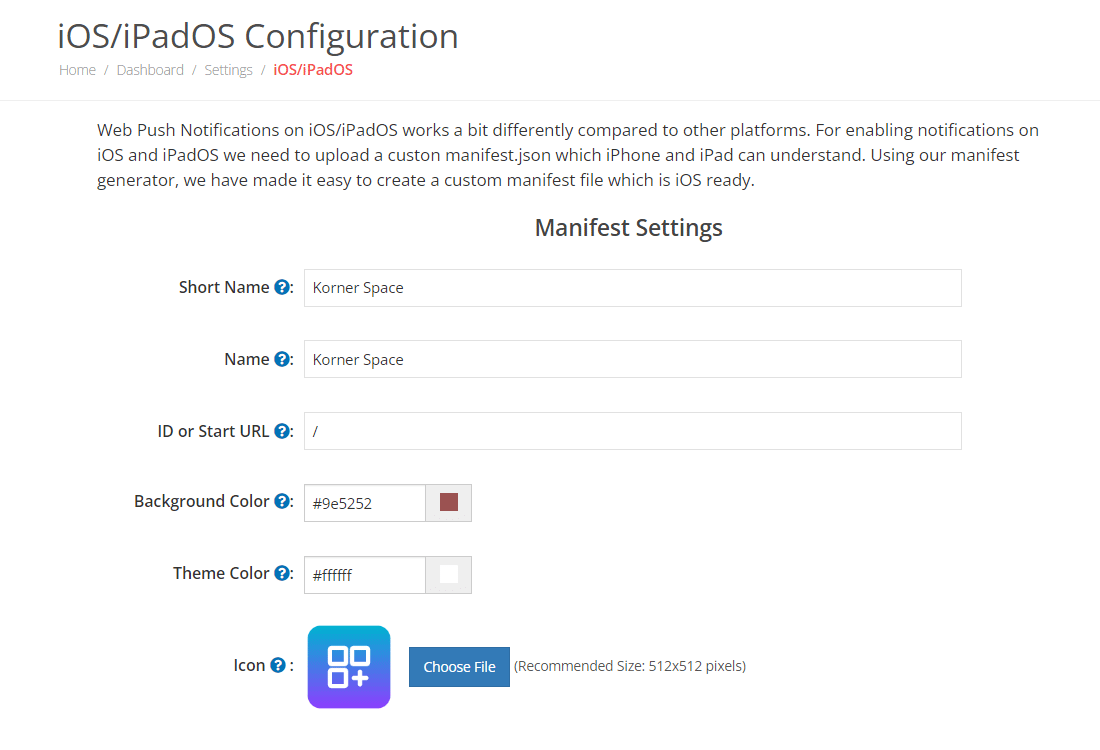
iOS Web Push Setup – Manifest Generator
iOS has some specific requirements for PWAs. We recommend using our PWA manifest generator to create or build your manifest.
Head to Settings > iOS/iPadOS Configuration and use our manifest generator to create your iOS specific manifest and click on Enable. Now, if you already have a manifest created. Copy the fields from the generated manifest which are missing in yours. You can read more about iOS specific manifest settings here.
Step 6: Sending your first notification campaign
Now your PWA is setup for web push notifications. Once you install it on your phone, you will be shown the opt-in prompt you had customized in Step 4. Once your visitors allow notification permission, you will then be able to send notifications.
For testing you can install the PWA to your iOS or Android device and allow notification permission. Then head to the Send Notification section on the dashboard. Customize the title, message and URL for the notification.
The notification will be delivered right to your device, and it will show your PWA icon. Once you click on the notification it will open your PWA and direct you to the specific page.
By following these steps, you can enable web push notifications in your PWA on both iOS and Android platforms, providing a richer and more engaging user experience.
