Add On-site Messaging to your Magento store
Magento is a popular e-commerce CMS, and PushAlert on-site messaging is supported on all versions. This guide is specifically for Magento 2, you can find instructions for Magento 1 stores here.
Steps to add PushAlert On-site Messaging to Magento
-
Step 1:
Download the Magento 2 extension from here.
-
Step 2:
Extract the extension and then copy the extracted PushAlert folder to the {magento_installation_root}/app/code folder of your Magento 2 installation through FTP or your cpanel. If the code folder does not exist, please create one.
-
Step 3:
Once copied, navigate to {magento_installation_root}/app/etc folder and open config.php in an editor. You can also download a copy and upload it later after editing. We recommend creating a backup copy first, before editing.
-
Step 4:
Scroll to the last in the list, and add the following there
,'PushAlert_OnsiteMessaging' => 1. Don't forget the initial comma. Save the file or upload the edited file. -
Step 5:
Head back to the Magento Admin section. Click on System > Cache Management and then click on Flush Magento Cache and then Flush Cache Storage. Then refresh the admin section.
-
Step 6:
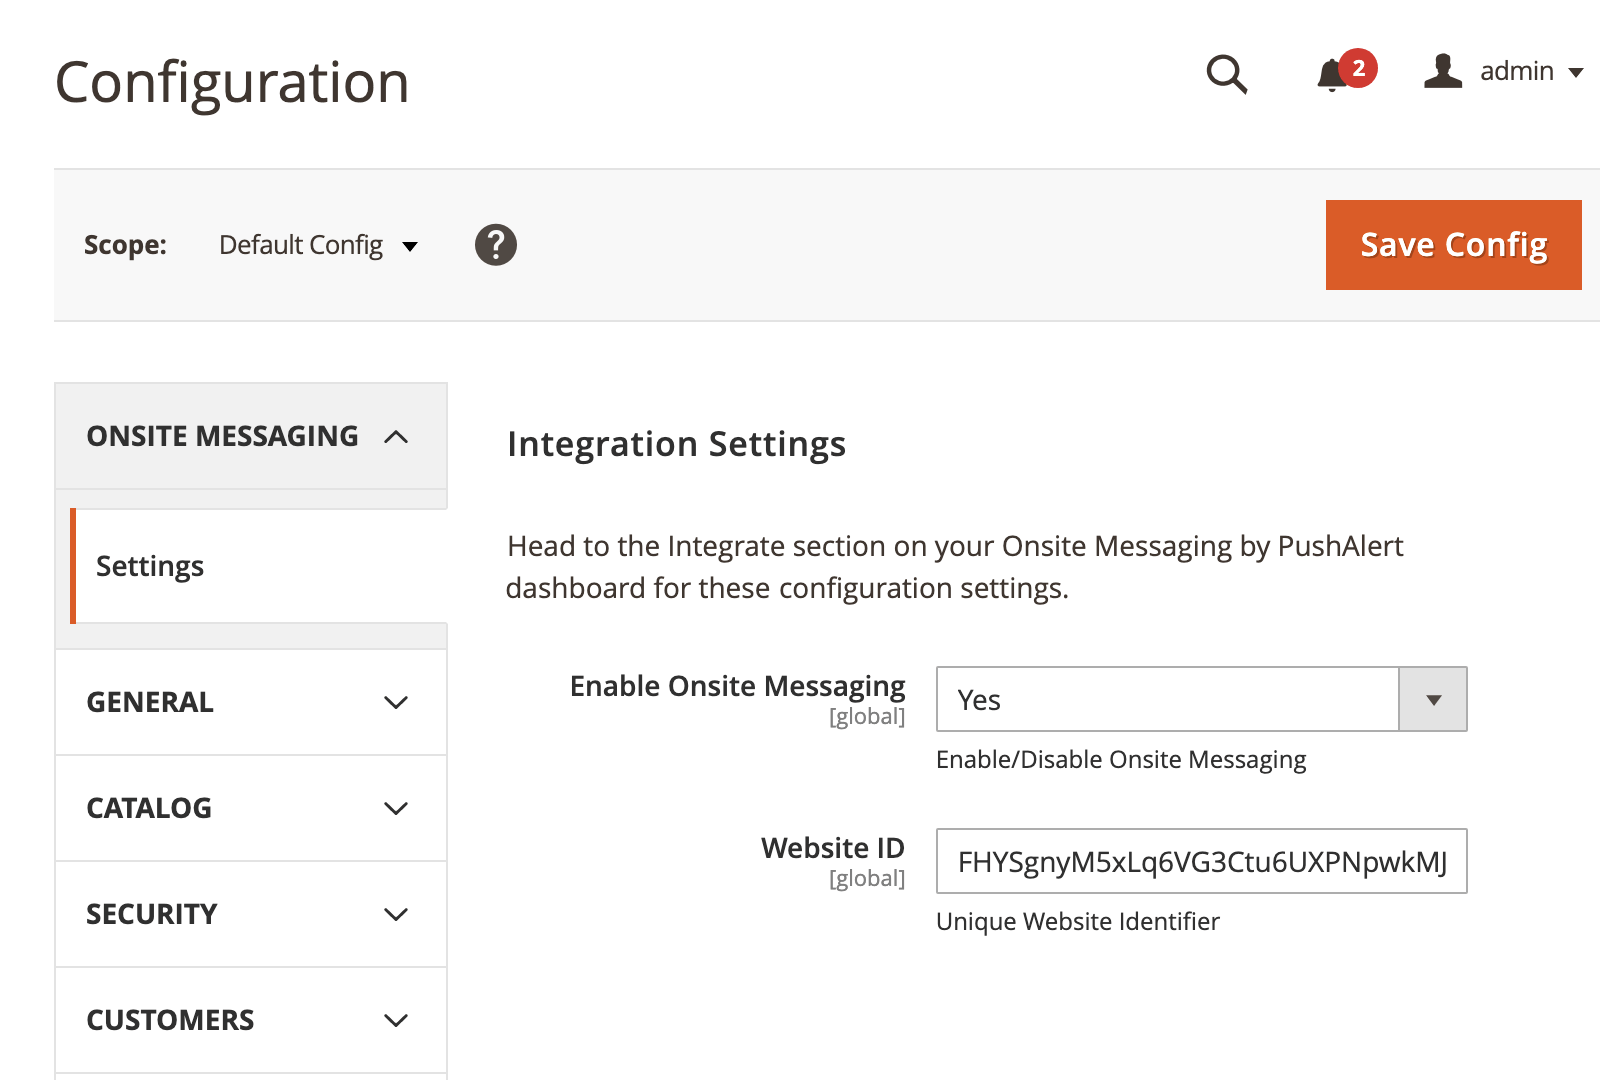
You will now be able to see Onsite Messaging in the left navigation menu. Click on Configuration.

-
Step 7:
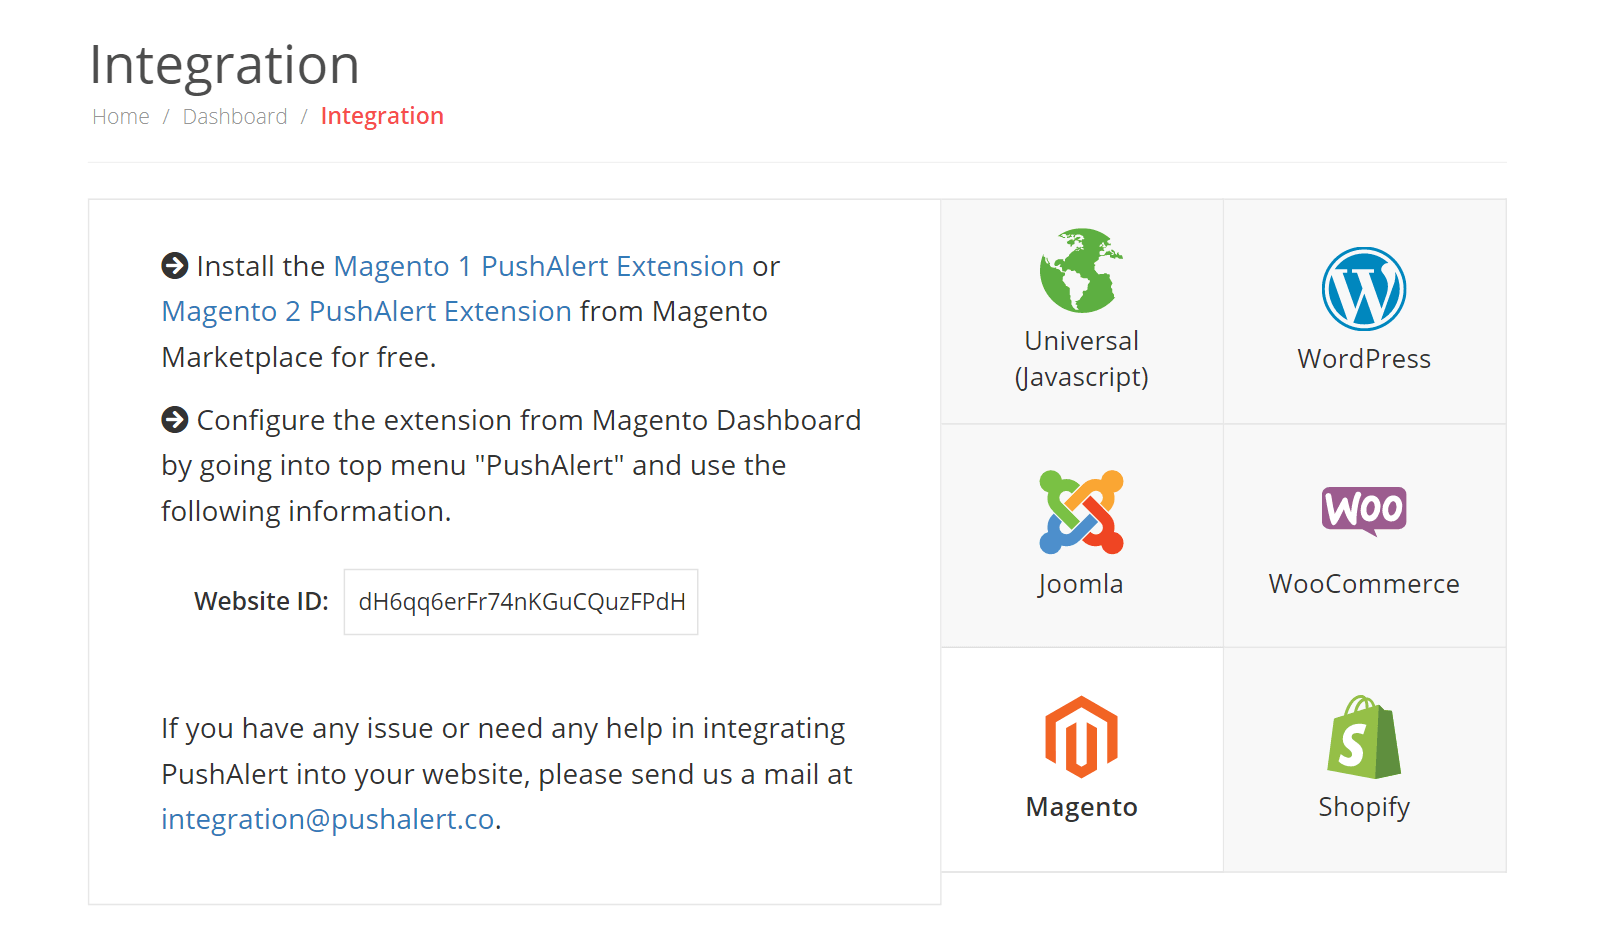
Now login to your PushAlert account and head to the Integrate section of the website where you want to enable onsite messaging.
-
Step 8:
Click on Magento in the integrate section and copy the Website ID and head back to Magento admin section.

-
Step 9:
Copy the Website ID into the PushAlert Magento extension Configuration page and Save Config.
-
Step 10:
Once done, head to System > Cache Management and flush both caches.
-
Step 11:
That's it, the integration is now complete and you can now configure the first popup from our dashboard.