Creating Safari Web Push Certificate
Getting Push Notifications working on Safari may look a bit complicated at first, but following this step-by-step guide makes it a lot easier. Then there’s a huge reward at the end of this tutorial where you will open your website to another user base for re-marketing and getting repeat traffic.
Before we get started, you need to have an active paid Apple Developer subscription to create a unique Push ID for your website. The entire process can be divided into 4 sections starting with a Certificate Request, then creating a Website Push ID, next the Web Push Certificate and then uploading the certificate to PushAlert.
iOS Web Push Notifications are now supported with iOS and iPadOS 16.4 beta update. You can read the detailed documentation for push notifications on Safari on iPhone and iPad here.
With Safari 16 running on MacOS 13 (Ventura) or later, Web Push Certificate is no longer required. Apple now uses the standard Web Push API for Safari 16, which is used by all other browsers including Chrome and Firefox. However, for users on Safari 15 or earlier, the web push certificate is still required to prompt for permission. Backwards compatibility will be maintained.
STEP 1: Create a Certificate Request
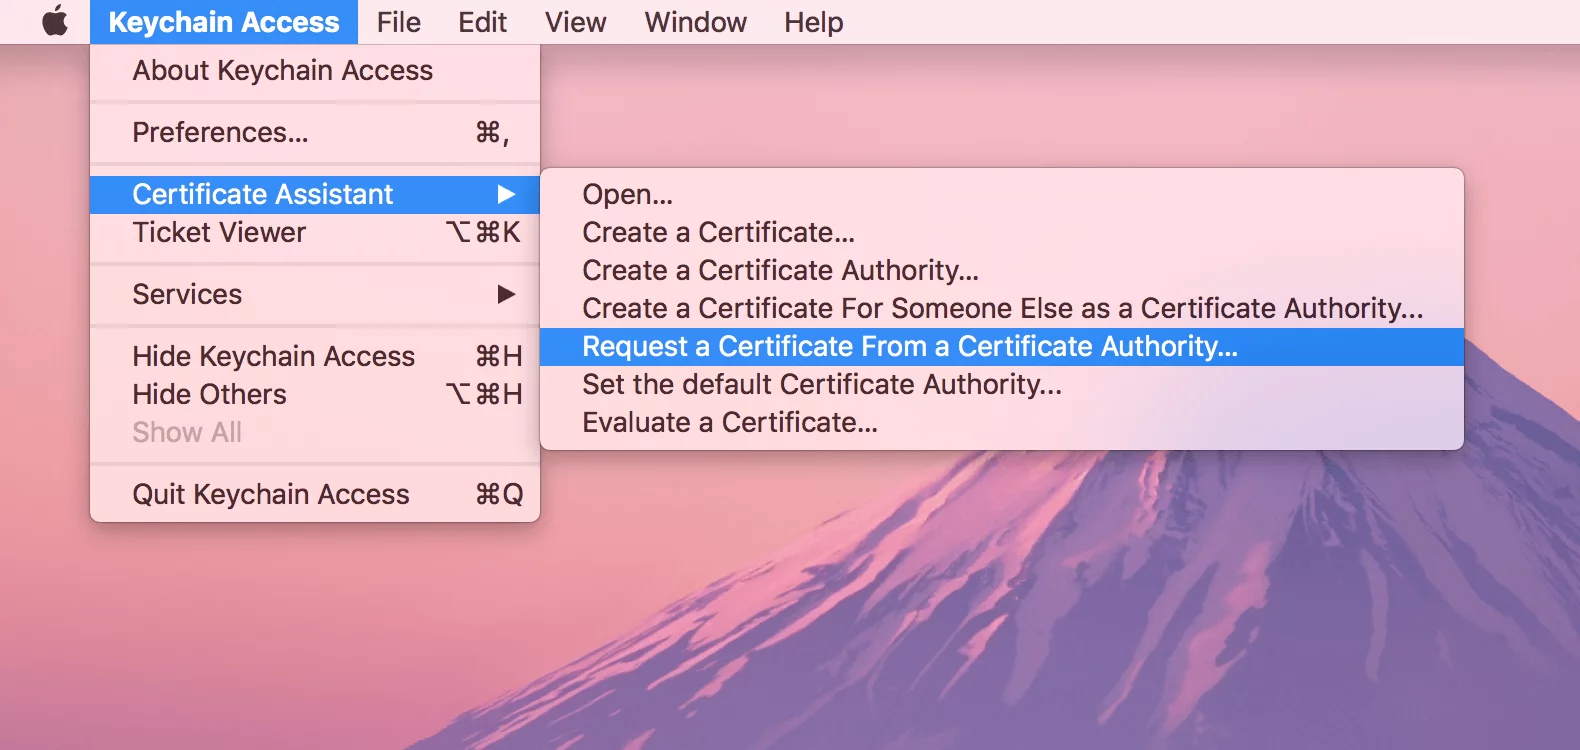
In this step, we are going to create a certificate signing request which will be used later on.
- Launch the Keychain Access app.
-
Click on Keychain Access > Certificate Assistant > then, Request a Certificate From a Certificate Authority.
-
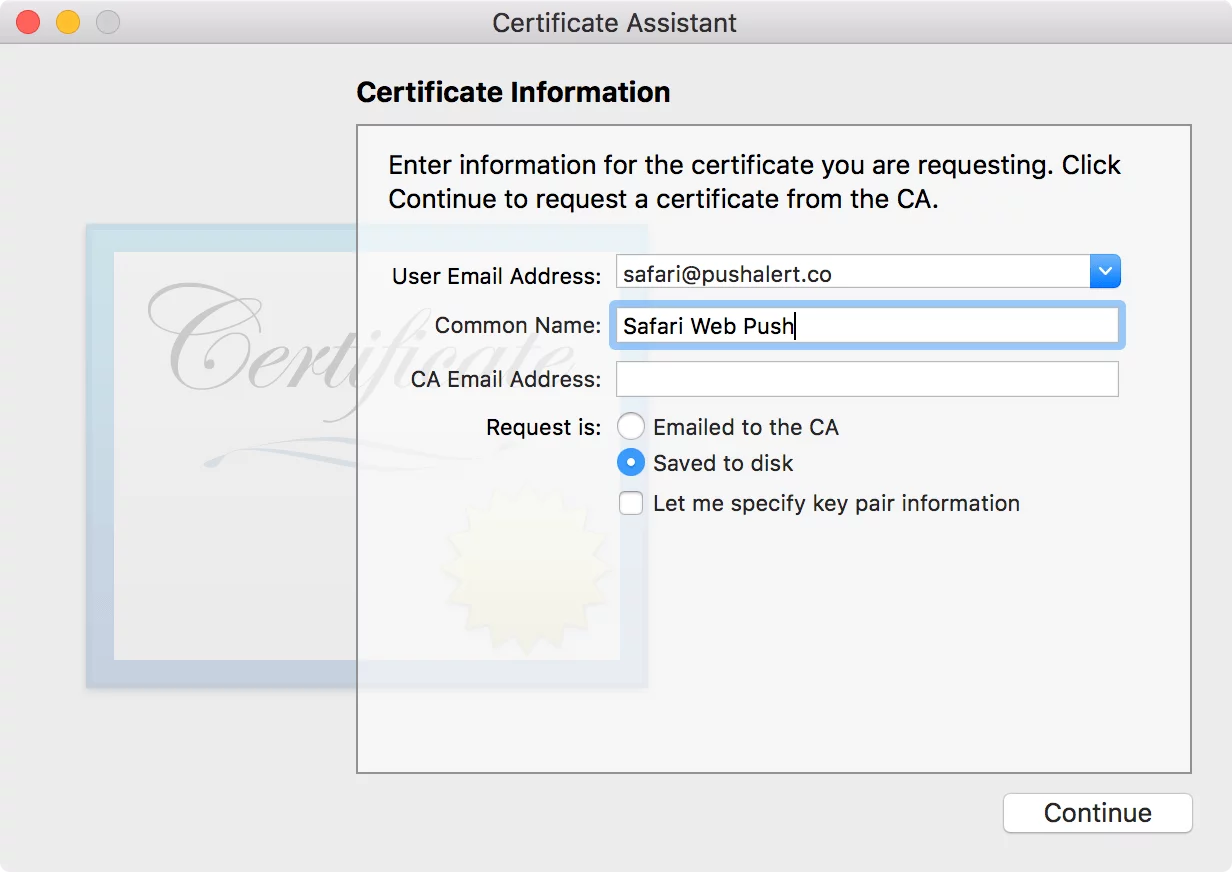
Enter email address, a name and then check "Saved to disk" option. Click on Continue.
-
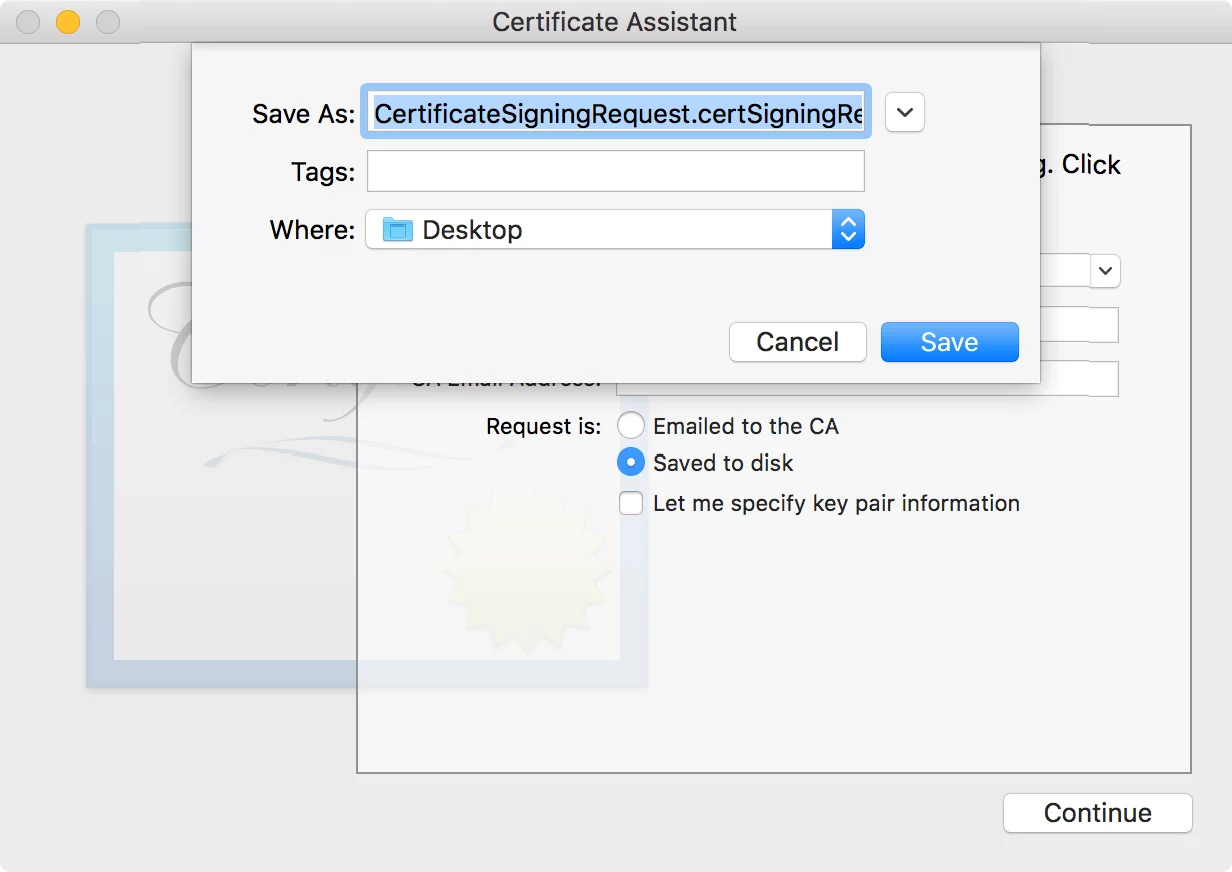
Save the certificate signing request (CSR) with the given name, we will need it later to create the Website Push Certificate.
STEP 2: Setting up Website Push ID for APNS (Apple Push Notification Service)
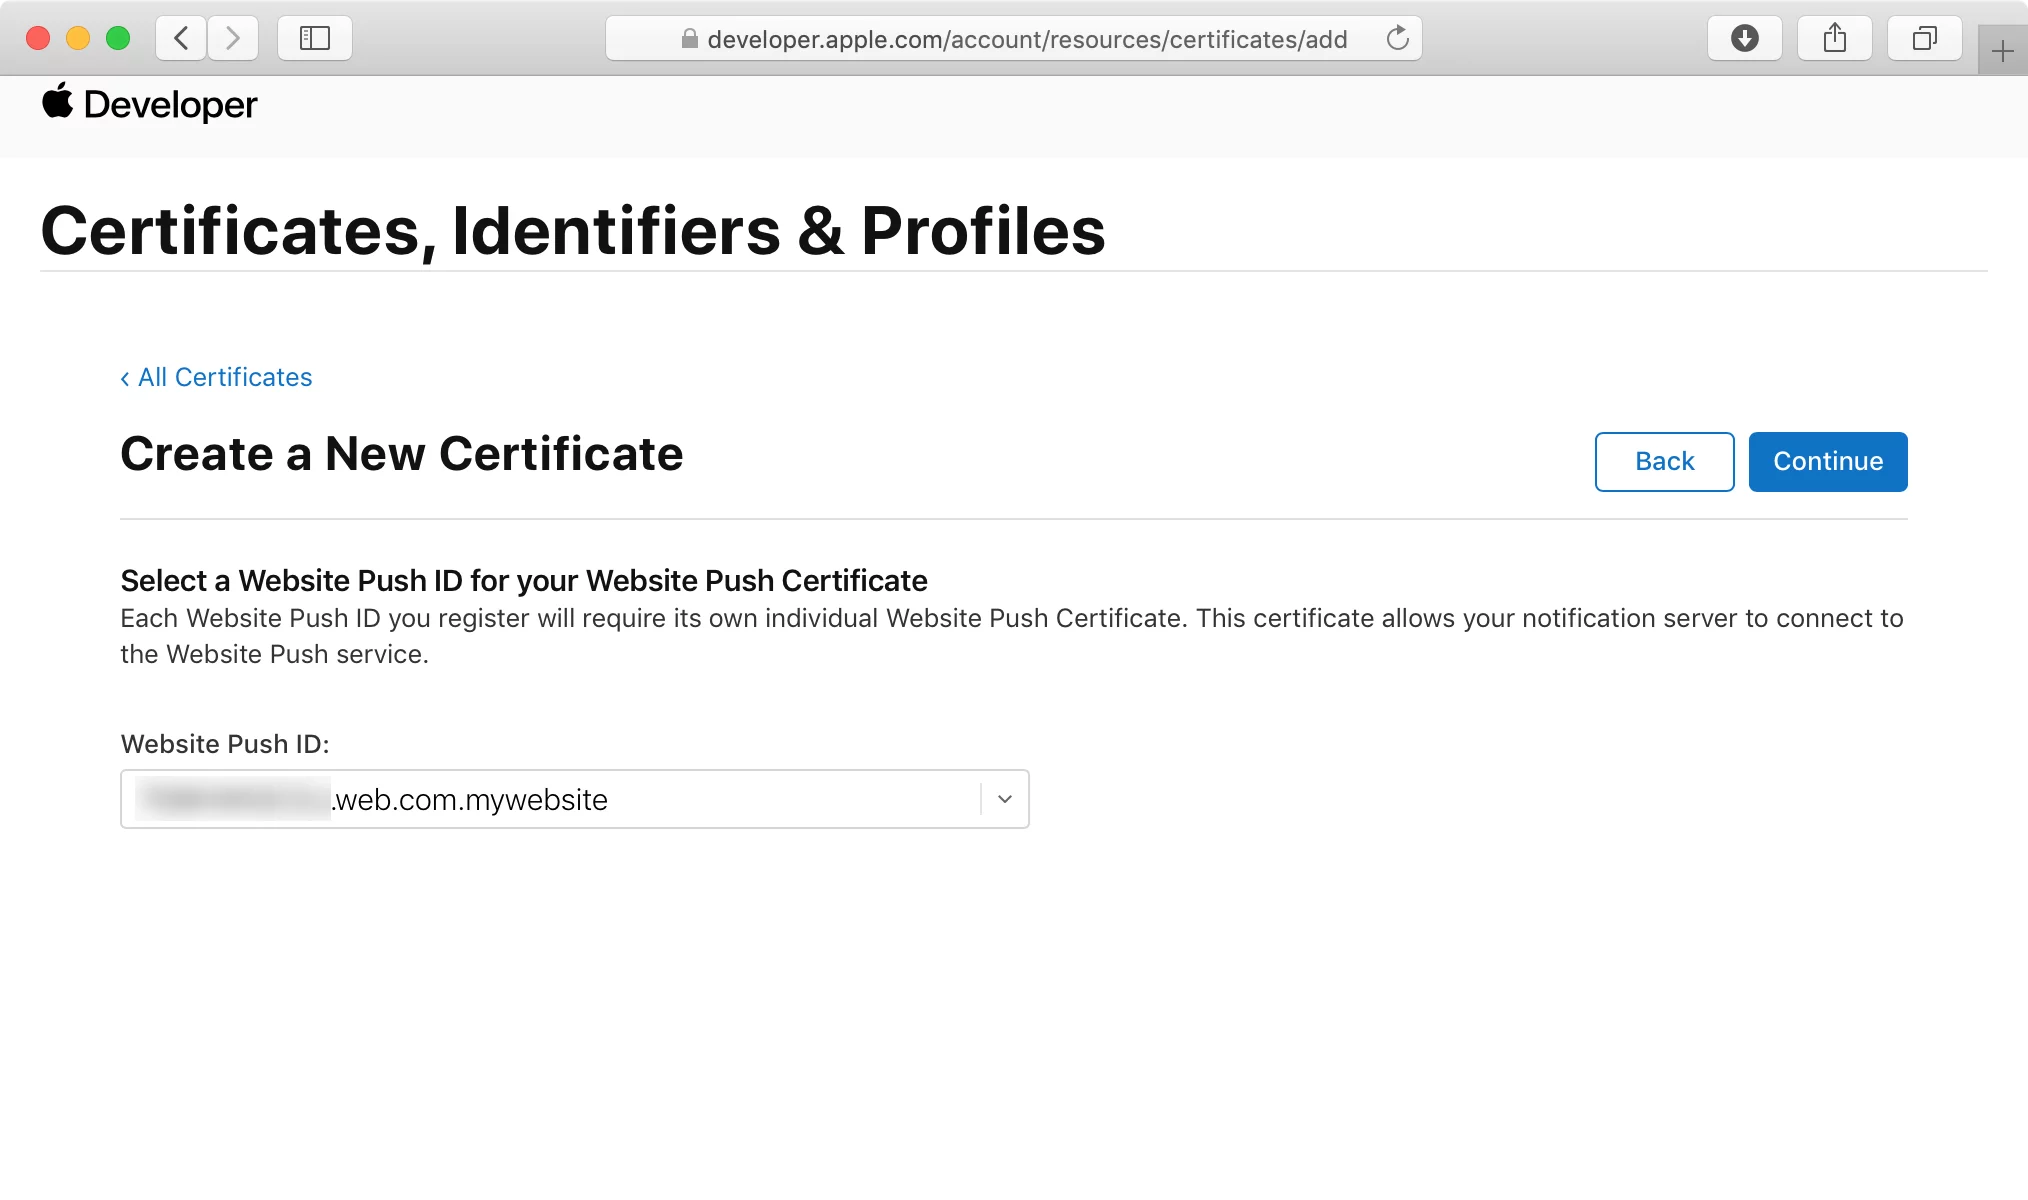
- For this, you need to first login to the Apple Developer Console. Here, we are going to create a unique Website Push ID for push notifications.
-
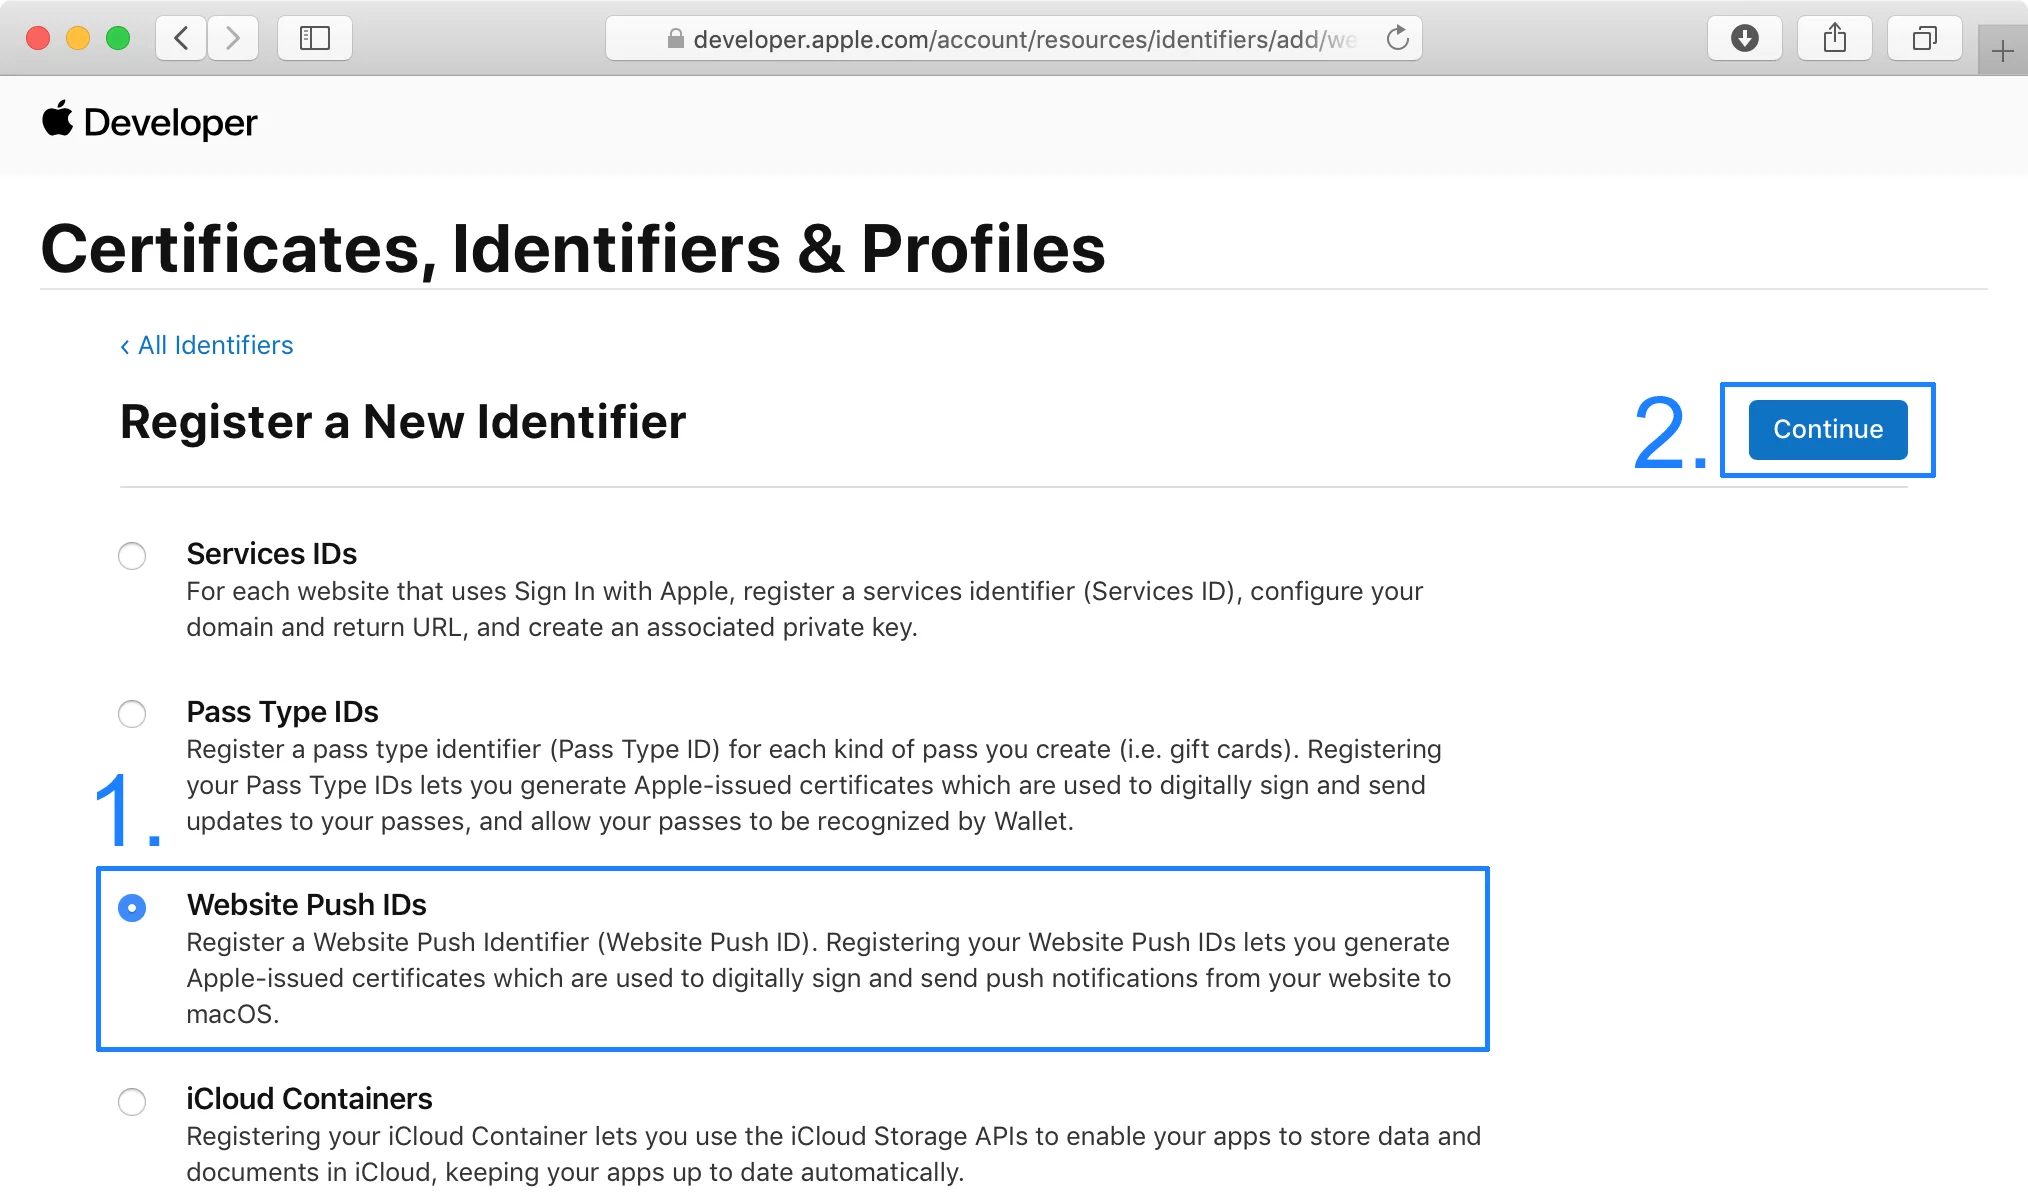
In the Developer Console, click on "Identifiers" and then click on "Register an App ID". Then select "Website Push IDs" from the "Register a New Identifier" list and click "Continue".
-
First enter a meaningful Description.
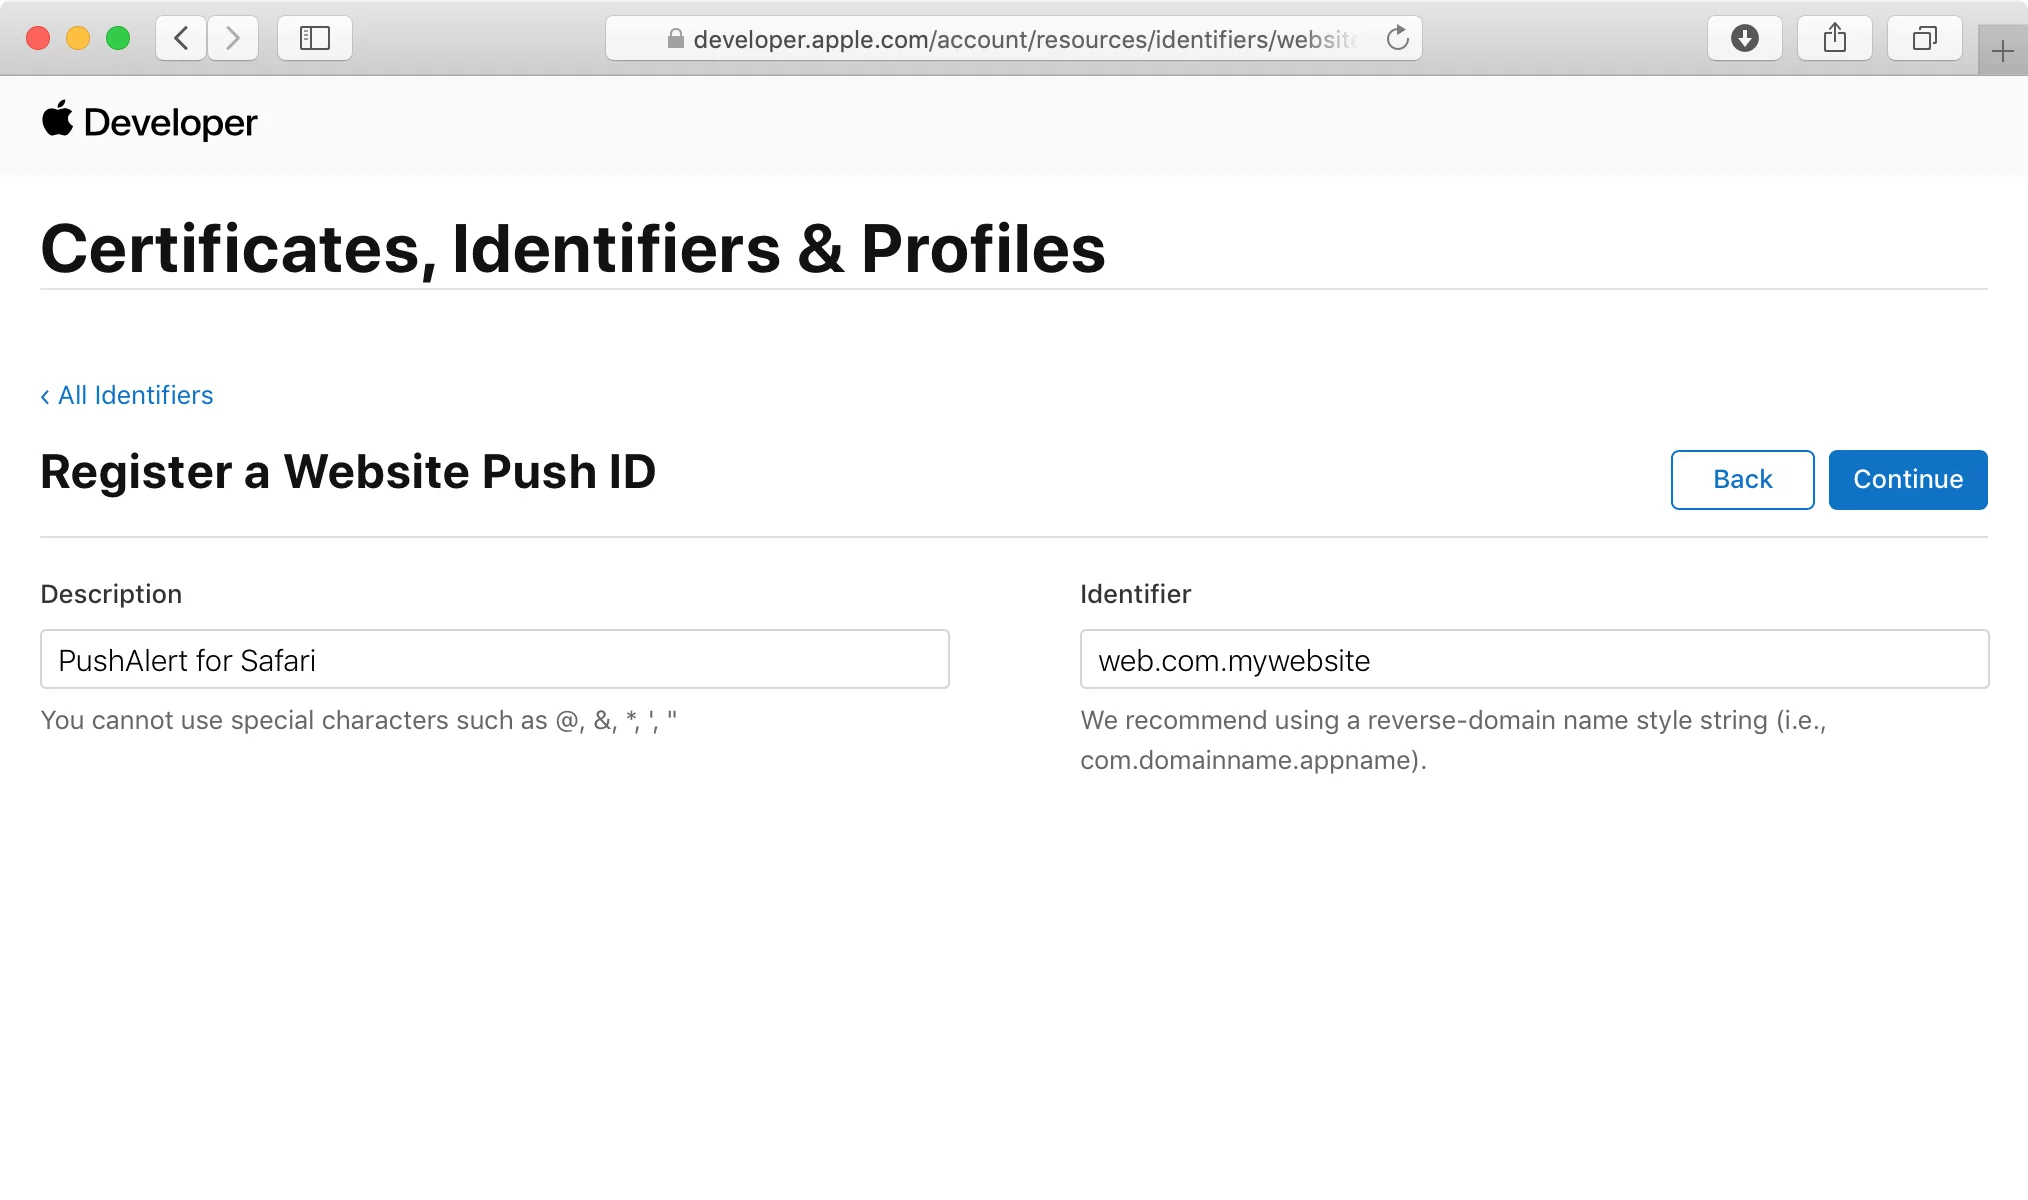
- Then enter an identifier, it follows reverse-domain name styling. So you should enter something like "web.com.mywebsite". (Note: "web" is added automatically to the identifier)
-
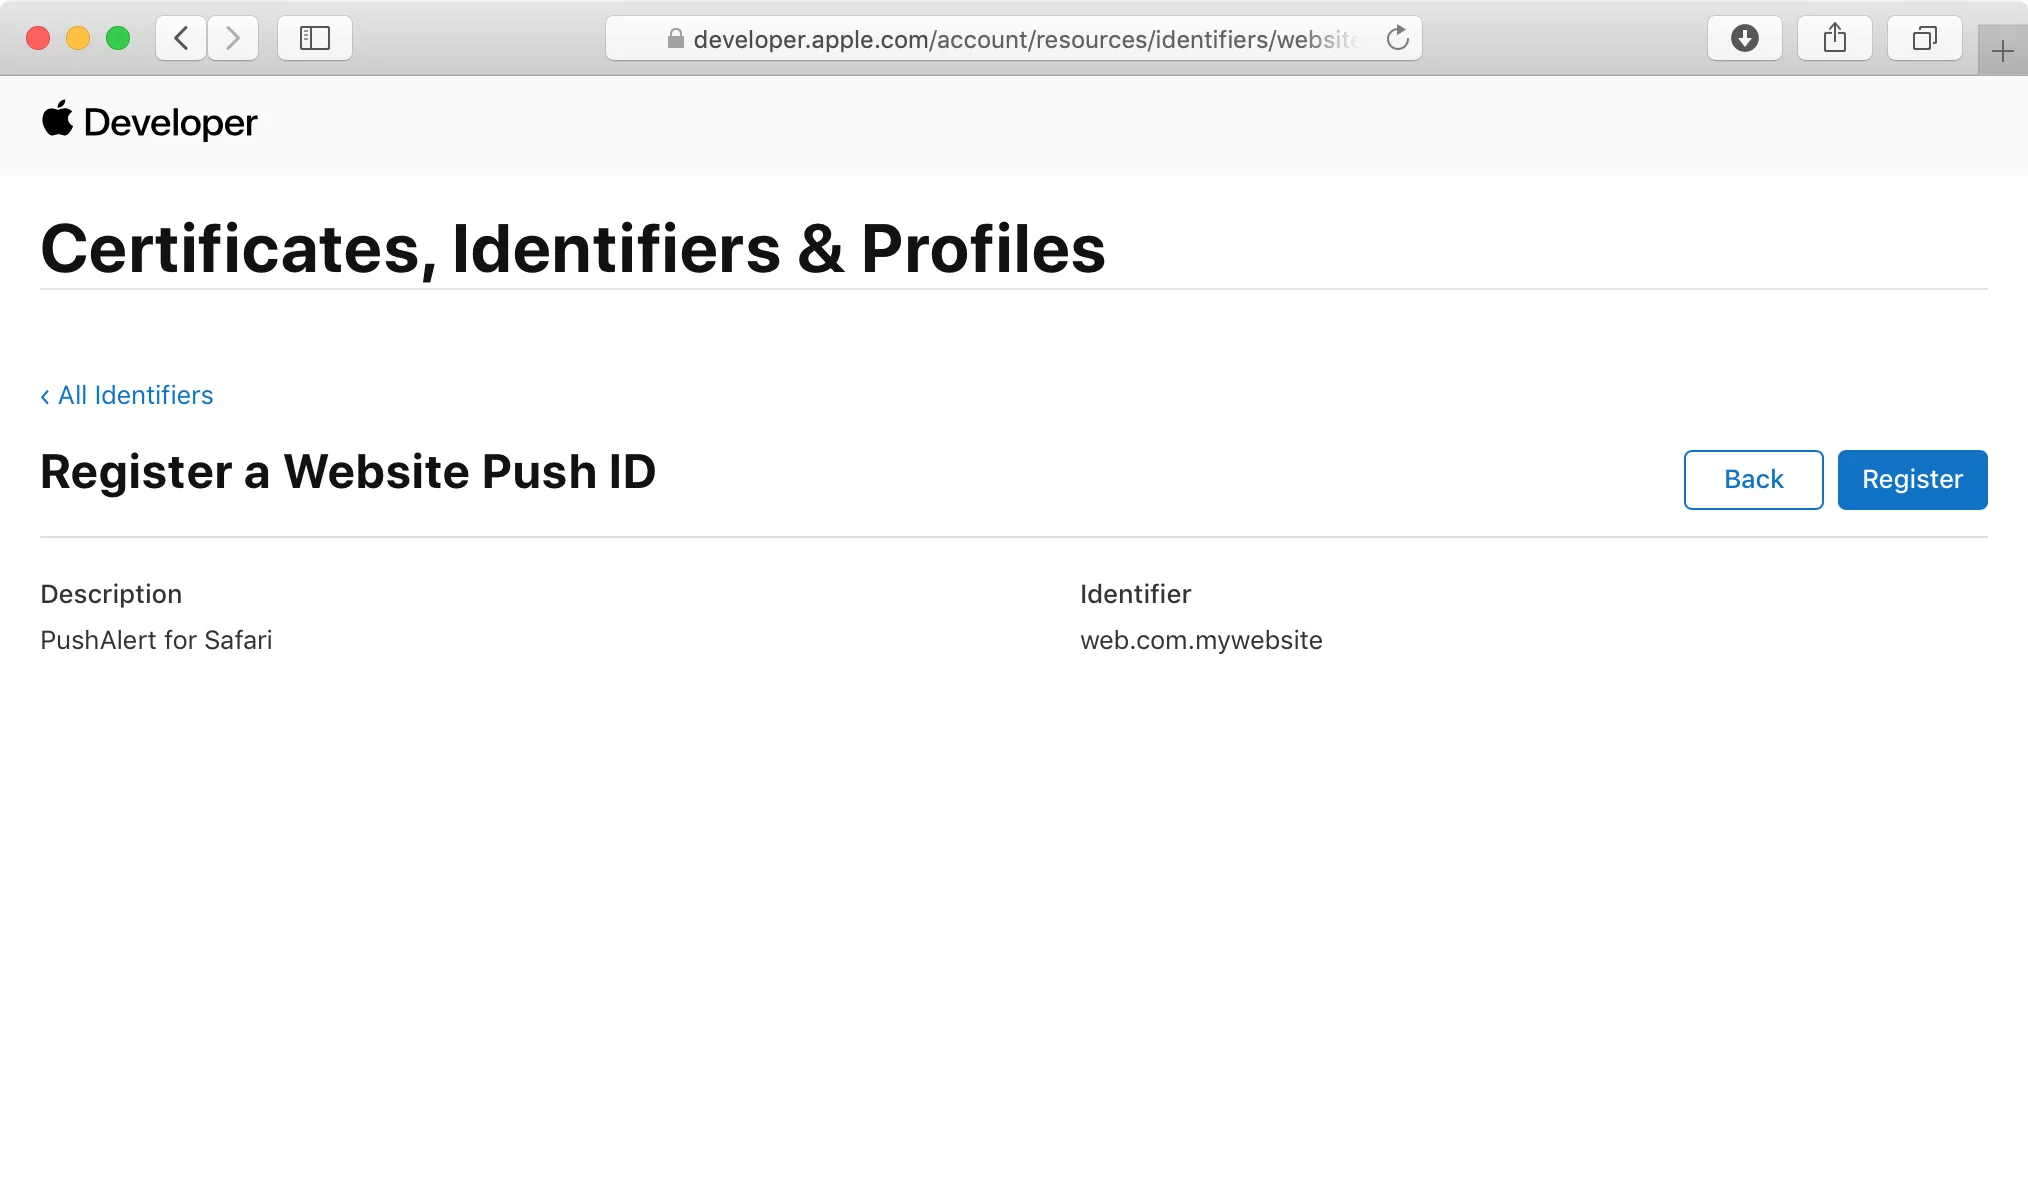
Click on Continue, check everything is in order and then click Register.
STEP 3: Generating Web Push Certificate
-
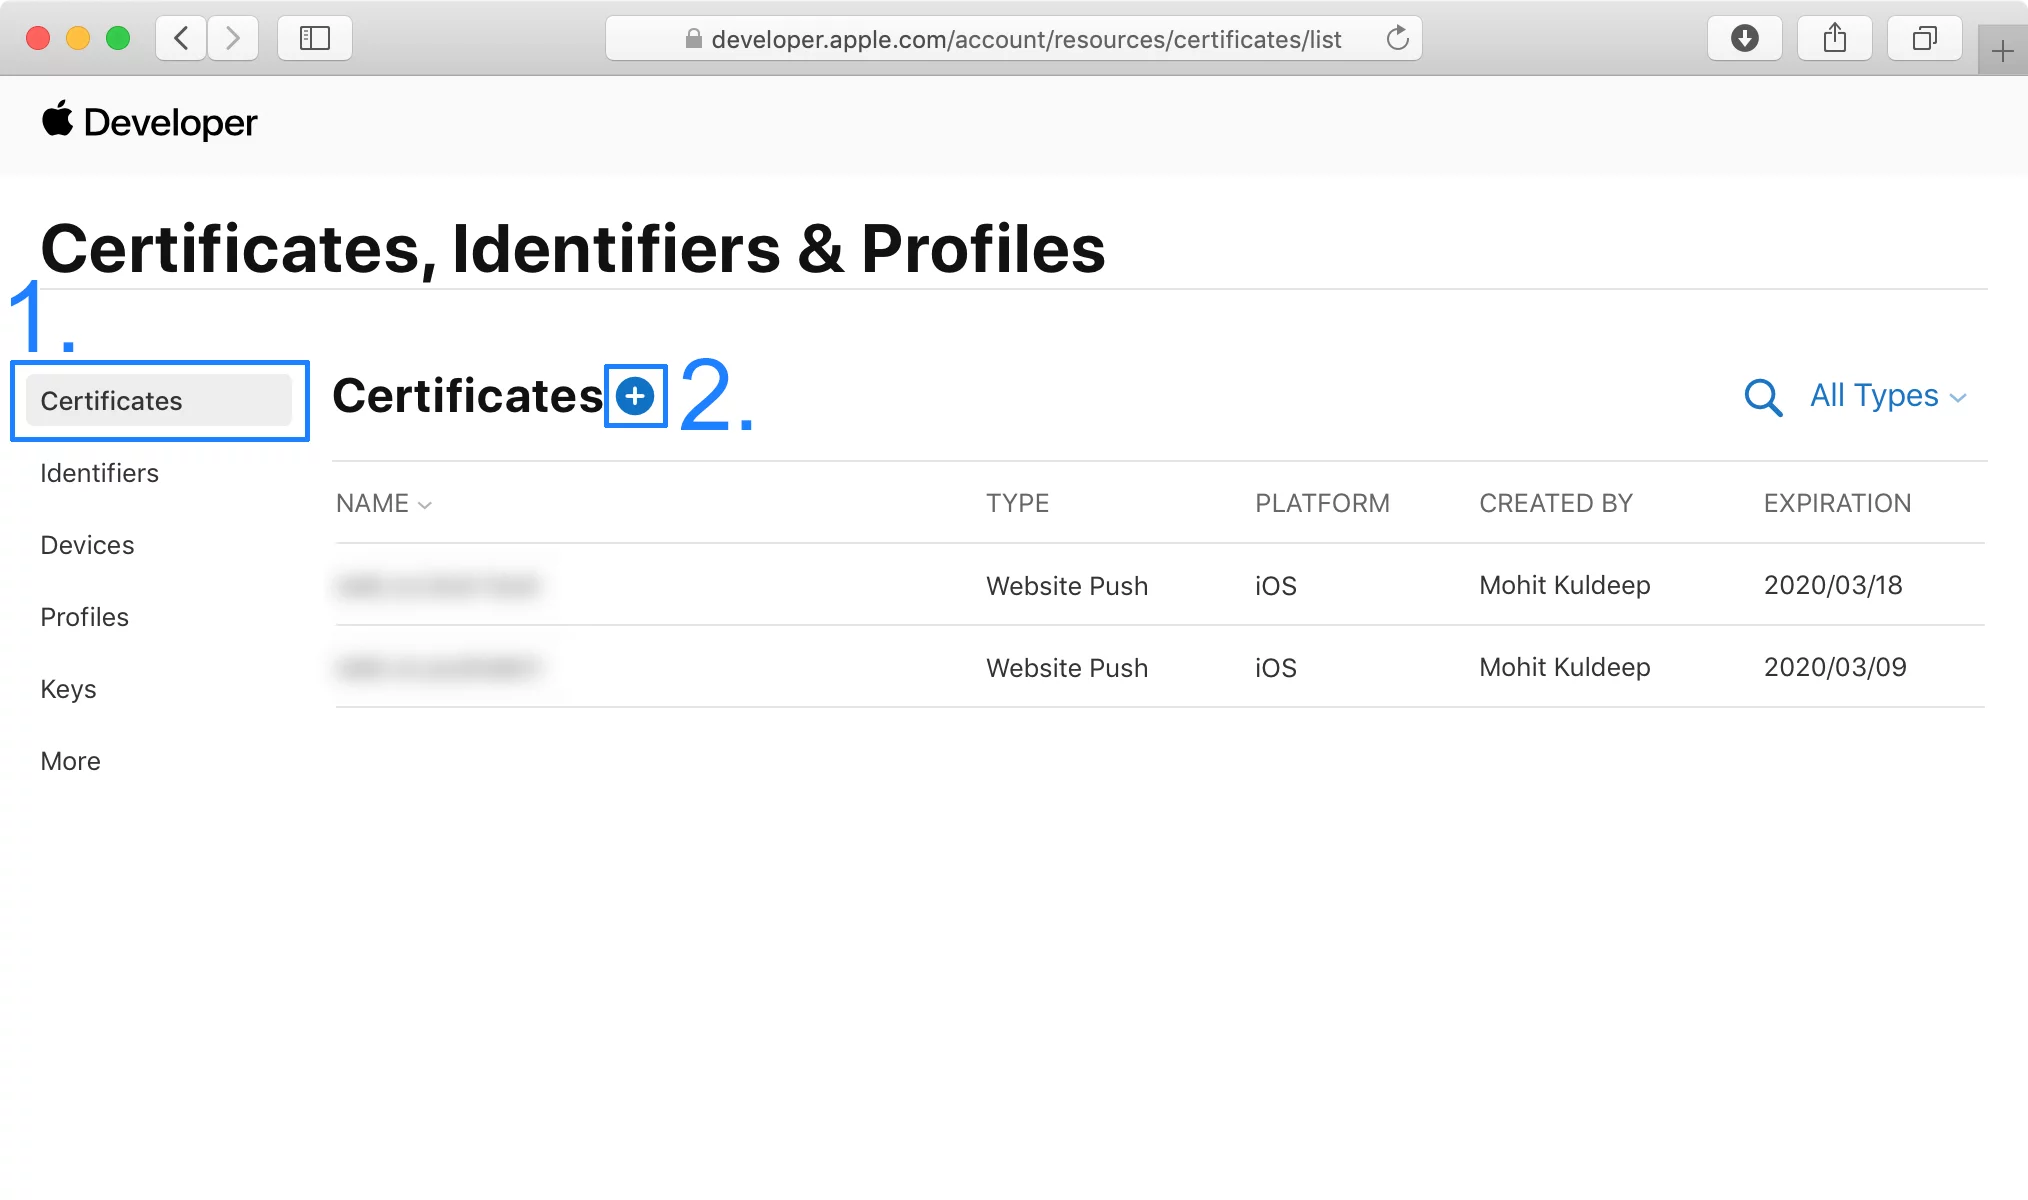
Click on the Certificates section, then click "+" to see all available options.
-
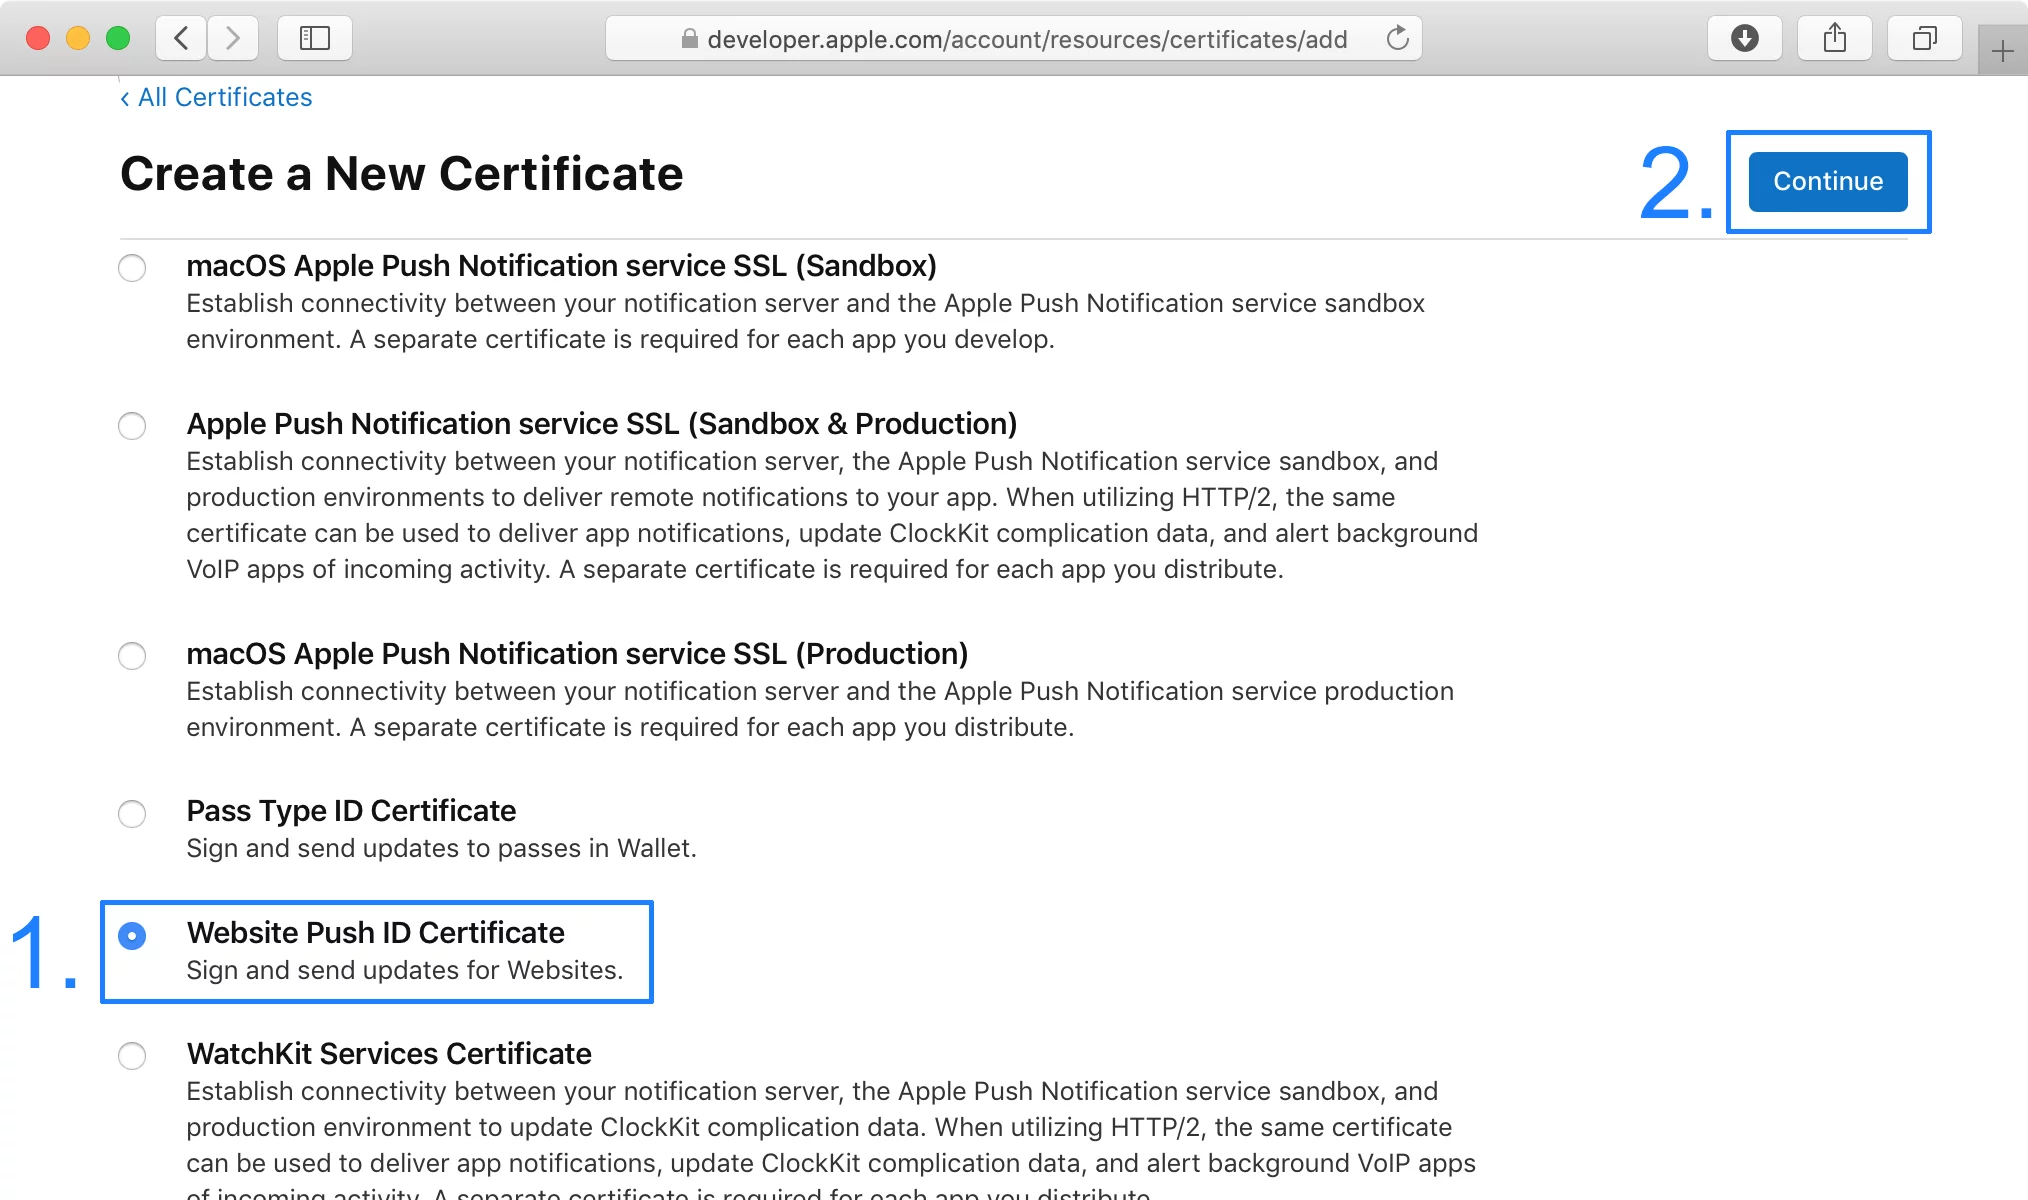
Click on Website Push ID Certificate and Continue.
-
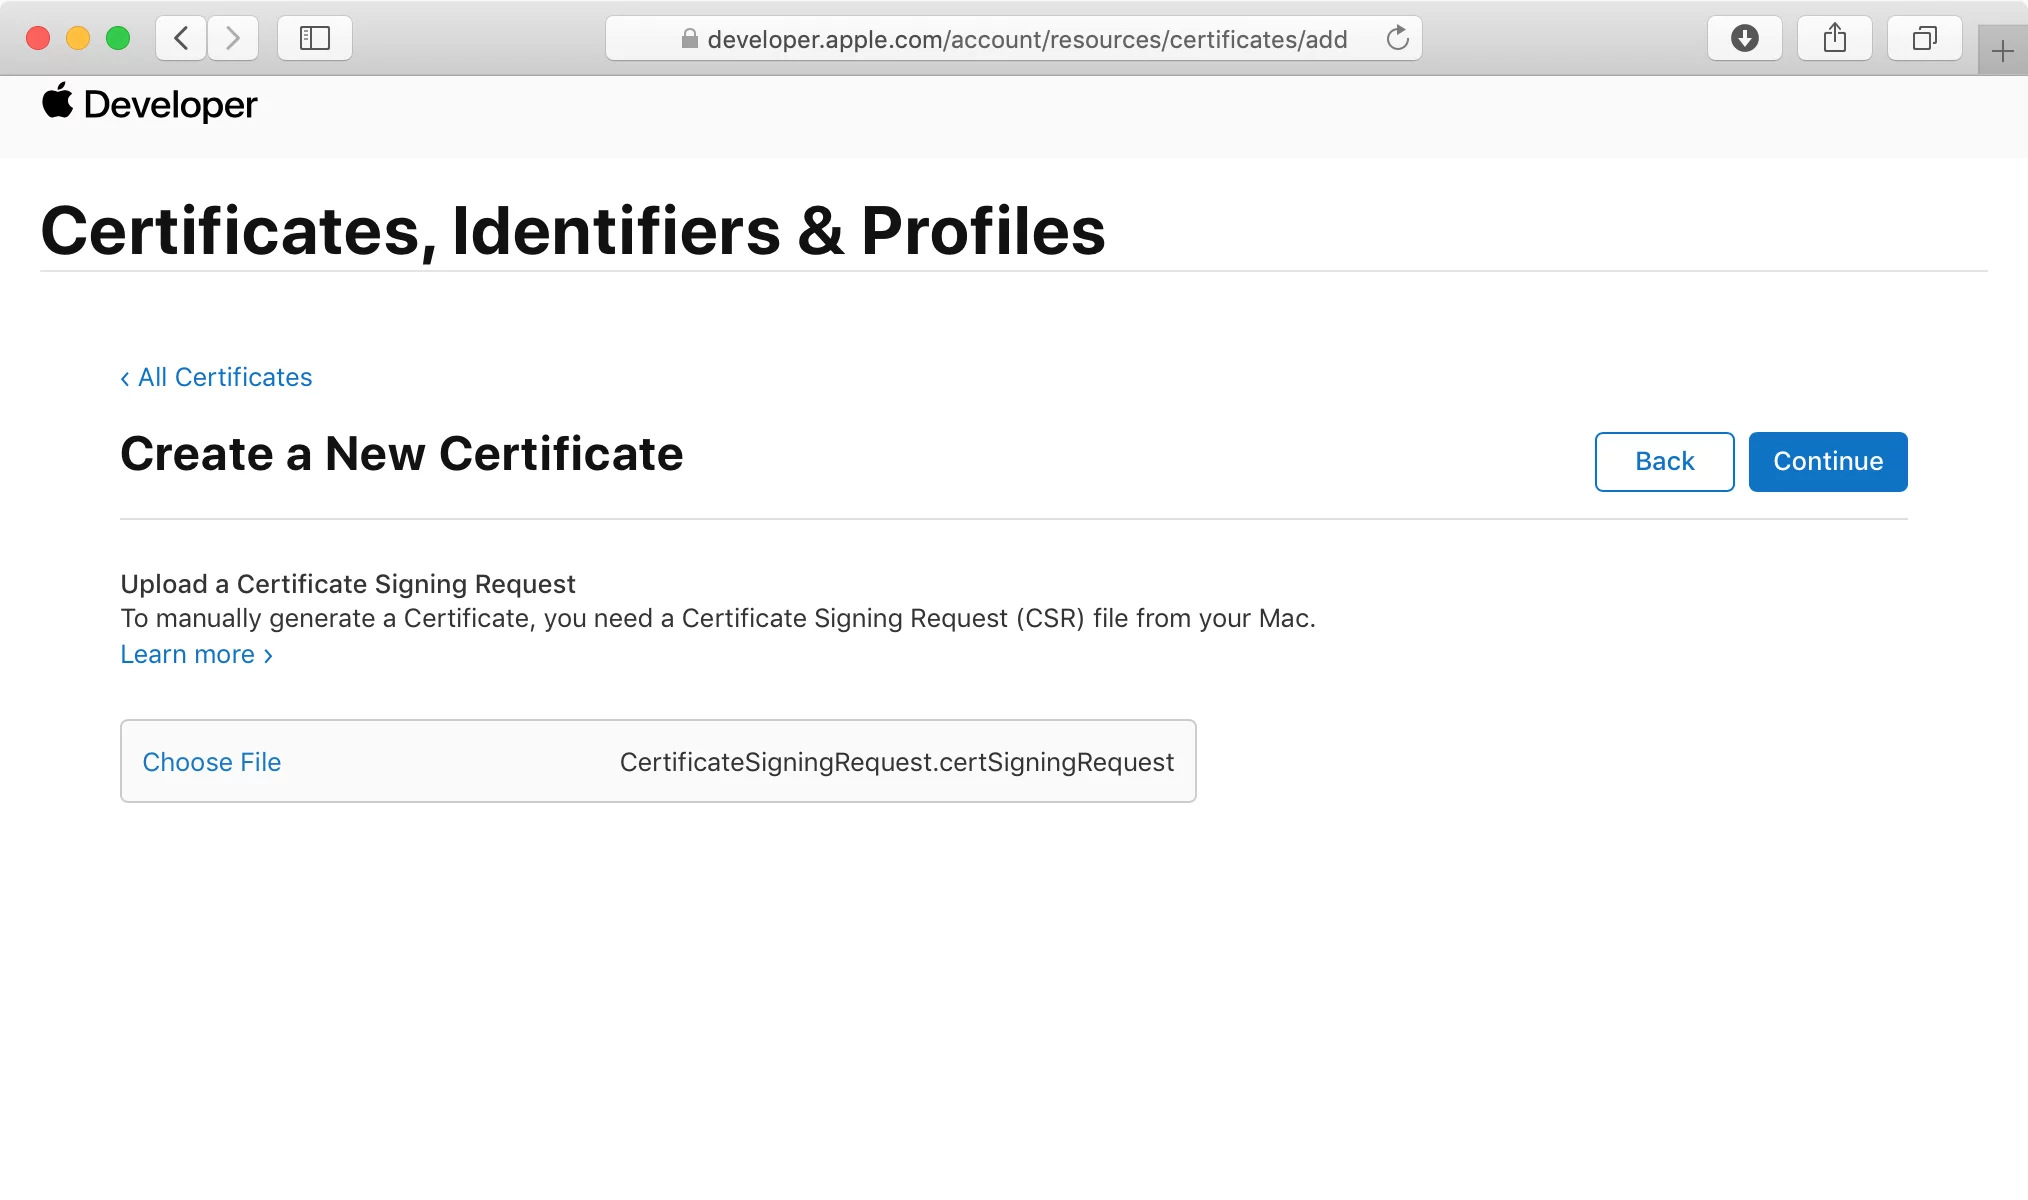
Next, select the Website Push ID we created earlier in Step 2 and hit Continue.
-
Now we need the CSR file that was created in Step 1. Browse to the file with the Choose file button, and hit Continue to upload.
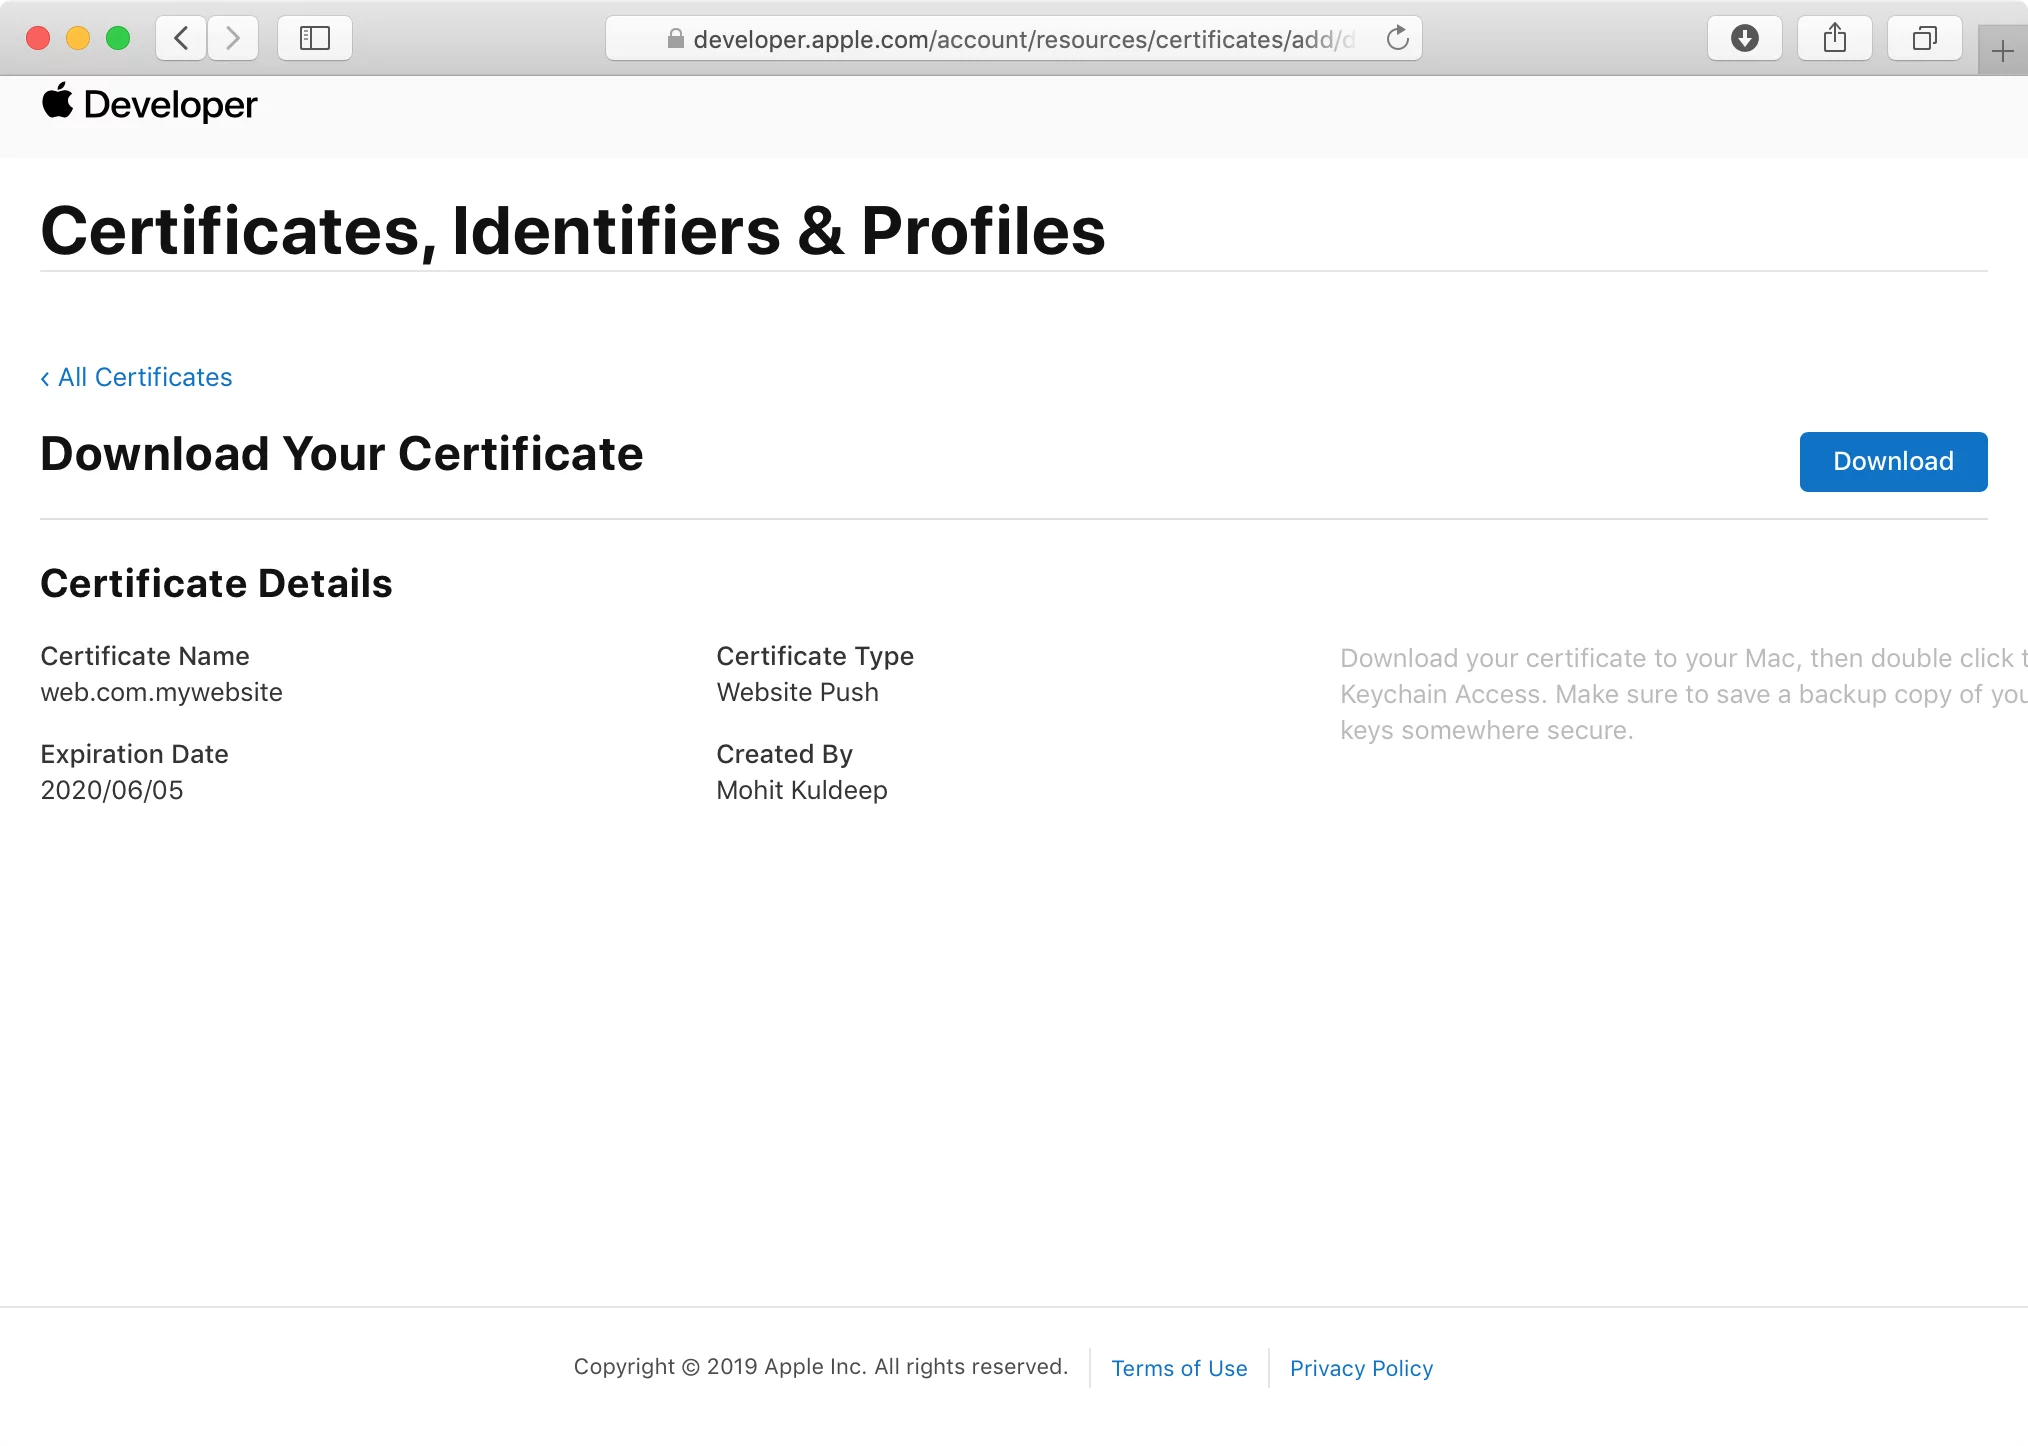
-
On the next screen you will see "Download Your Certificate". Download the SSL certificate, this will be used to send notifications to your Subscribers.
- Now we need to install and export the Certificate. For that, double click on the downloaded certificate, this will install the certificate in the Keychain Access app.
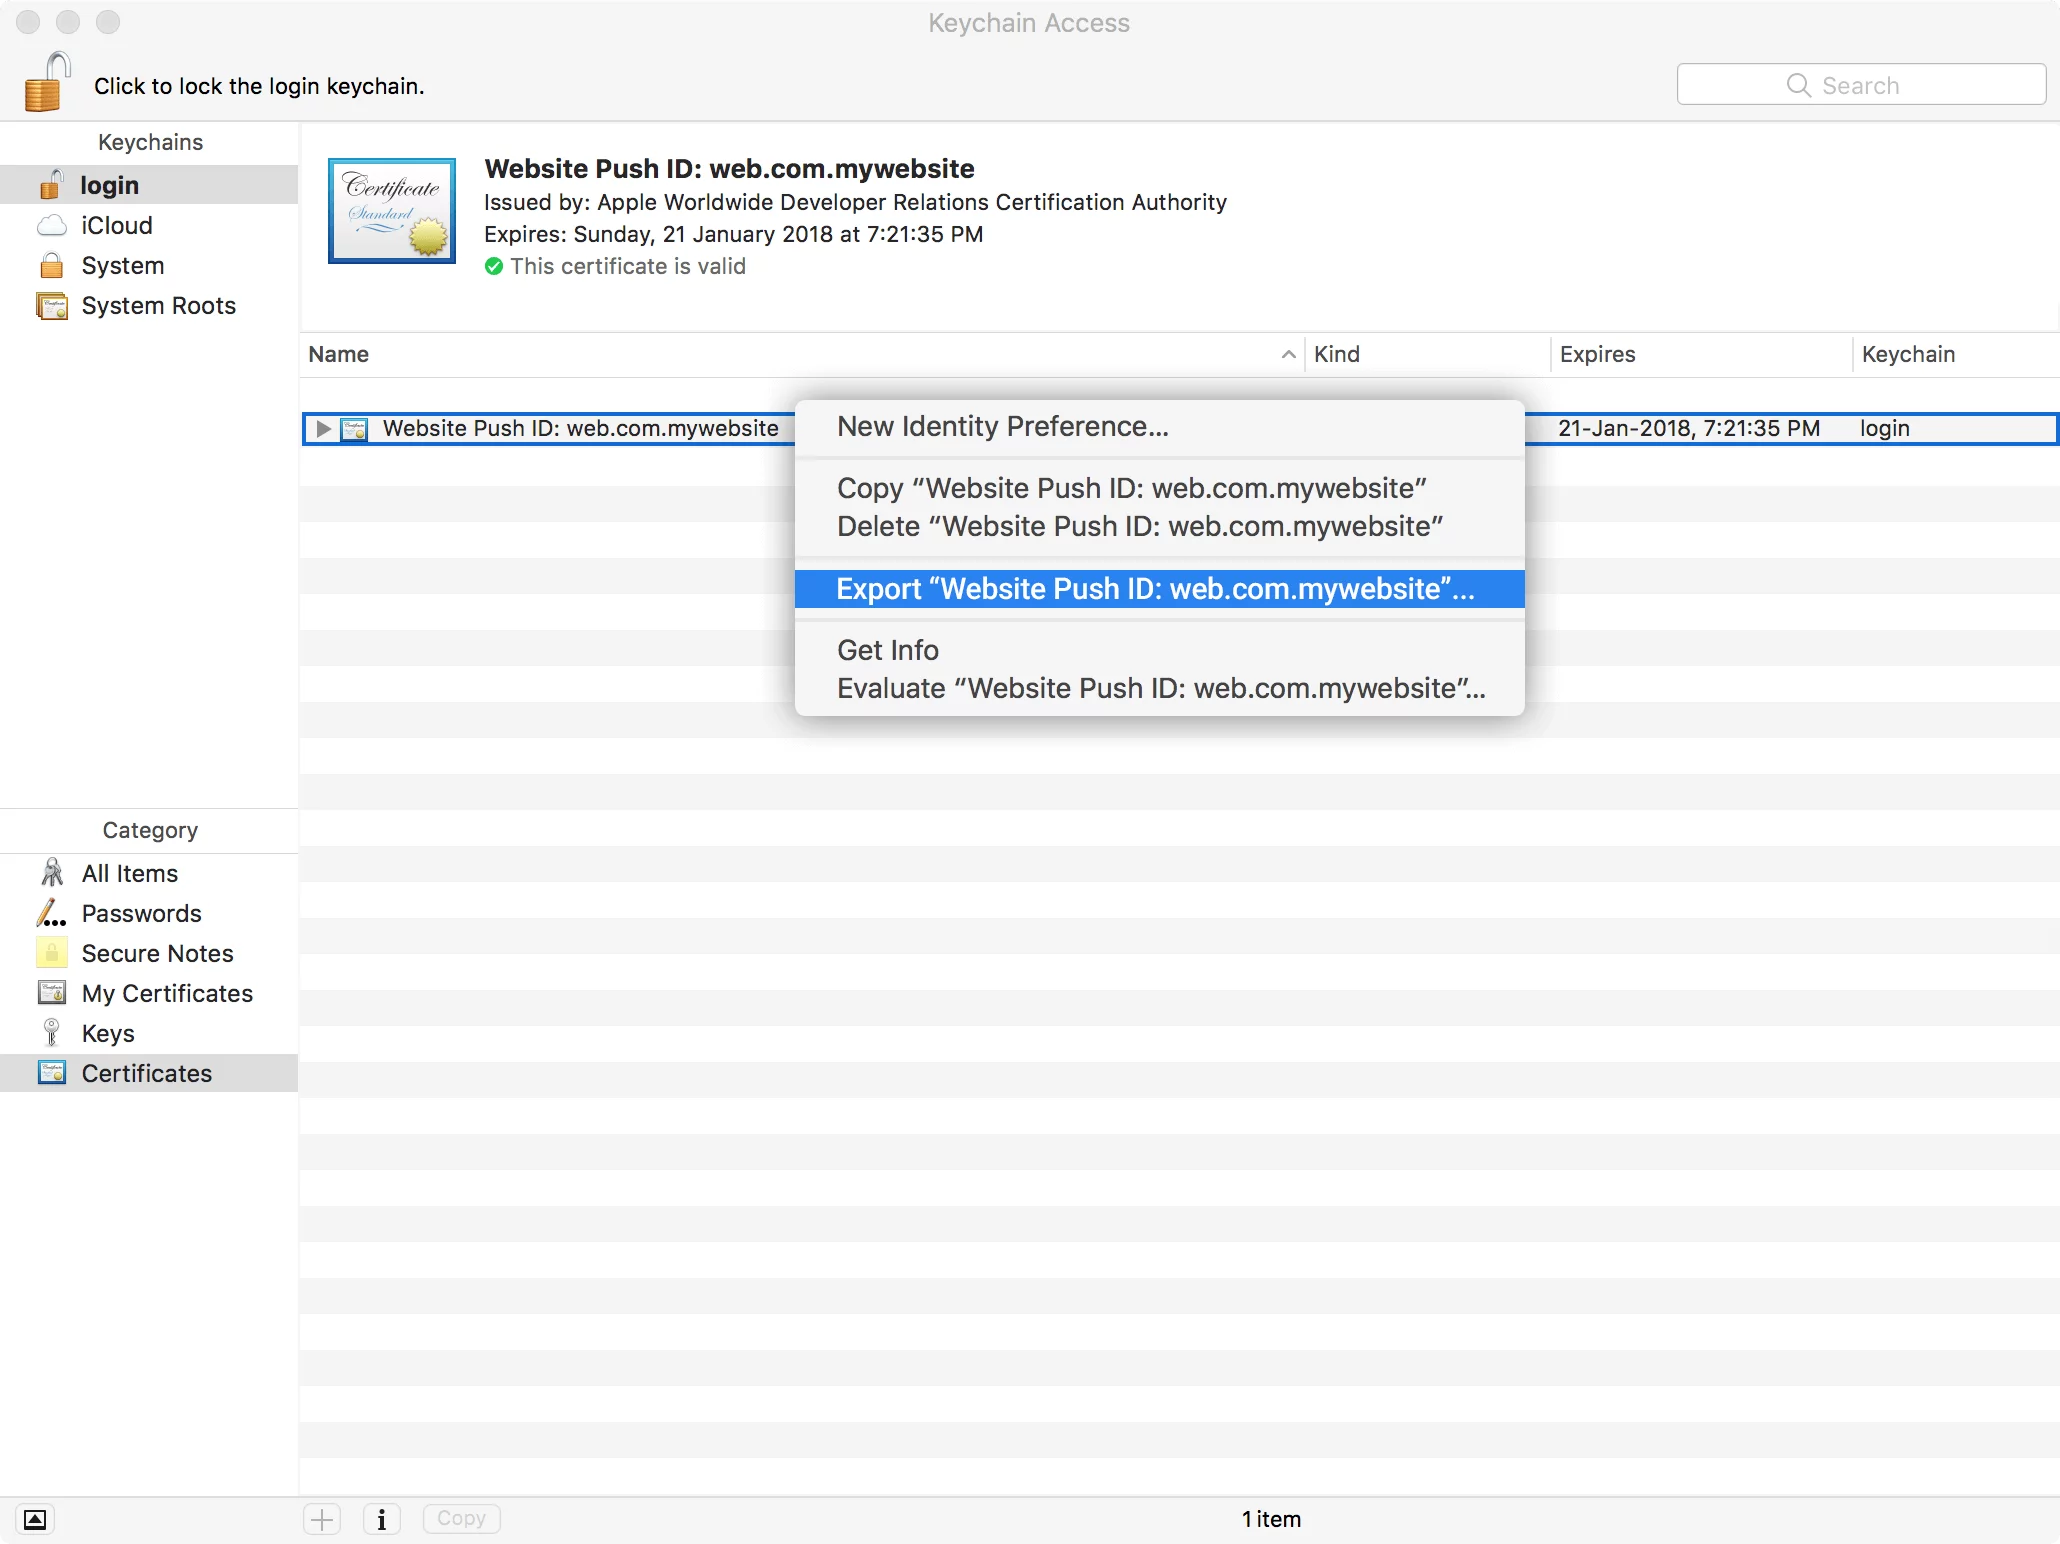
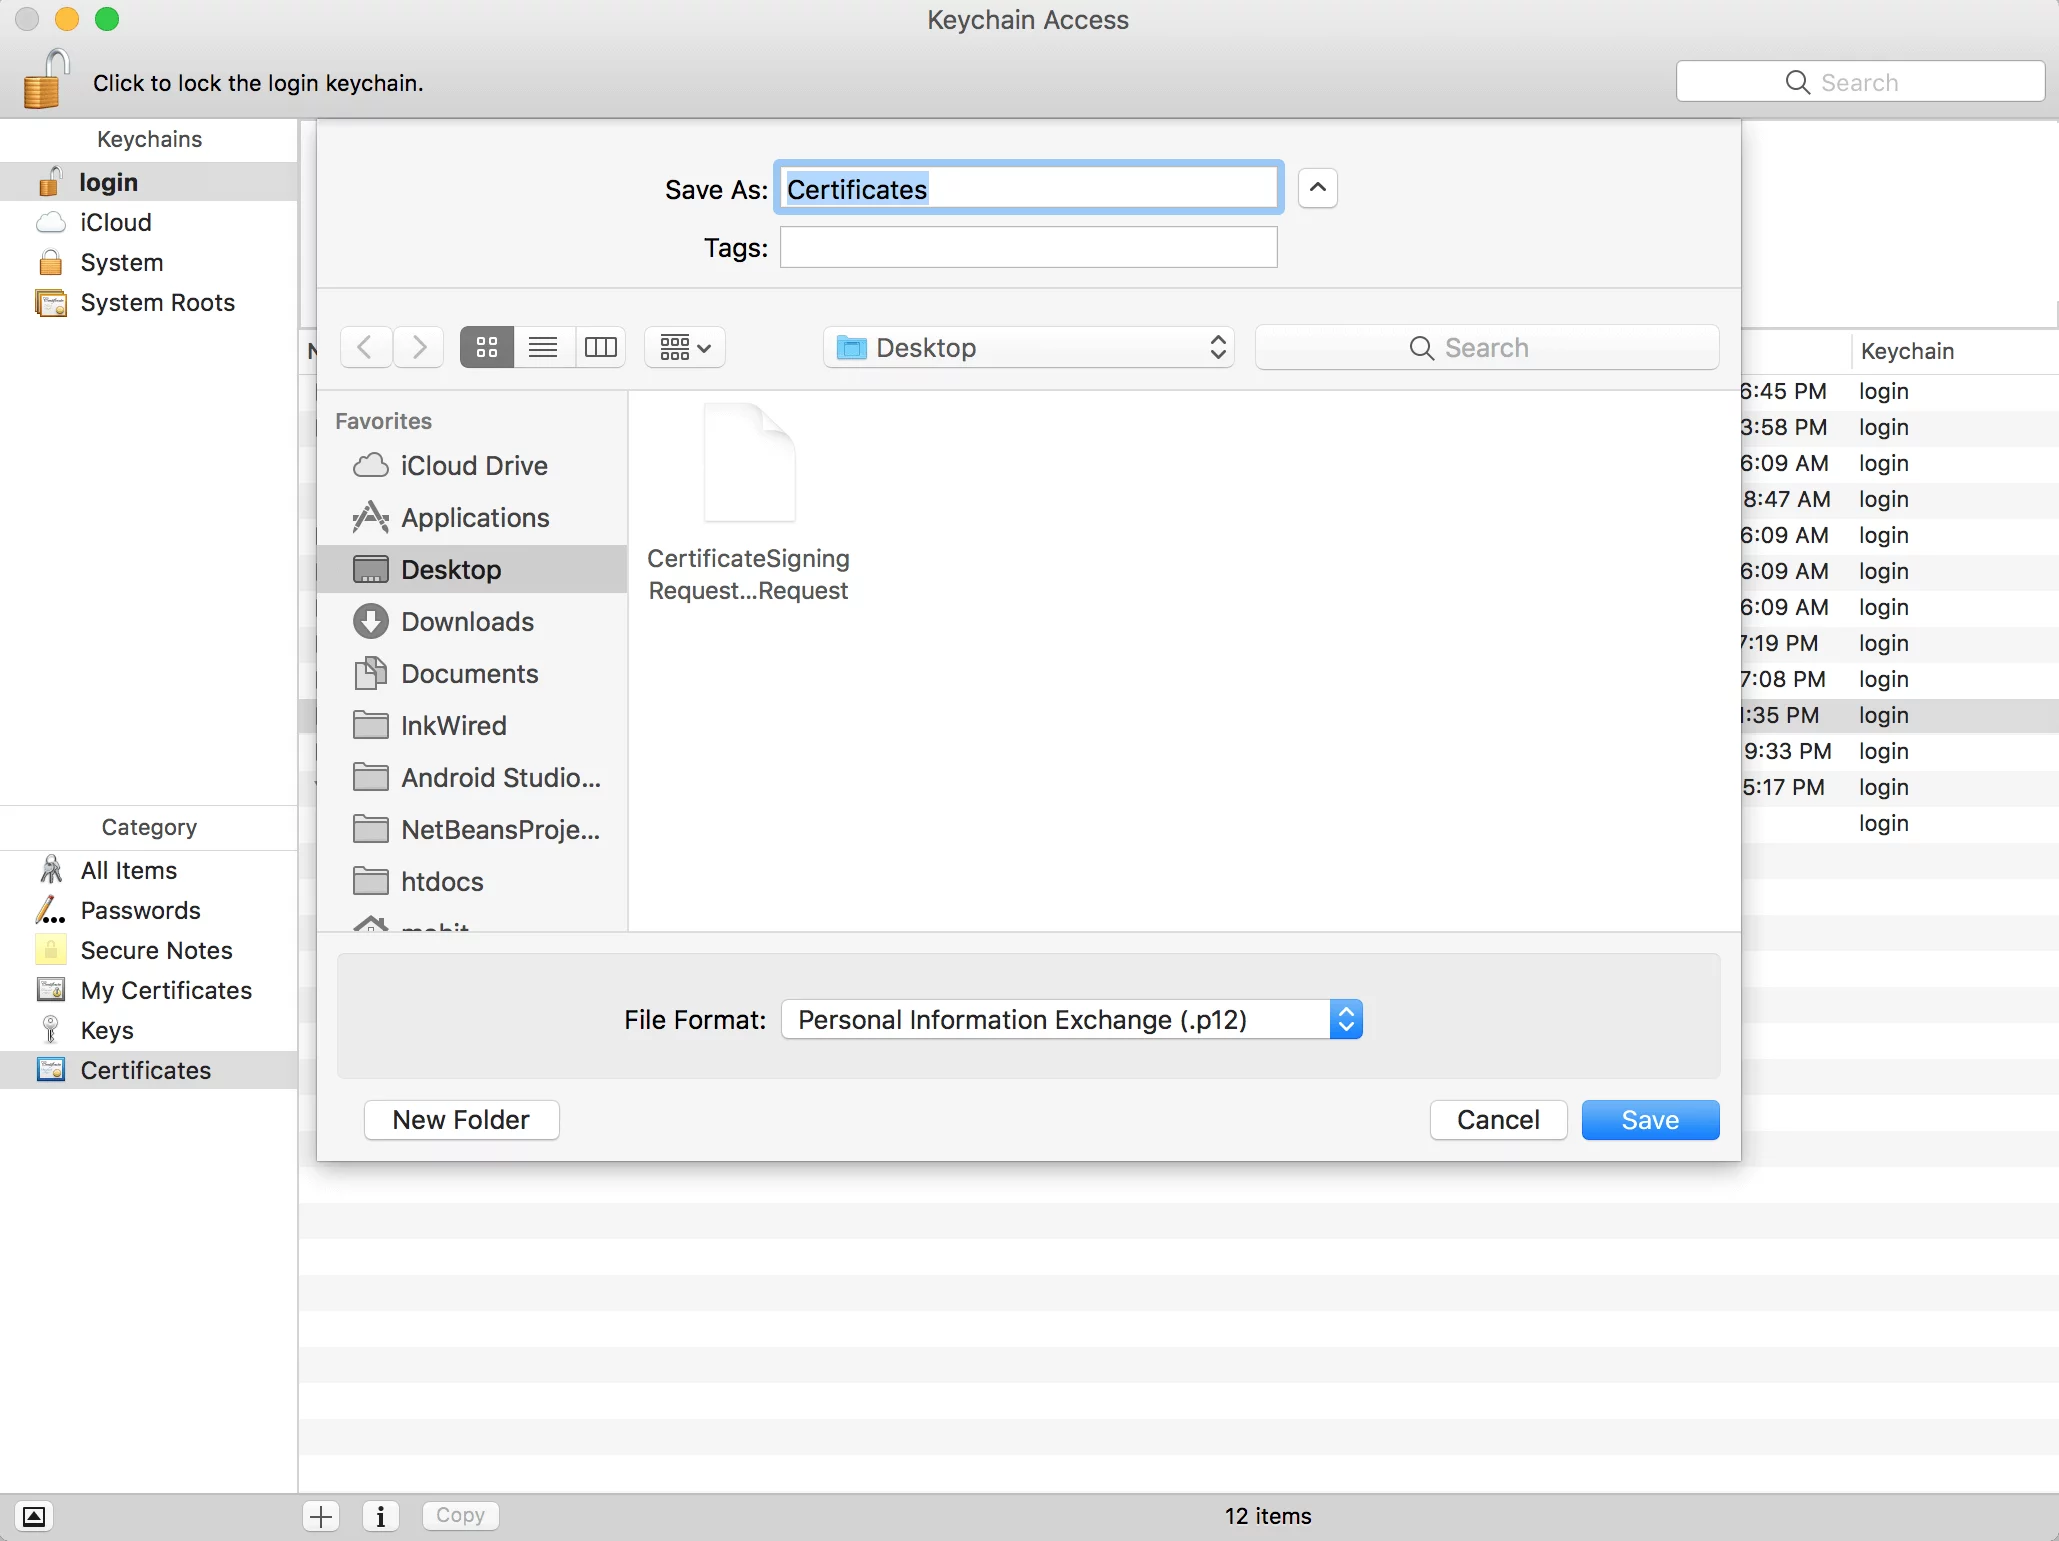
- Let’s export the Certificate now. Open the Keychain Access app and click on Certificates in the category section.
-
Right click on the Website Push ID for which we had created the certificate, you will get a menu where you need to click on Export.
-
While saving the certificate file, use Personal Information Exchange (.p12) format.
-
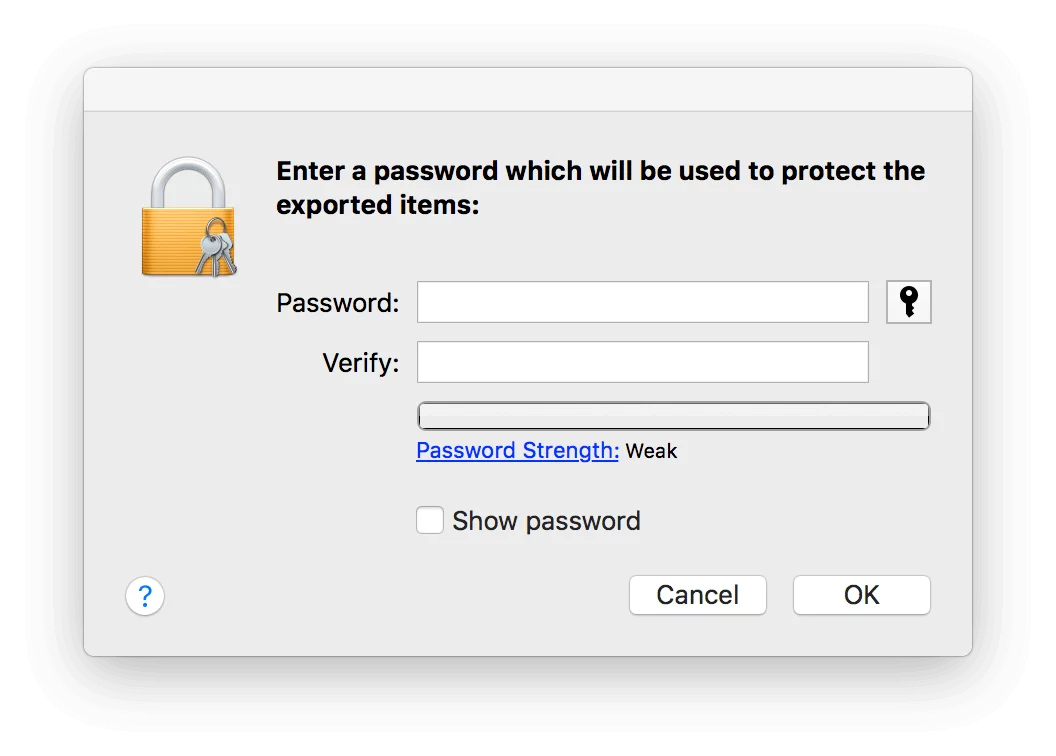
Next, you will be prompted to enter a password, please leave it blank and click on "OK".
-
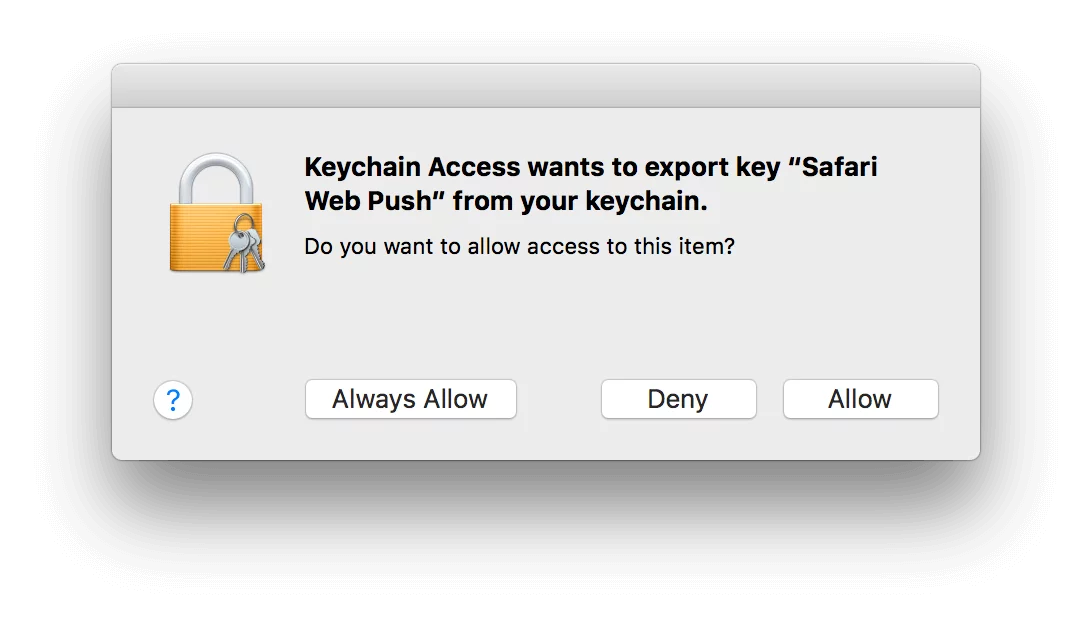
Then click "Allow" and enter your Mac password to export the certificate to your Mac. In the last step, we will upload this certificate to PushAlert.
STEP 4: Uploading Certificate to PushAlert
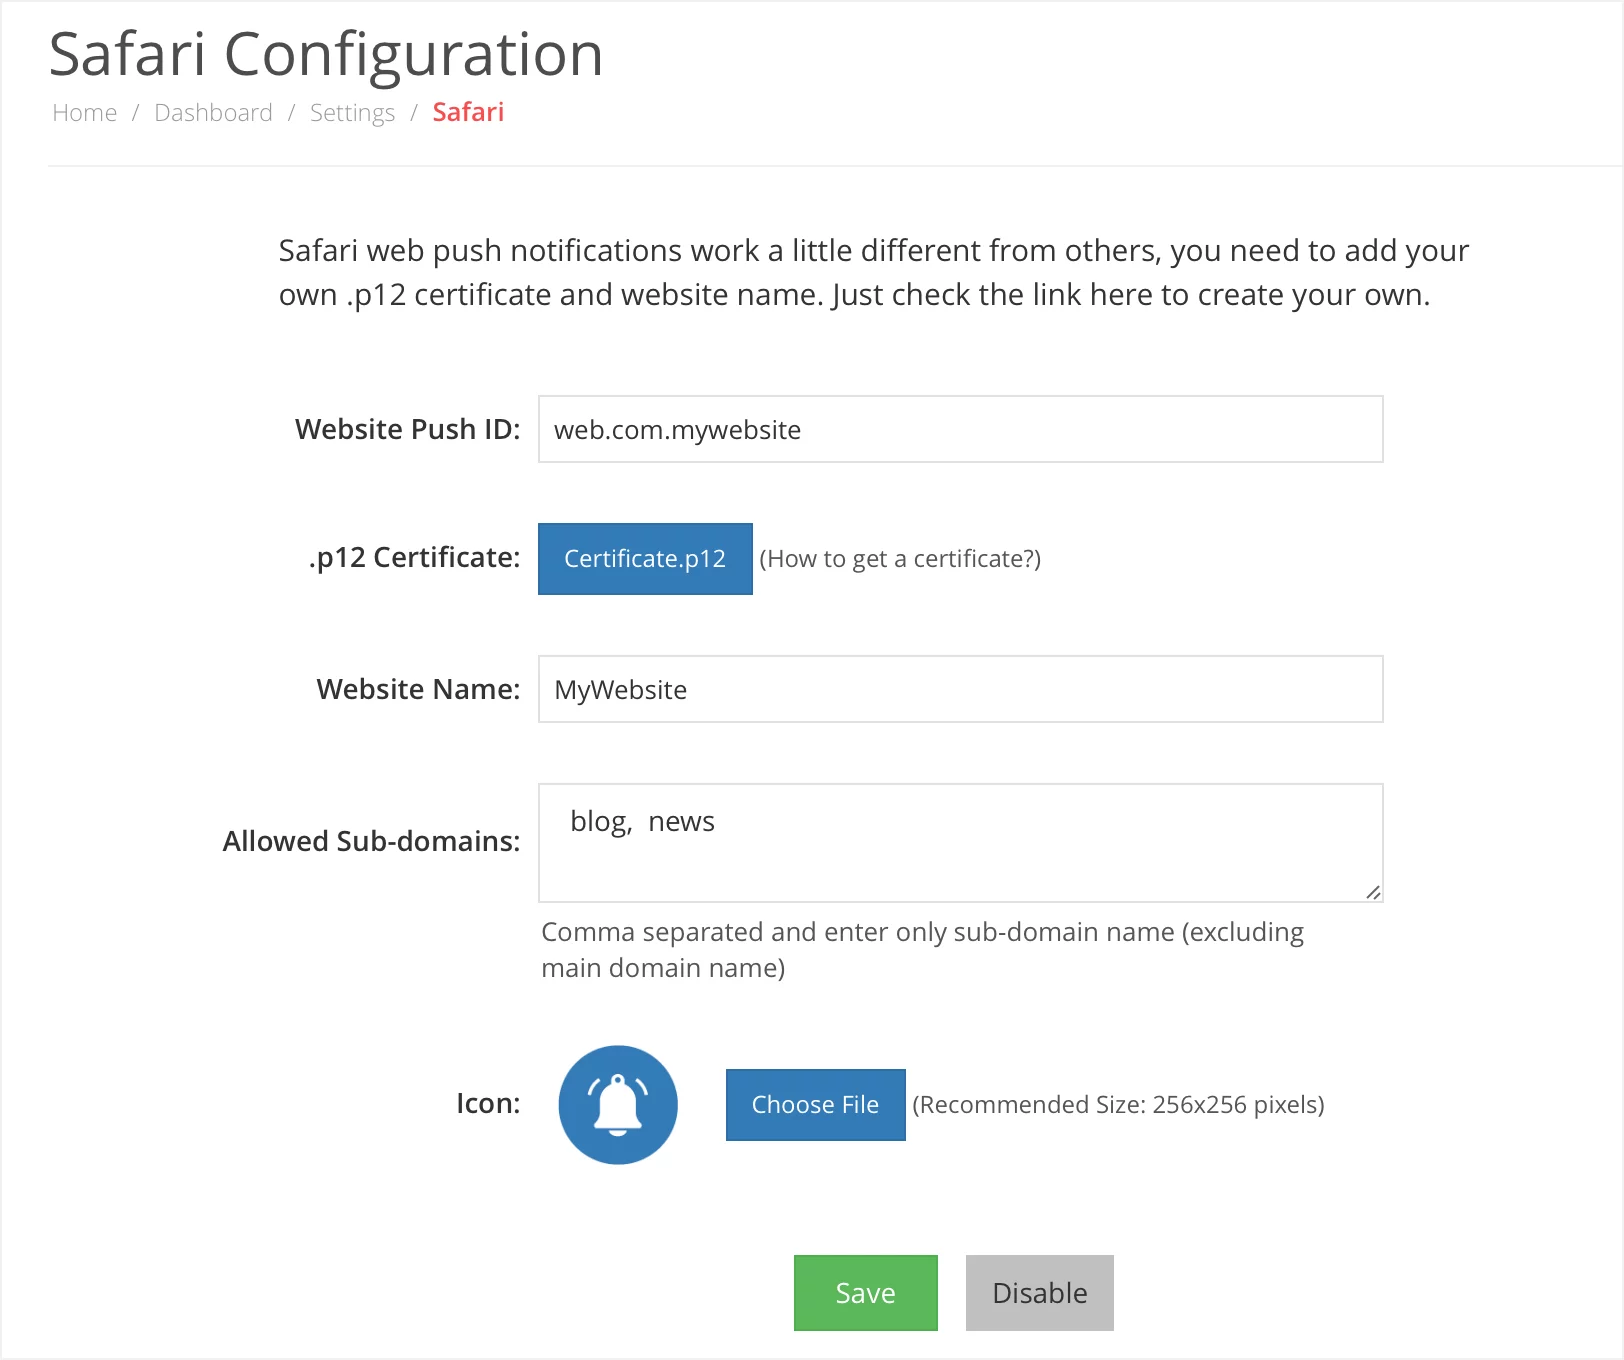
- Go to the Safari Configuration page, Website Dashboard > Settings > Safari Configuration
- Enter the Website Push ID, which was used to create the .p12 certificate in previous step.
- Click on Choose File, browse to the certificate and upload.
- Enter your website name in the next field for e.g. "My Website" (without quotes)
- APNS requires sub-domains to be mentioned separately from the main domain where you want Push Notifications to be enabled. You can mention all your subdomains in the next field separated by comma for e.g. blog, mysubdomain
- Upload an icon which would be used on the subscription dialog with a recommended-size of 256x256 pixels.
- Check the Preview to see that everything is in order and click on Save.
That’s it, we are all set now. Even though Safari takes a lot more steps to setup than Chrome or Firefox, the end result is a brand new audience for your Push Notifications.
When a user is asked for permission to receive push notifications, Safari asks the web server for a push package. The package contains data which will be used by the notification UI on the browser, including your website name and icon, as well as the cryptographic signature which verifies that the notification is coming from the subscribed source (your website). This Push package with all its contents is downloaded ONLY ONCE when a user subscribes and cannot be updated on devices. Do keep this in mind before implementing Safari push notifications on your production website.