Welcome Drip Notifications
With welcome drip campaign you can send a series of notifications to your new subscribers. With these you can automate customer on-boarding, and direct the way they navigate your website.
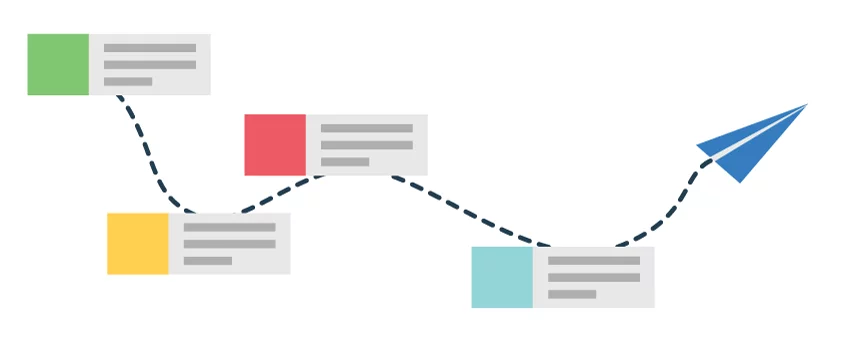
To start with the automation, it is important that you visualize the funnel and identify the steps the user has to take at every stage to lead to a conversion. Once done, you will then have a set of URLs through which the user moves in the funnel. In this article, we explain the steps required to create your automation funnel based on a discrete set of URLs.
A welcome drip campaign can help in creating a great on-boarding experience and lead nurturing.
- You can create a great first impression about your website/service by acknowledging the subscription to notifications, giving them an example of how the updates would be sent in the future.
- Send a series of on-boarding push messages to help your subscribers get acquainted with your website/service, or direct them towards a specific journey.
- You can pre-define any number of notifications, which would keep your subscribers engaged.
- If you run an e-commerce website, you can share coupon codes for new users or inform them about offers running on the website.
- Build a strong relationship with your subscribers, by helping them with features on your website, tutorial videos or announcing new products.
Setting up Welcome Drip Notifications
Welcome notifications are now welcome drip notifications. If you had welcome notifications enabled, they have now been converted to a welcome drip with a single step and immediate delivery. So it works the same as before. But you can now add more steps to the drip and automate subscriber re-engagement.
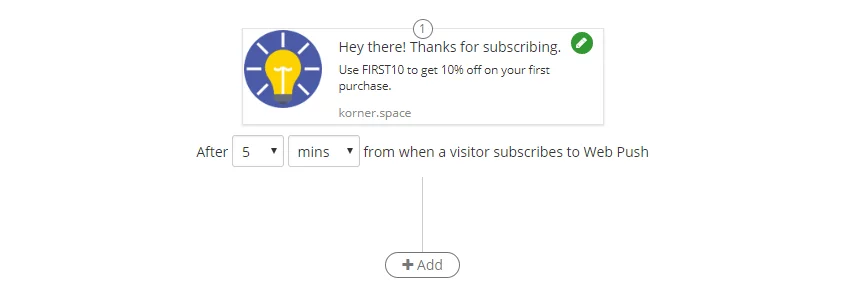
- The first step is already created for you. You can click on the green edit icon to make changes to the notification.
- You can add CTA buttons, add a large image which is known to boost click-through.
- Once you have customized the notification, click on Save Notification.
- Now, you can set the time when you want the first notification from the welcome drip to go out. By default it is set to 0 minutes, which means it is set to go out immediately as soon as the user subscribes.
- Now you can add the next step in the drip by clicking on the Add button.
- You will get a popup to edit the notification content. Save this notification once you are done with the changes.
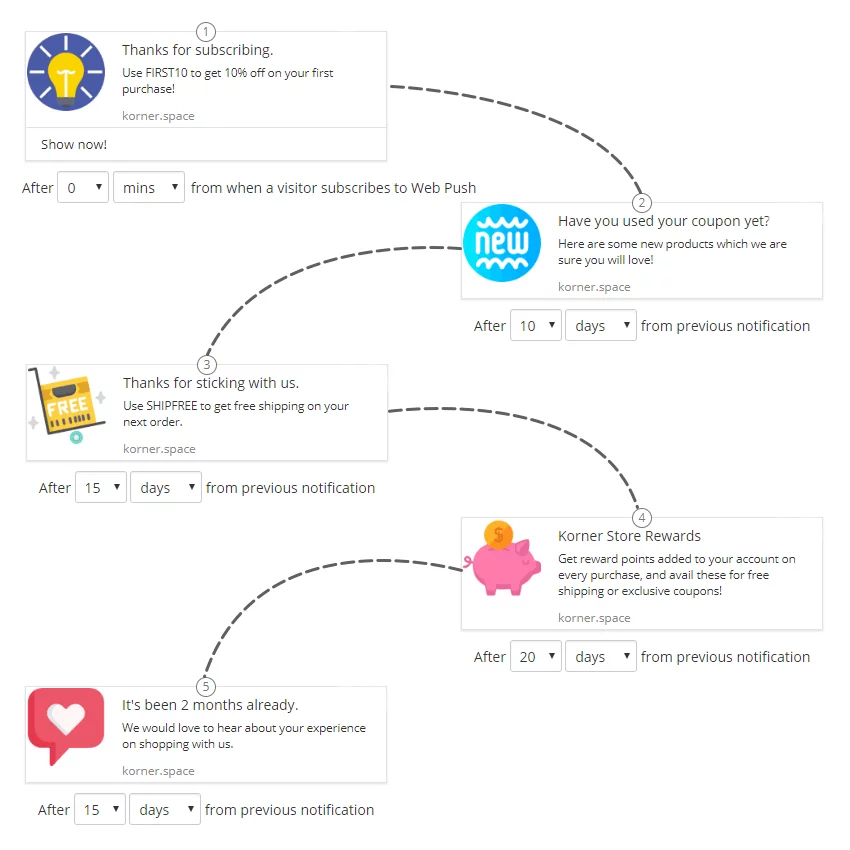
- This notification will be sent after the previous notification, you can specify the duration after which it should be sent. You can set the duration in minutes, hours or even days from the previous notification.
- Similarly, you can add more steps to the drip campaign, and once you are set, click on Enable at the bottom. That's it, the drip campaign is now active and it will keep your subscribers engaged.
Editing an active drip campaign
- If you want to edit an active active campaign, click on the Edit button at the bottom. You will be notified that the current drip will be stopped for the subscribers that are already in this drip campaign.
- What this means is that, for the subscribers who have not yet completed this drip campaign, they will not get further notifications from this campaign.
- Essentially, if you edit the welcome drip campaign, it is paused immediately and will only send notifications to new subscribers once it is enabled.
- Once you are in the Edit mode, you can change the timing, add or delete steps or change the notification content as well.
- Once you are done with the changes, click on Enable to start the drip for new subscribers.
Welcome Drip Analytics
- Welcome drip campaign has a separate reporting dashboard. Click on the View Stats button at the bottom of the page to check the statistics on the current drip.
- The analytics here give you an in-depth look at the performance of the campaign, right from how many subscribers entered to how many completed the drip.
- You also get detailed analytics on clicks as well as click-through rate for each step of the welcome notification campaign.
Optimizing your Drip Campaign
- Make sure the previous notification expires before the next is sent out: To do that, set the previous notification to expire before the next is set to go out. You wouldn't want your subscribers to be bombarded with notifications if they had gone out on a holiday.
- Give the notifications some space to breathe: Timing is the key to getting meaningful engagement from push notifications. Space them so as to not overwhelm your subscribers. For eg. if you run an e-commerce website, you can start with a welcome coupon which can be used for the first purchase. Then, after a few days, you can check back if they made a purchase and also send them links to popular or new products on your website. Next, you can talk about any rewards program you may have, bulk shipping coupons. And finally ask for feedback on their experience.
- Add call to action buttons to notifications: Call to action or CTA buttons help guide your customers through a specific journey. While the main body of the notification can be used to direct the journey as well, CTA buttons provide context.
- Large images boost click-through rates: Notifications are a visual medium, and adding large images not only draws attention but makes them more clickable as well. You can stand out from the clutter with a well timed notification with a hero image that highlights the context of the notification.
For Basic plan users, welcome drip notifications will continue to work as single-step welcome notifications with immediate delivery. While Premium and higher plan users will be able to take full advantage of the customizable drip.