Web Push Notifications on Shopify
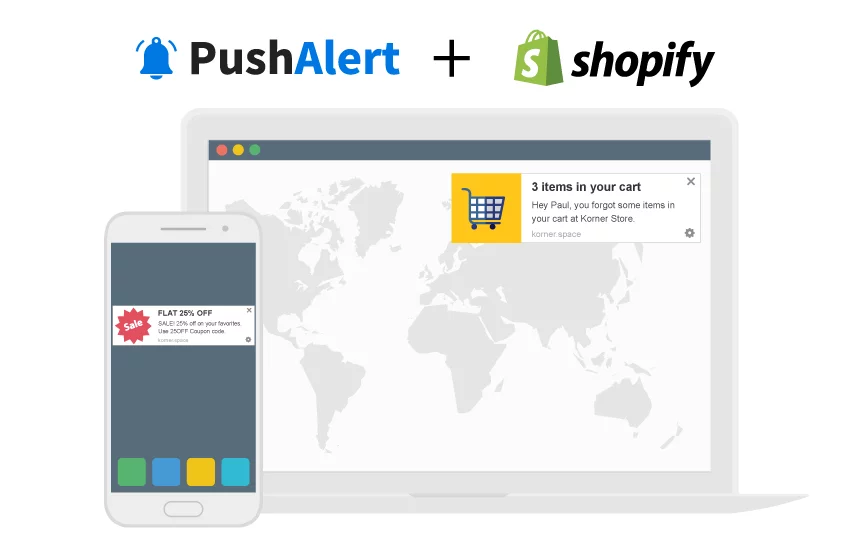
Enable automated web push notifications on Shopify.
- Go to our app listing on Shopify, click Get and Install the app.
- Once done, you would be redirected to PushAlert where you need to choose a plan based on the automation features you want, and create an account.
- You can try any plan for free for 15 days but for paid plans, you would have to approve the recurring monthly charge on Shopify. Don't worry, you won't be charged till the trial period is over.
What does our Shopify App do?
- It automatically integrates web push notifications on your store and prompts your visitors and customers to subscribe to notifications.
- Coming to specific Shopify features, you can automate notifications on your store and see up to 30% boost in sales. Click the links below to jump to their specific section.
- Setup Automated Abandoned Cart Notifications with One-to-one Personalization.
- In-stock Notifications For Out of Stock Products
- Real-time Price-drop Alerts for Virtual Product Wishlists
- Automated Order fulfilled Notifications
Automated Abandoned Cart Notifications
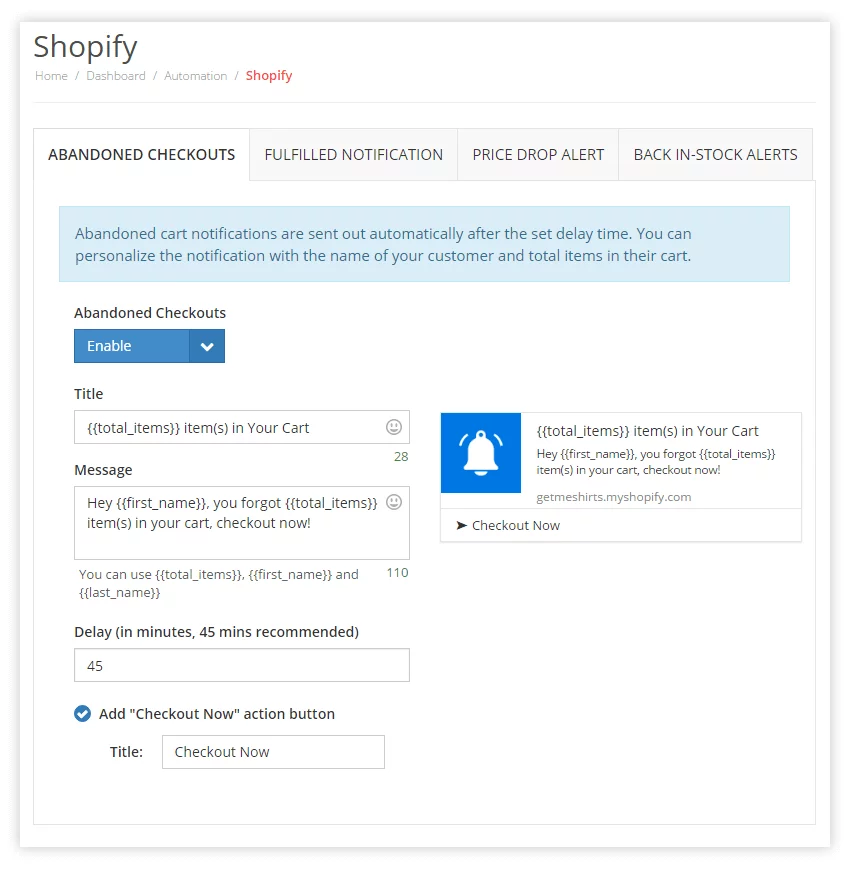
- Automated Abandoned Cart checkouts are enabled by default after our app has been installed. To customize its settings, head to Automation > Shopify.
-
Since these are one-to-one personalized messages, you can also include your customer's first name, last name as well as the total number of items in their cart.
-
Here are the different attributes you can use within your notifications:
{{total_items}} - This will be substituted with the total items in the cart of your customer.
{{first_name}} - This will be substituted by the first name of the customer and it can be combined with the last name.
{{last_name}} - Substituted by the last name.
- You can use any combination of the above three attributes in the title or message of your notifications.
- Delay: Here you need to specify after how many minutes of the cart being abandoned, should the notification be sent. By default it is set at 45 minutes but you can lower it to a minimum of 15 minutes.
- This notification will be sent to all devices of the customer from which they have subscribed for notifications. This increases the chances of your notification being seen.
- Additionally, you can also enable the Checkout Now action button which increases the need for urgency and also adds another call to action on your notification.
- The icon used in the automated notifications is your store icon that can be set from Settings > Website. Alongwith the Store name in the notification, this helps build familiarity.
- Click Save, to implement any changes.
Back In-Stock Notifications
- Back in-stock notifications can also be configured from Automation > Shopify in your PushAlert Dashboard.
- Widget Configuration
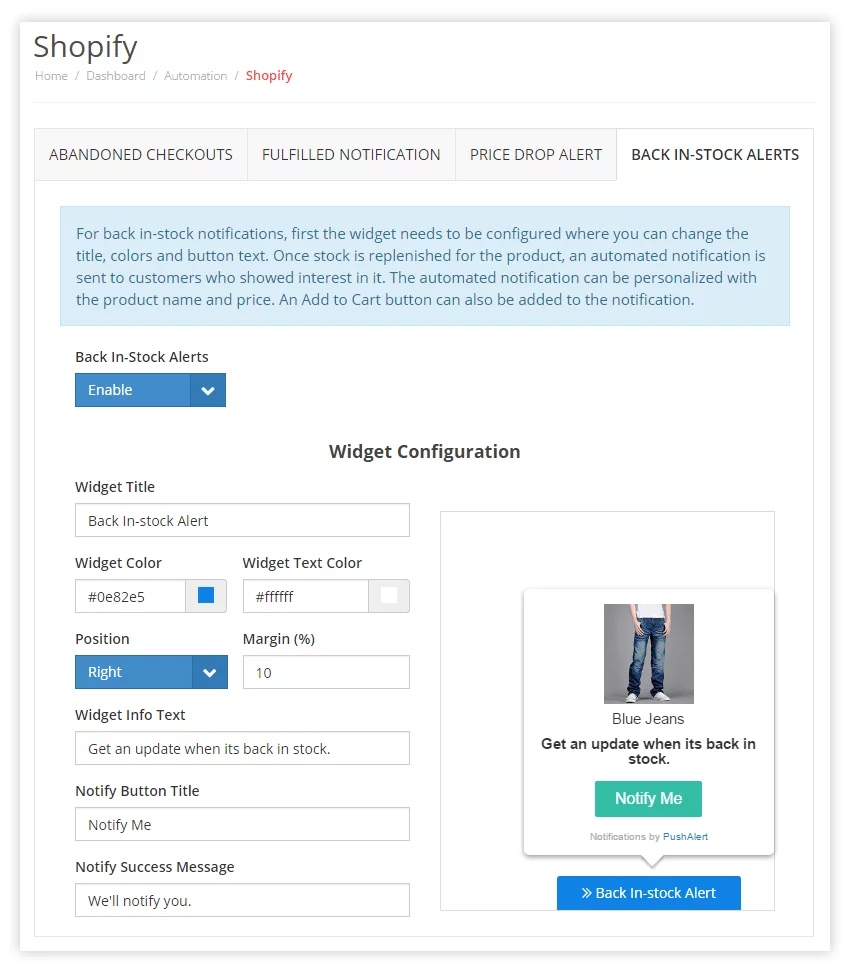
- You can customize the widget title and colors.
- The image of the product is pulled from the store.
- Then set the position where you want the widget to appear.
- Next are the messages you want displayed within the widget when its shown.
- First in the Widget Info Text which tells the customer what the widget will do, by default it is set to "Get an update when its back in stock".
- Next is Notify Button Title, which is the main action here. As soon as your customers hit this button they will be subscribed to get updates when the particular product is back in stock.
- Notify Success message is displayed after the customer clicks on the Notify Button.
- Notification Details
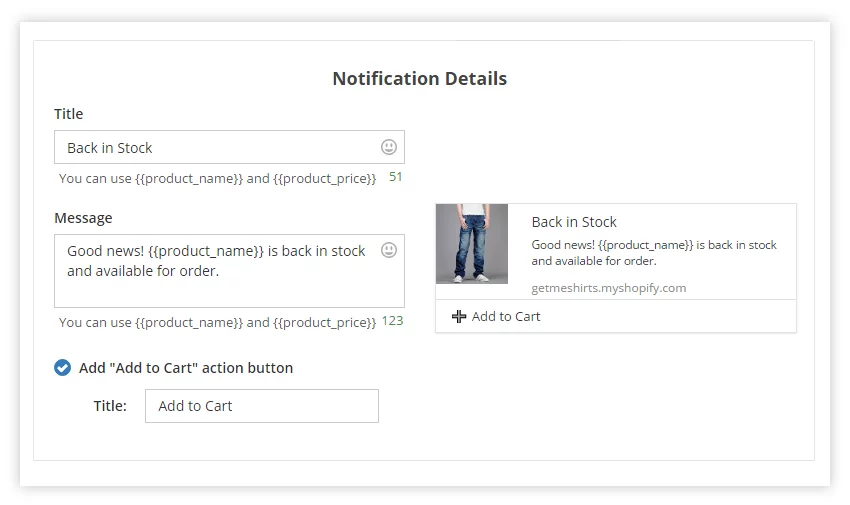
- This is where you set the default In-stock notification.
- Product Image will be pulled from the store for the notification icon.
- You can set the title and message along with specific attributes:
{{product_name}} - Substituted by the name of the product which is back in stock. {{product_price}} - The price of the product. - You can use any combination of the above two attributes in both title and message.
- You can also use our Add to Cart button, which will help your customers add the product directly to their cart, reducing the time to checkout.
- Once all changes have been made, click on Save. UI changes may take up to 15 minutes to reflect on your store.
Price Drop Alerts
- Price Drop Alerts need an opt-in from the customer for a particular product. You can head to Automation > Shopify to customize both the appearance and location of the widget on your store and the notification to be sent.
- Widget Configuration
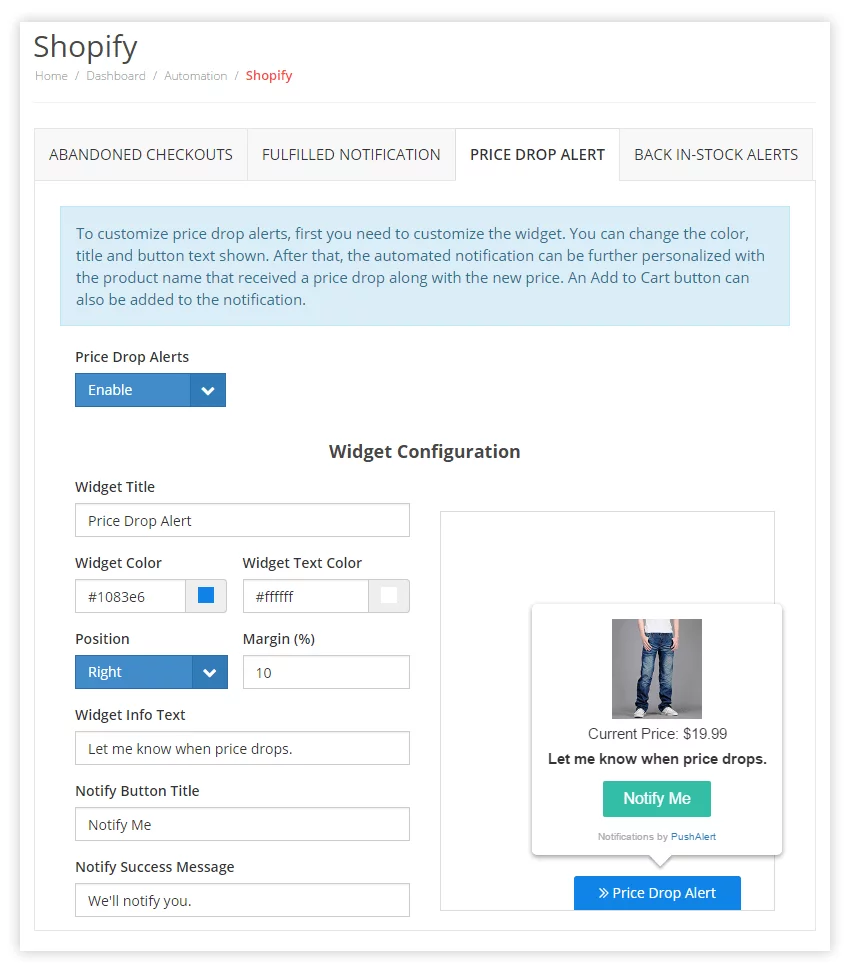
- You can customize the widget title, widget color and widget text color based the language and design of your store.
- The image of the product is automatically pulled from the store.
- Then set the position where you want the widget to appear, you can choose left or right of the screen and set a margin in percent for the distance from the nearest edge.
- Next are the messages you want displayed within the widget when its shown.
- First in the Widget Info Text which tells the customer what the widget will do, by default it is set to "Let me know when price drops.
- Next is Notify Button Title, which is the main action here. As soon as your customers hit this button they will be subscribed to get updates on price drop for the particular product.
- Notify Success message is displayed after the customer clicks on the Notify Button.
- Notification Details
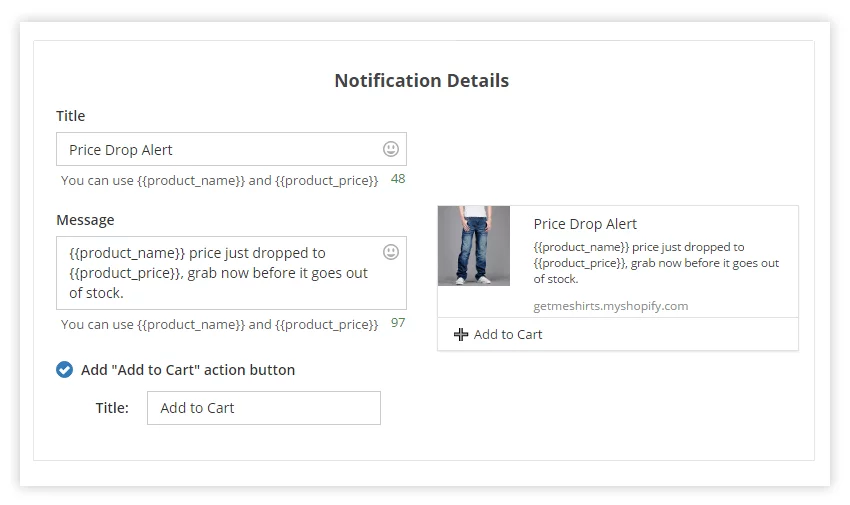
- This is where you can set the default price drop alert.
- Product Image will be pulled from the store for the notification icon.
- You can set the title and message along with specific attributes:
{{product_name}} - Substituted by the name of the product which has received a price drop. {{product_price}} - The new price after the drop to entice customers. - You can use any combination of the above two attributes in both title and message.
- You can also use our Add to Cart button, which will help your customers add the product directly to their cart, reducing the time to checkout.
- Once all changes have been made, click on Save. UI changes may take up to 15 minutes to reflect on your store.
Order Fulfilled Notifications
- Head to Automation > Shopify to customize order fulfilled notifications.
-
These notifications can also be personalized with the first name and last name of your customers. For reference you can also add the order ID which has been shipped.
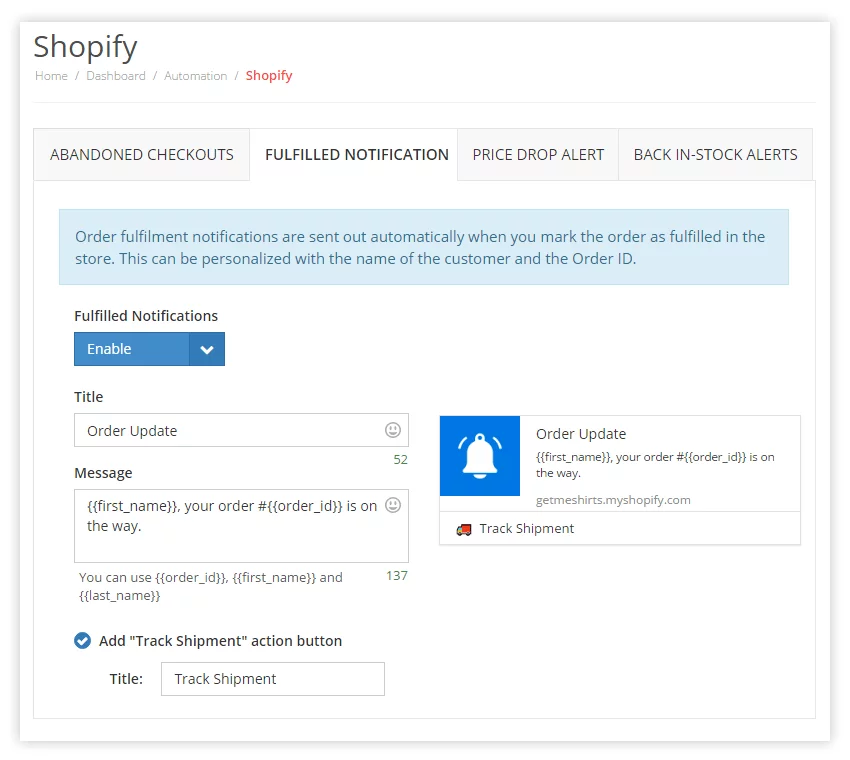
- Order fulfilled notifications are fired in real-time when you mark the order as fulfilled in your store admin account and if tracking details are added, then the customer can also track their shipment.
-
Here are the different attributes you can use in title or message, these can be used in any combination and any number of times within a notification:
{{order_id}} - Substituted with the order number which is ready to ship.
{{first_name}} - Substituted by the first name of the customer, can be combined with last name.
{{last_name}} - Substituted by the last name.
- Additionally the Track Shipment button can also be added which again gives another reason for engagement with the notification and brings the customer directly to the tracking page.
- This notification will be sent to all devices of the customer from which they have subscribed for notifications.
- The store icon will be used to send all automated notifications, you can change it from Settings > Website. It fosters your brand image with your customers and improves retention.
- If you have made any changes, click on Save to reflect them on your store. It may take up to 15 minutes for UI changes to be shown.
If you have any query, please feel free to contact us on support@pushalert.co or start a chat.