Android: Getting Firebase Credentials
For sending push notifications to an Android app, you need to create a Firebase account and then setup Firebase Cloud Messaging Credentials. This guide will help you to generate the required Service Account JSON and uploading to your app.
Requirements - Before You Begin
- An Android mobile app.
- A Firebase account
- A PushAlert Account
Step 1: Create a Firebase Project
Android Push Notifications requires a Firebase Project. If you don't have one, follow the below steps otherwise jump to Step 2.
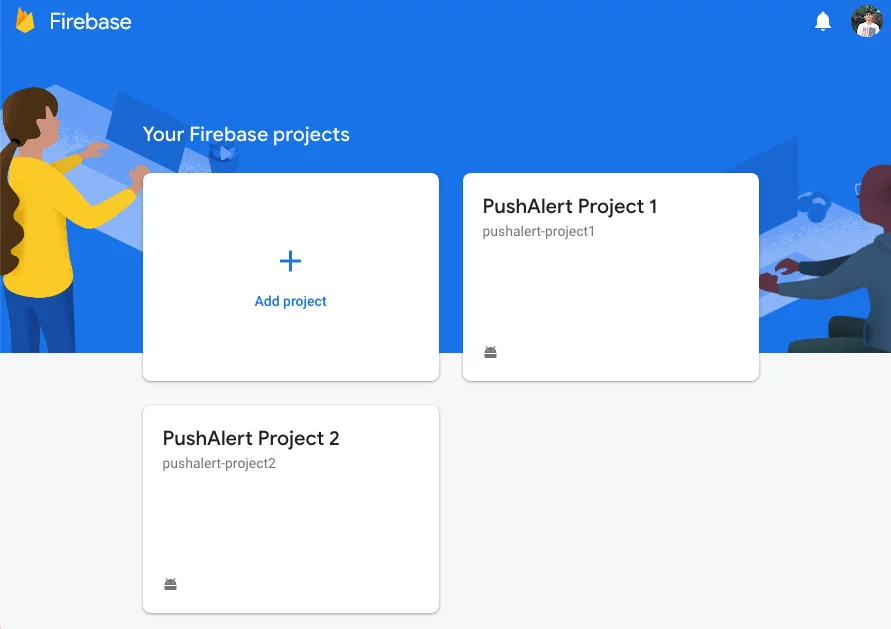
- Go to Firebase Console
- Click Add project.
-
To add Firebase resources to an existing Google Cloud project, enter its project name or select it from the dropdown menu.
OR
To create a new project, enter the project name (optionally edit the project ID displayed below the project name). Then click Continue.
Note: If prompted, review and accept the Firebase terms and click Continue.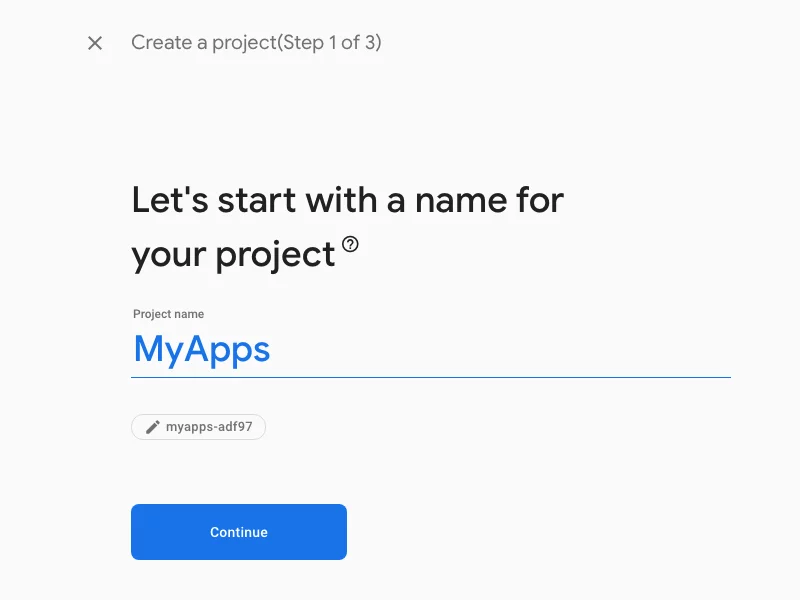
-
Make sure to enable Google Analytics (recommended), so that you can track PushAlert events. Then click continue.

- In "Configure Google Analytics", select an existing Google Analytics account or create a new one.
- Click Create Project

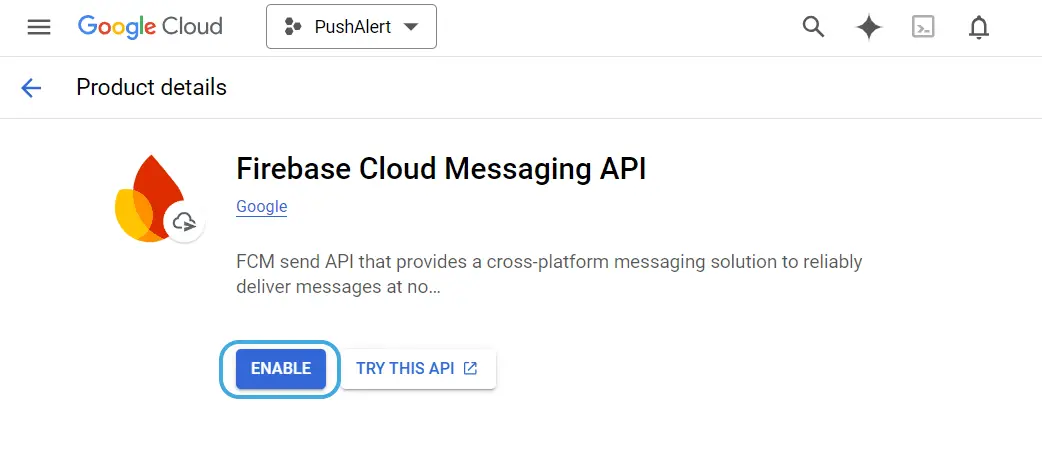
Step 2: Enable Firebase Cloud Messaging API (V1)
-
For new projects, Firebase Cloud Messaging API (V1) is enabled by default. If you're using an older or existing Firebase project, check if it's enabled.
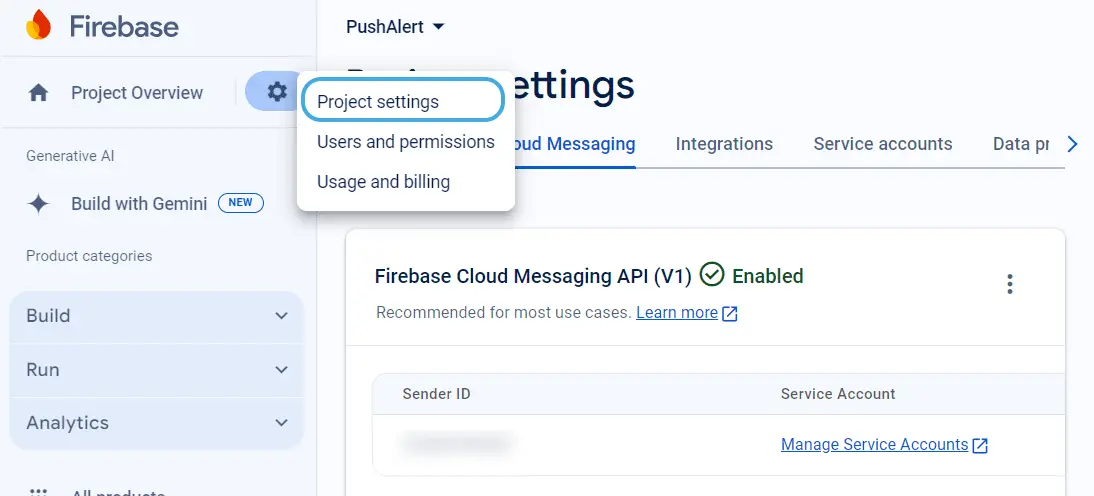
Go to "Project settings" by clicking the Gear icon near "Project Overview," then navigate to the "Cloud Messaging" tab.
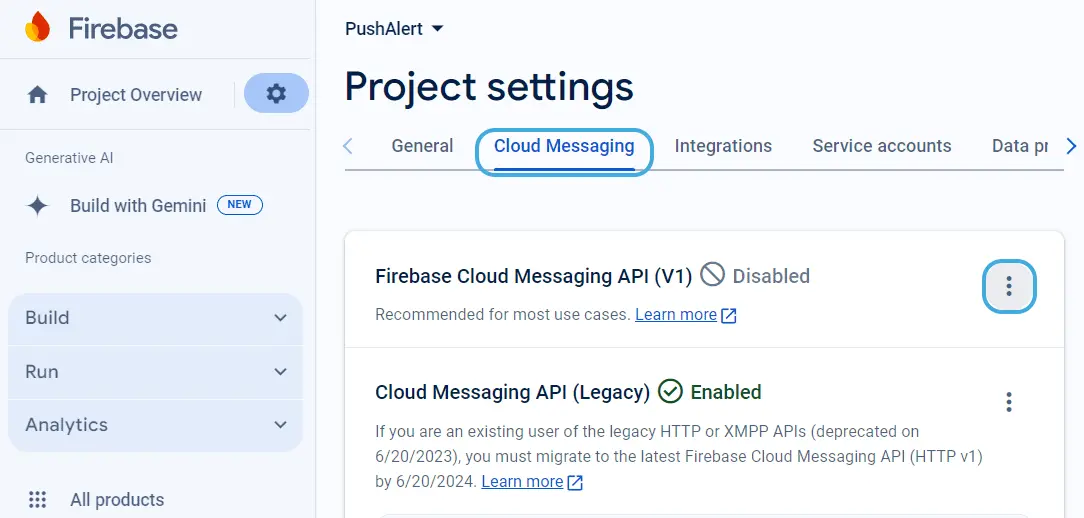
If the API is disabled, click the overview menu in the top-right corner to access the "Enable" link. Activation may take a few minutes to process.
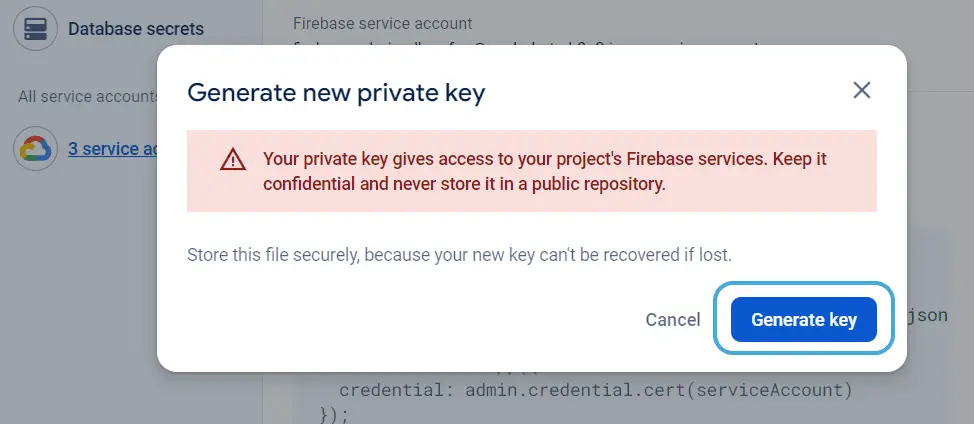
Step 3: Generate a Private Key JSON file
-
In your Firebase "Project settings," head to the "Service accounts" tab.
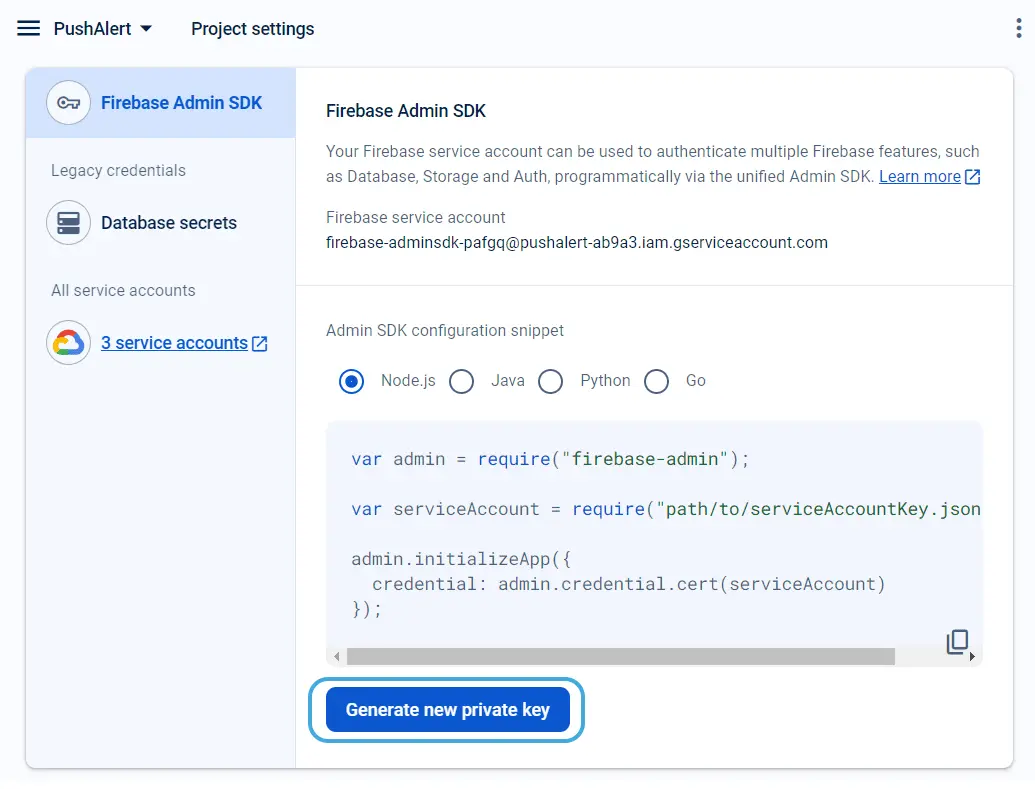
Click "Generate new private key" and confirm the warning prompt by clicking the Generate Key button. Save the generated JSON file securely, as it will be needed later.
Step 4: Configure your Android app in the PushAlert Dashboard
-
If you are adding a new Android App to the PushAlert dashboard, you can upload the JSON file generated above directly.
If you heve already added your Android app project to your dashboard here, then head to Settings > App and upload the generated Service Account JSON. Then save Settings.