iOS SDK Setup
iOS push notifications play an integral role in enhancing user engagement and retention. With PushAlert, you can send timely updates, reminders, and personalized messages directly to your users, keeping them informed, active, and connected to your app. By integrating the PushAlert iOS SDK, your app leverages Apple’s Push Notification Service (APNs) to ensure reliable, high-performance message delivery across all iOS devices.
This guide will walk you through the complete process of integrating the PushAlert SDK into your iOS application.
Requirements - Before You Begin
- iOS .p8 Authentication Key along with Key ID and Team ID
- PushAlert account with iOS App added where you can get your App ID, available in Settings -> App
- macOS with Xcode (e.g. Xcode 14+; instructions here assume Xcode 16.2)
- A device or simulator running iOS 12+ (or iPadOS 12+)
Step 1: iOS Setup
Follow these steps to enable push notifications for your iOS app, with support for Badges, delivery confirmation, and images.
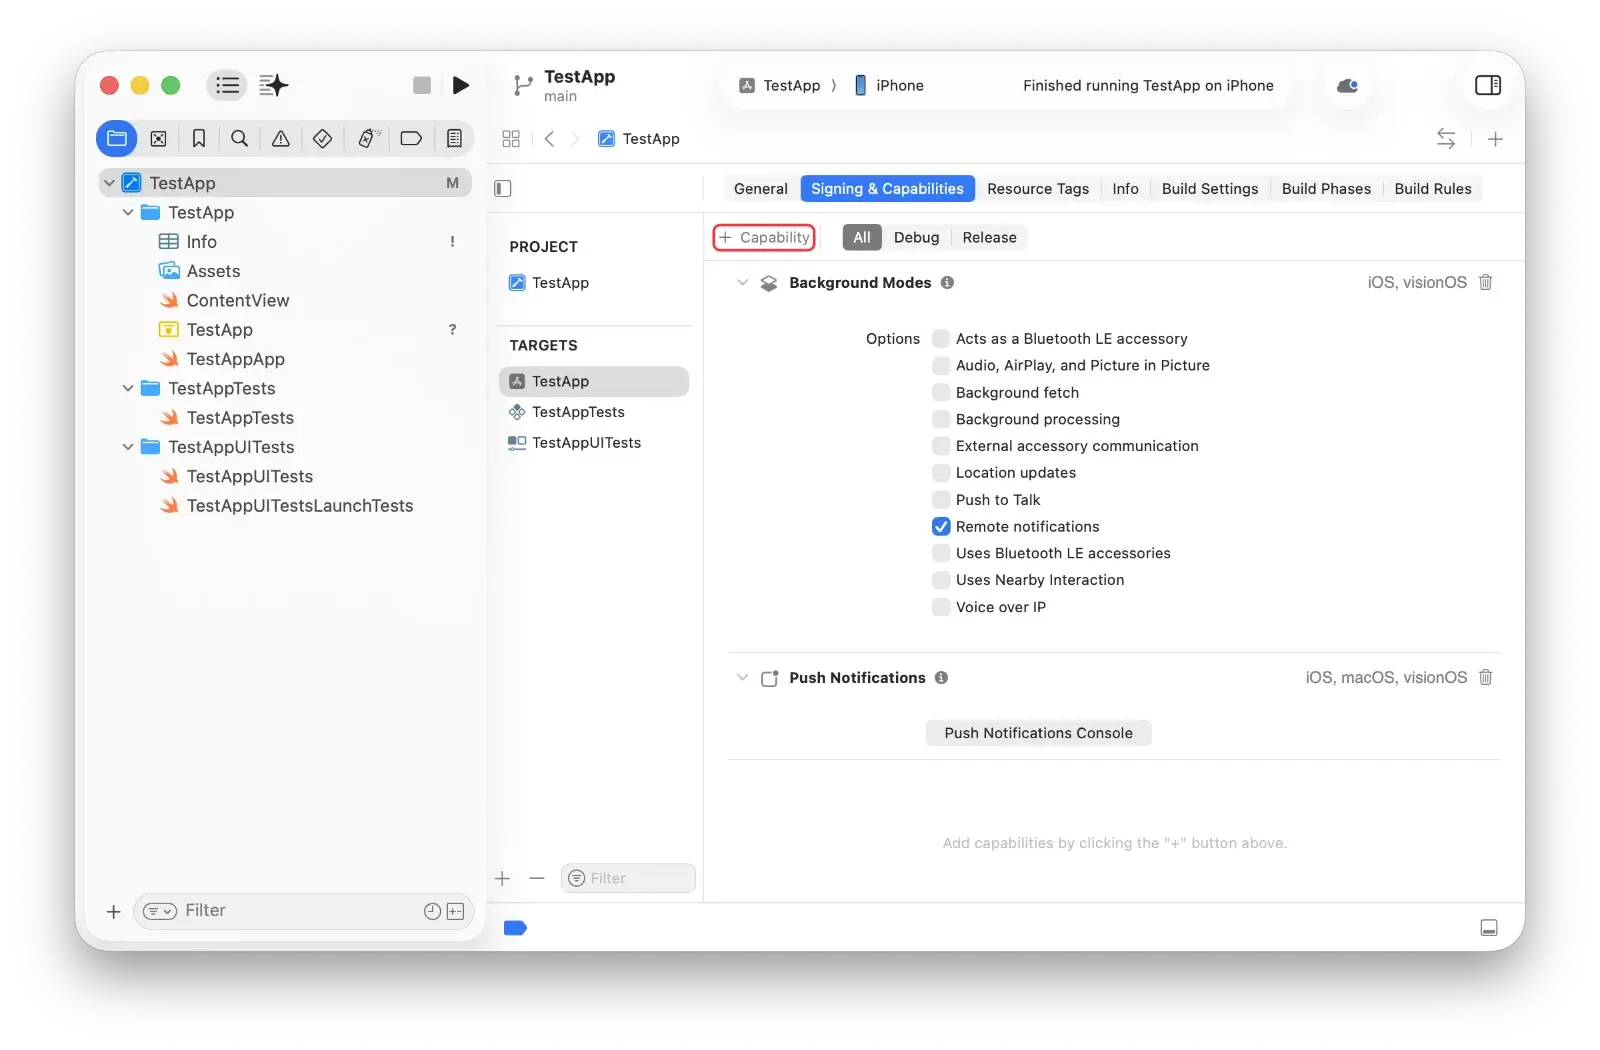
1. Add Push Notifications capability
- Open your .xcworkspace in Xcode
- Select your App target Signing & Capabilities
-
Click + Capability and add Push Notifications
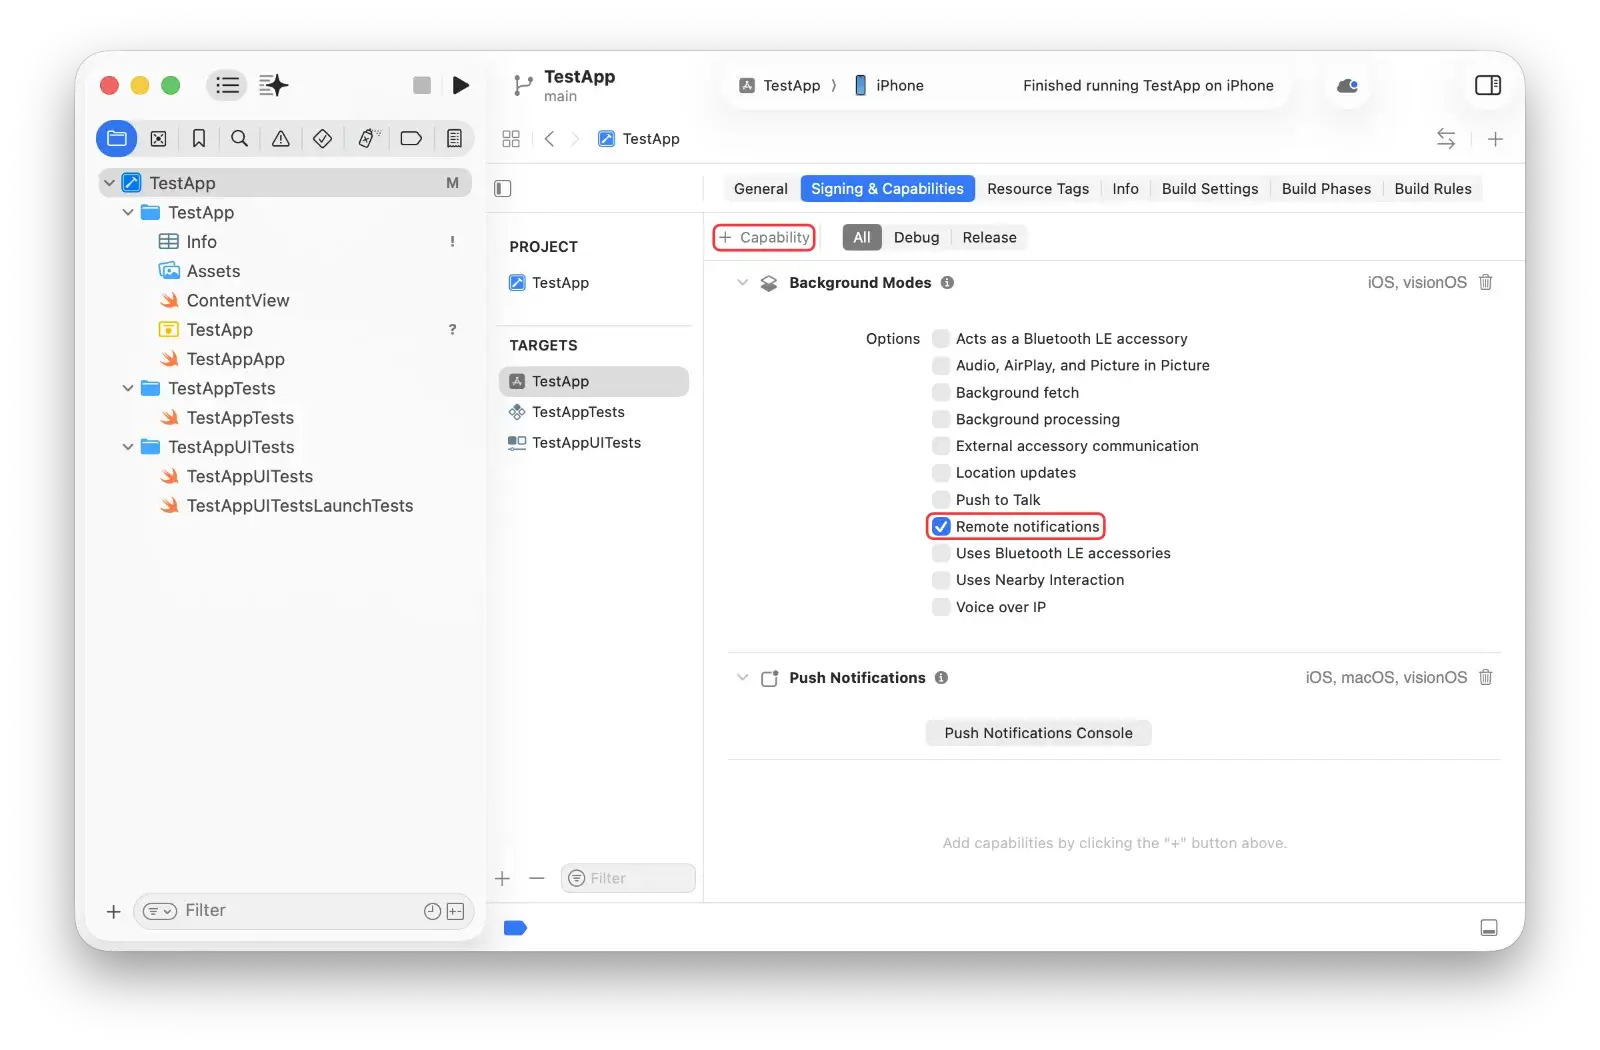
2. Add Background Modes capability
- Still under Signing & Capabilities
- Click + Capability choose Background Modes
-
Tick Remote notifications
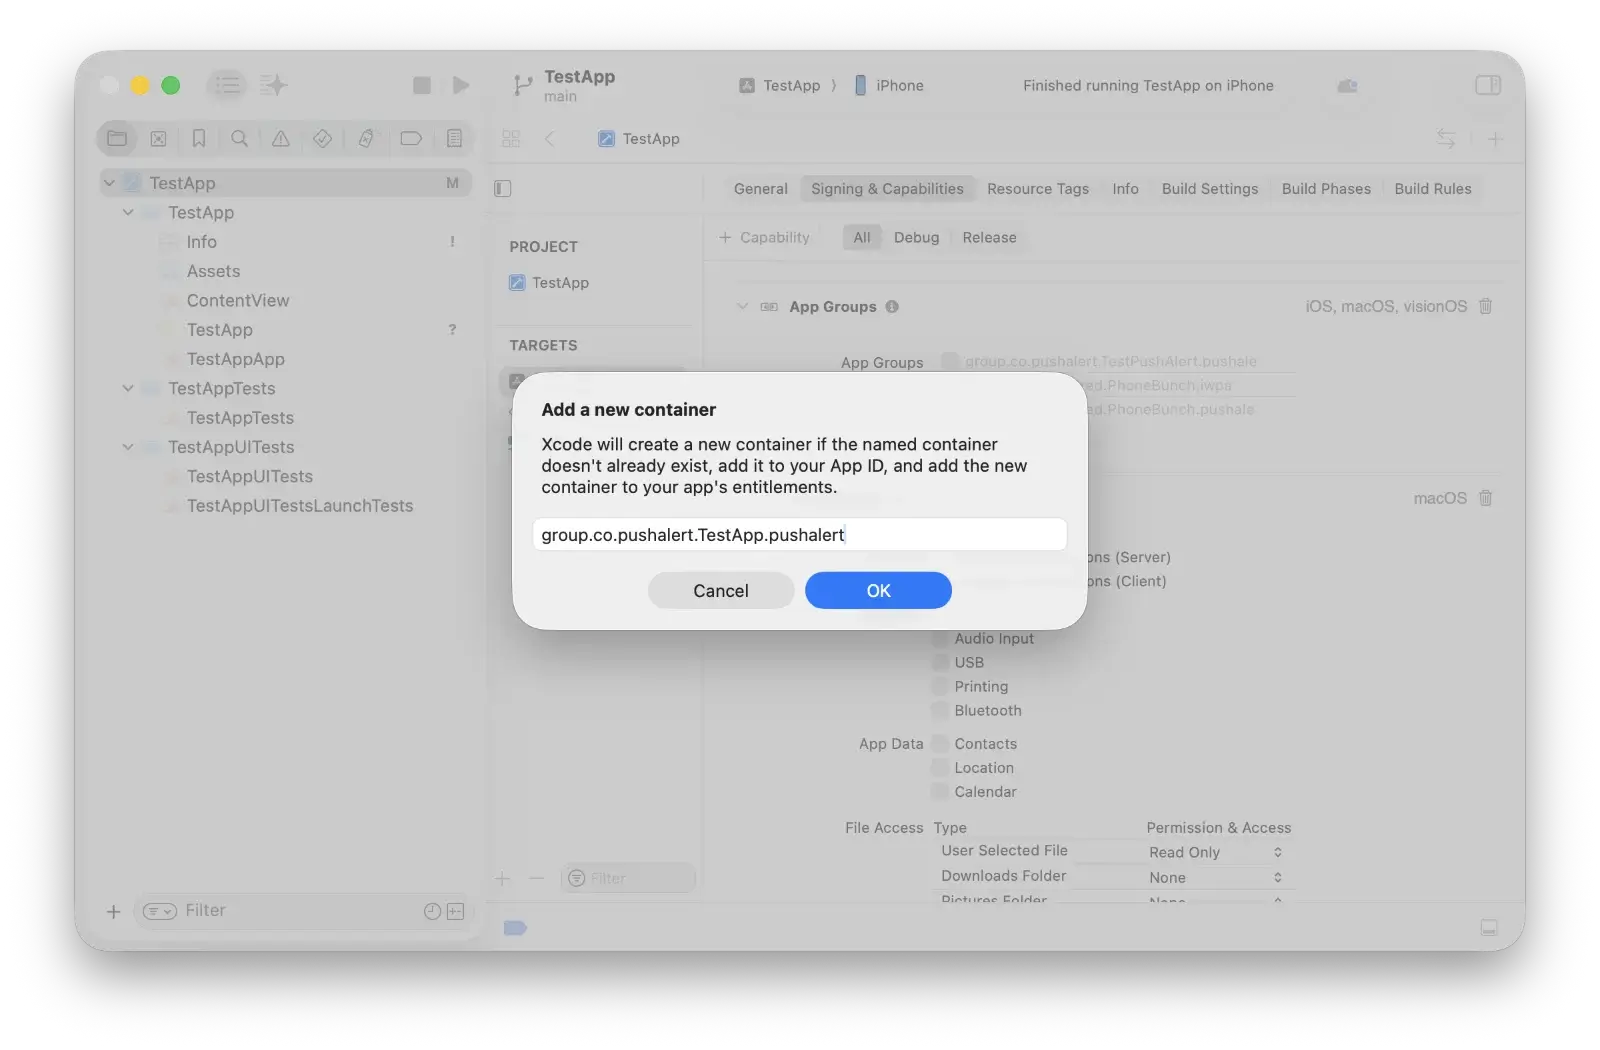
3. Add App Group
This allows sharing data between your app and a Notification Service Extension.
- Still under Signing & Capabilities, add App Groups capability
- Click + and create a group with name format: group.<your_bundle_id>.pushalert (e.g. if bundle ID is com.example.MyApp, the group name might be group.com.example.MyApp.pushalert)
-
Make sure spelling and capitalization match exactly across targets
4. Add Notification Service Extension (NSE)
- In Xcode: File New Target...
-
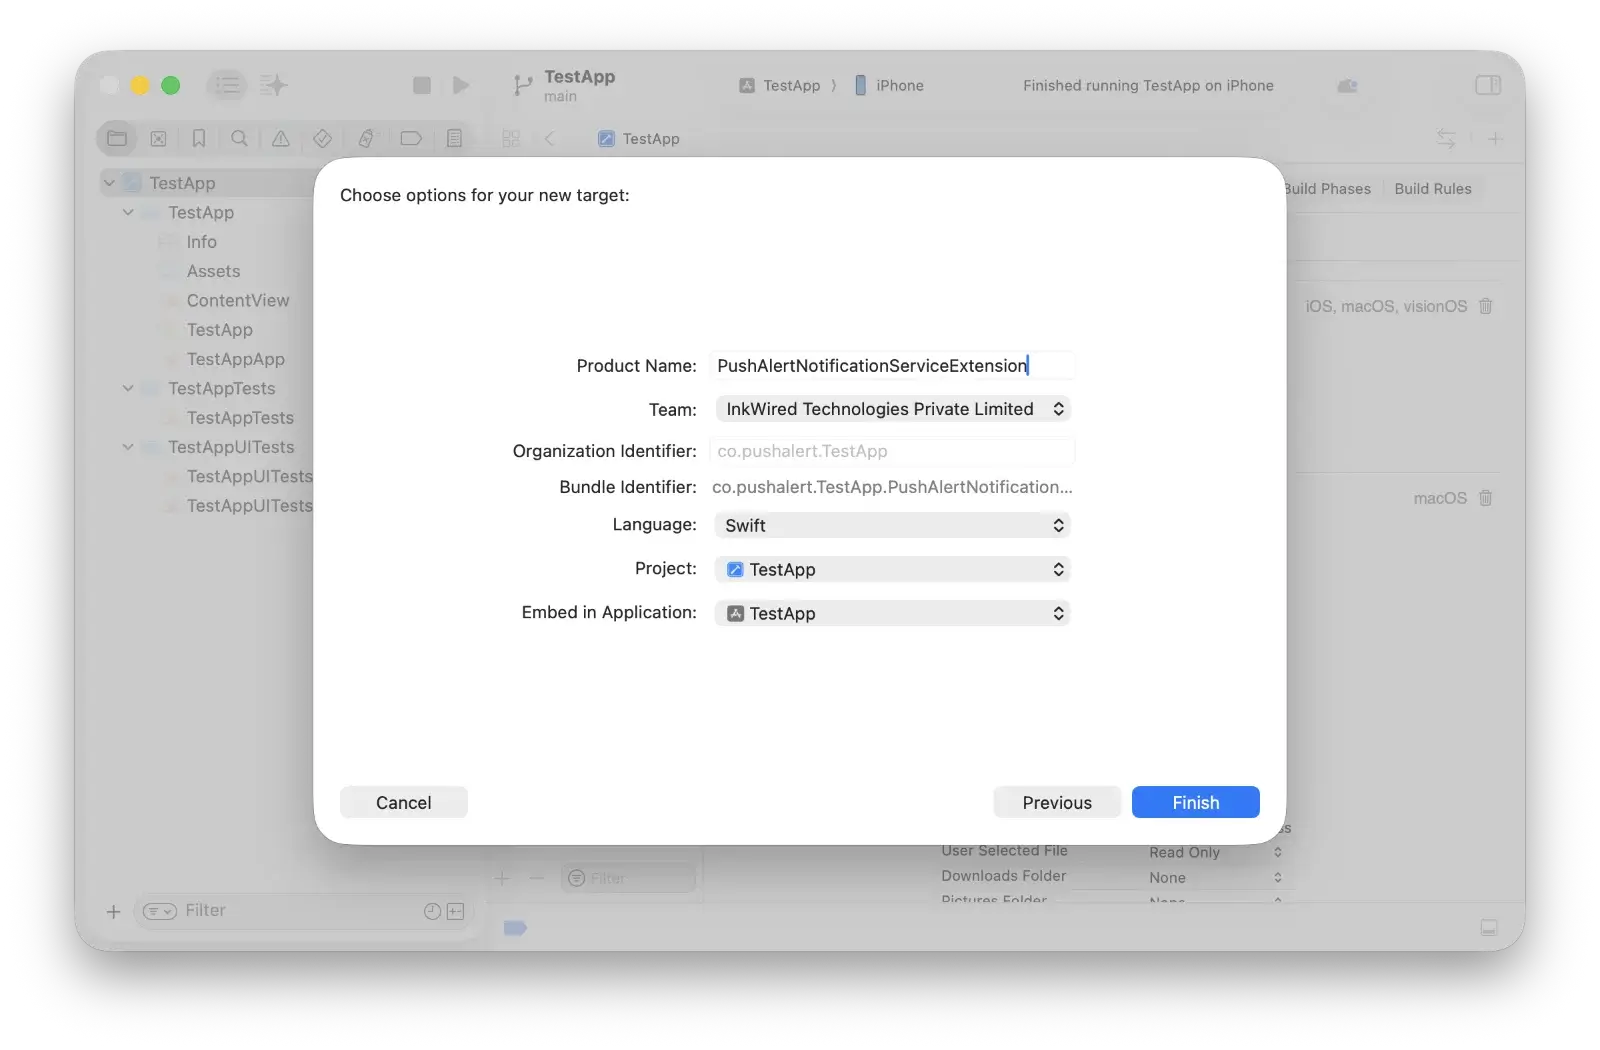
Choose Notification Service Extension, then Next.
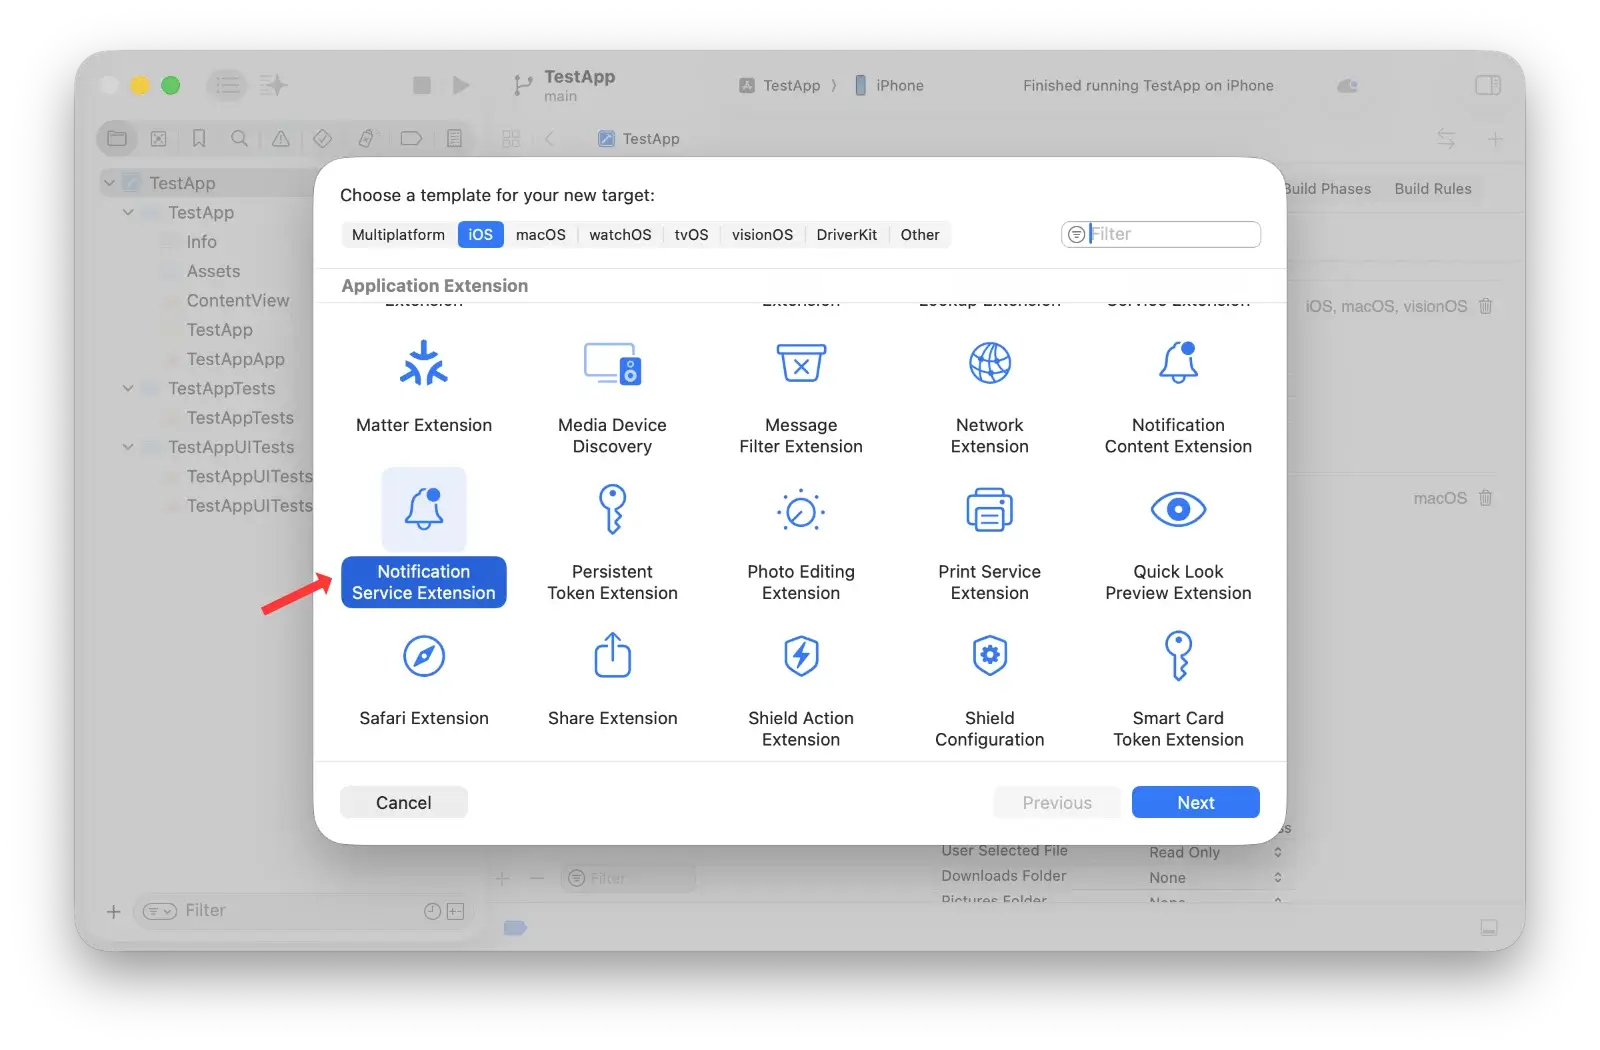
-
Name it PushAlertNotificationServiceExtension and click Finish.
-
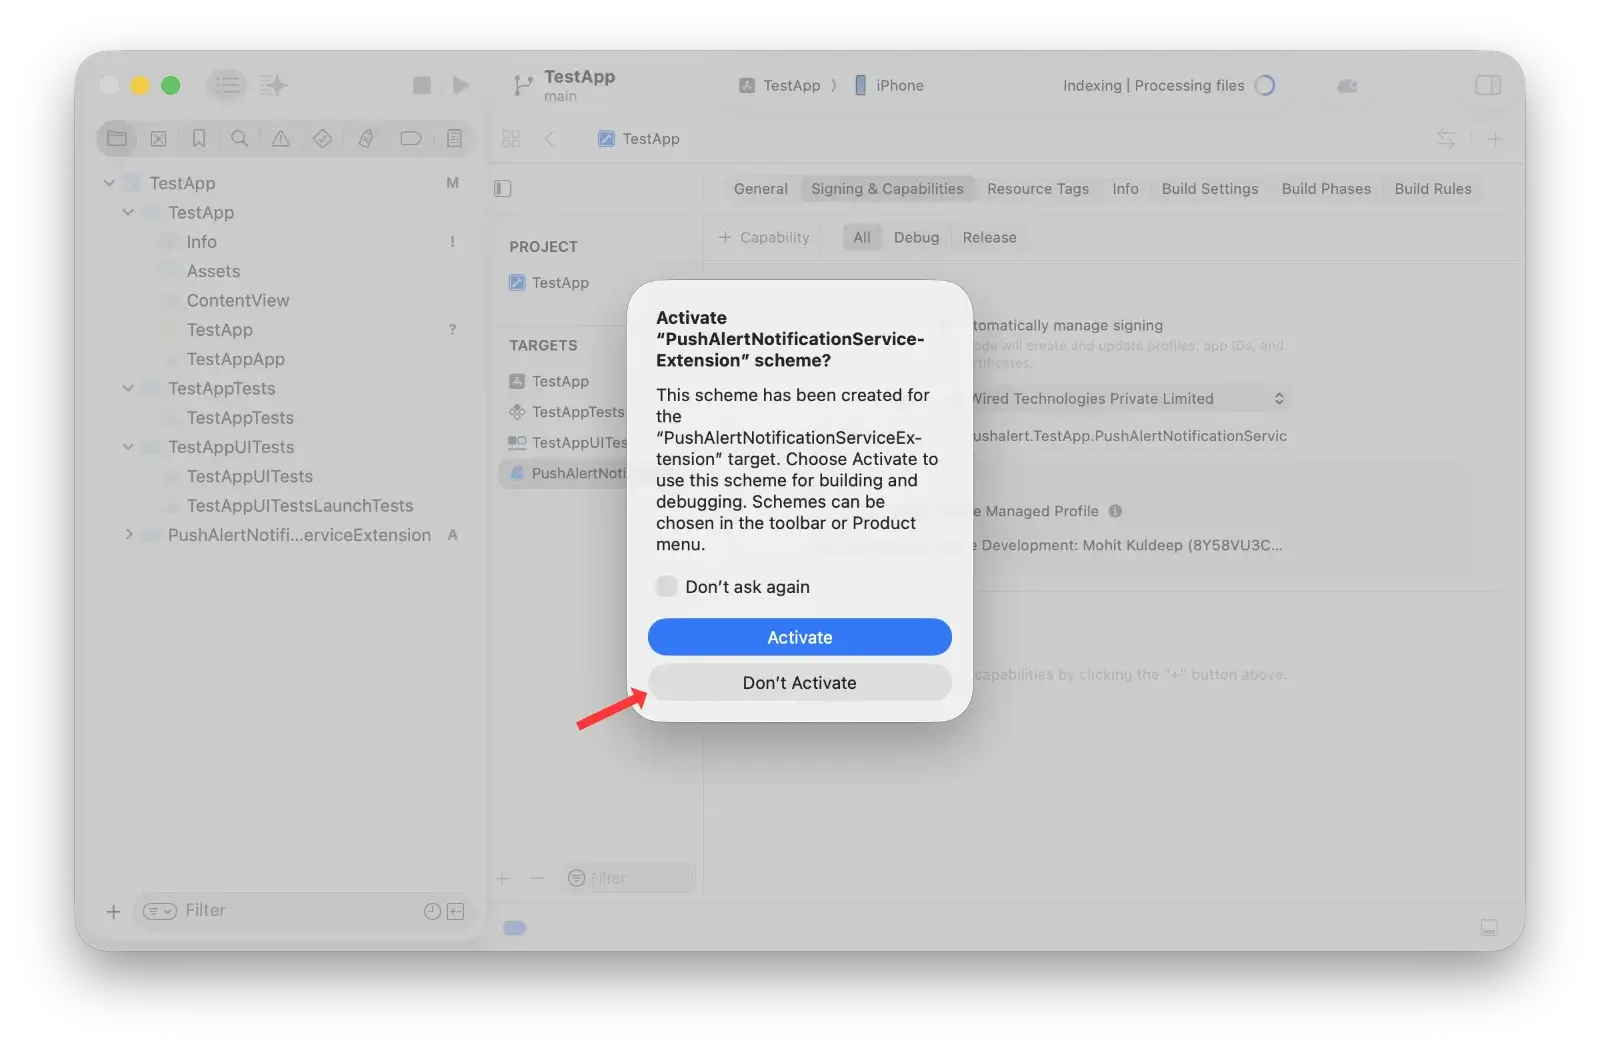
Click Don’t Activate when asked to activate scheme.
- Make sure its minimum deployment target matches your app (recommended iOS 15+)
5. Assign NSE to the same App Group
- In the target settings for the PushAlertNotificationServiceExtension, under Signing & Capabilities, add App Groups
-
Use the same group ID you added to the main app target

6. Update NSE Code
-
Navigate to the PushAlertNotificationServiceExtension folder.

-
Inside NotificationService.swift, replace the code with the following:
import UserNotifications
import PushAlert

class NotificationService: UNNotificationServiceExtension {

    var contentHandler: ((UNNotificationContent) -> Void)?
    var bestAttemptContent: UNMutableNotificationContent?
    var receivedRequest: UNNotificationRequest!

    override func didReceive(_ request: UNNotificationRequest, withContentHandler contentHandler: @escaping (UNNotificationContent) -> Void) {
        self.receivedRequest = request
        self.contentHandler = contentHandler
        bestAttemptContent = (request.content.mutableCopy() as? UNMutableNotificationContent)


        if let bestAttemptContent = bestAttemptContent {
            //DEBUGGING: Uncomment the below line to check this extension is executing
            //print("PushAlertNotificationServiceExtension")
            PushAlert.didReceiveNotificationRequestFromExtension(request: receivedRequest, bestAttemptContent: bestAttemptContent, contentHandler: contentHandler)
        }
    }

    override func serviceExtensionTimeWillExpire() {
        // Called just before the extension will be terminated by the system.
        // Use this as an opportunity to deliver your "best attempt" at modified content, otherwise the original push payload will be used.
        if let contentHandler = contentHandler, let bestAttemptContent =  bestAttemptContent {
            contentHandler(bestAttemptContent)
        }
    }

}
Copy
You’ll see an error at this stage since the PushAlert package hasn’t been installed yet — this will be resolved in the next step.
Step 2: iOS SDK Setup
With the native setup done, now integrate PushAlert’s iOS SDK to start using push notifications.
1. Add SDK
Add our SDK using Swift Package Manager
-
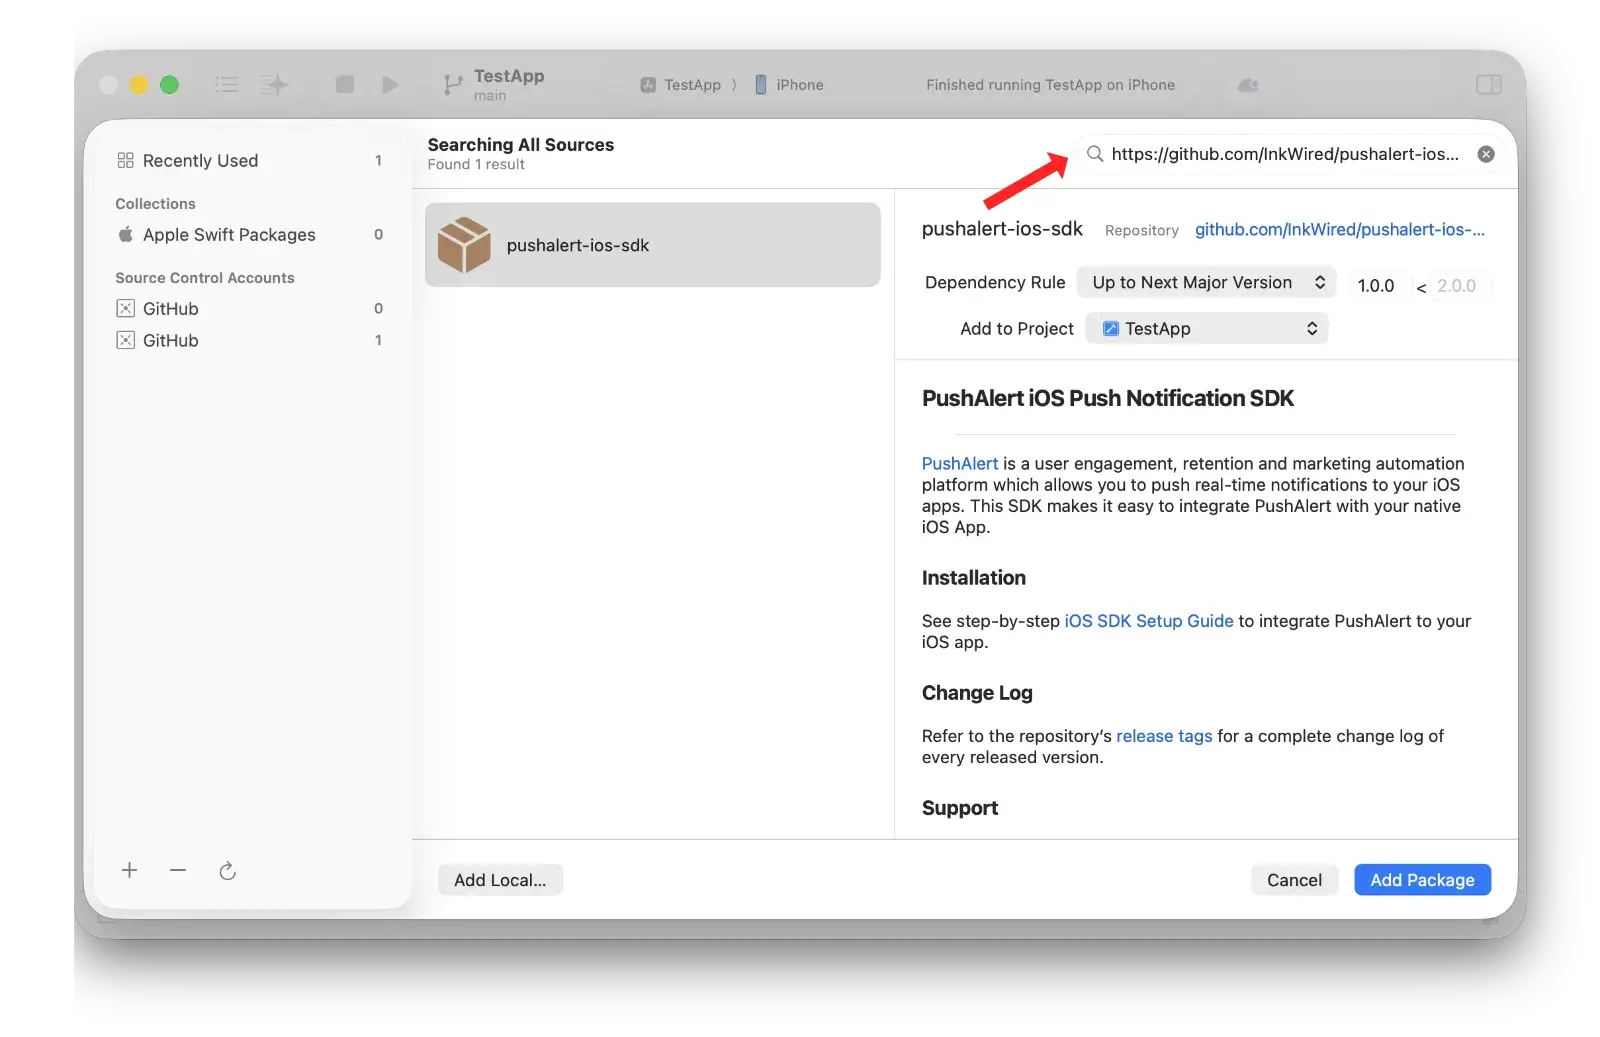
Navigate to File Add Packages Dependencies… in Xcode and enter the PushAlert Swift Package Manager (SPM) repository URL in "Search or Eneter Package URL":
https://github.com/InkWired/pushalert-ios-sdk
-
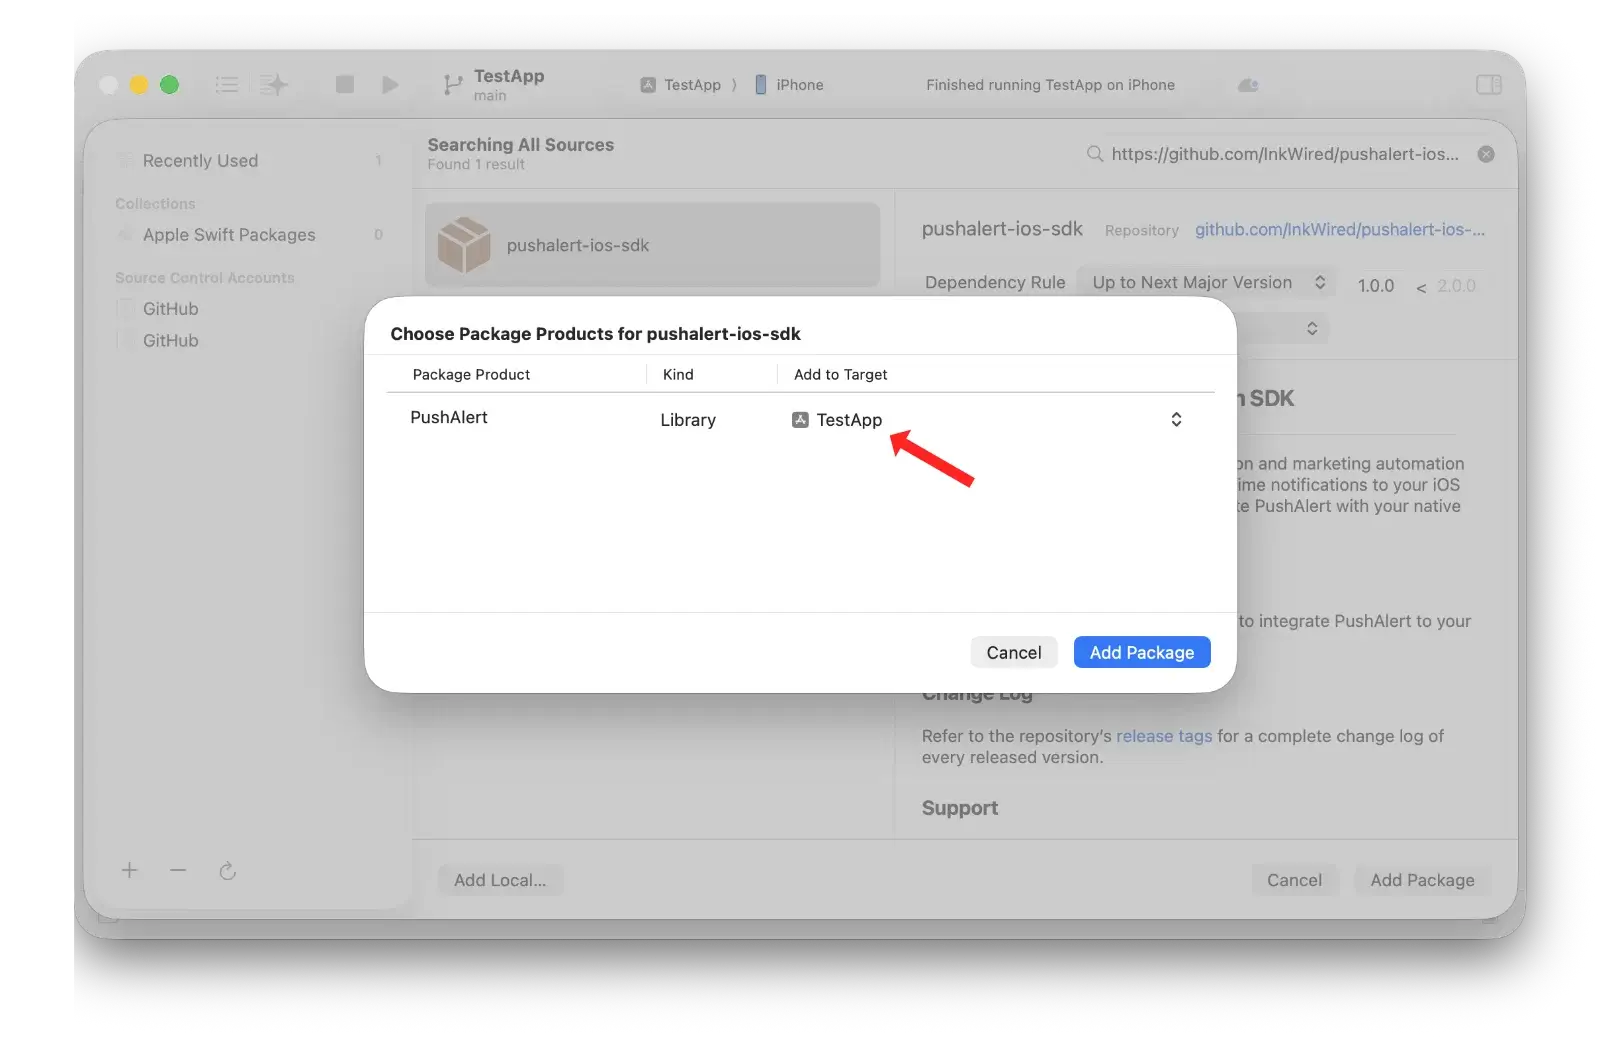
Select the PushAlert package and click Add Package.
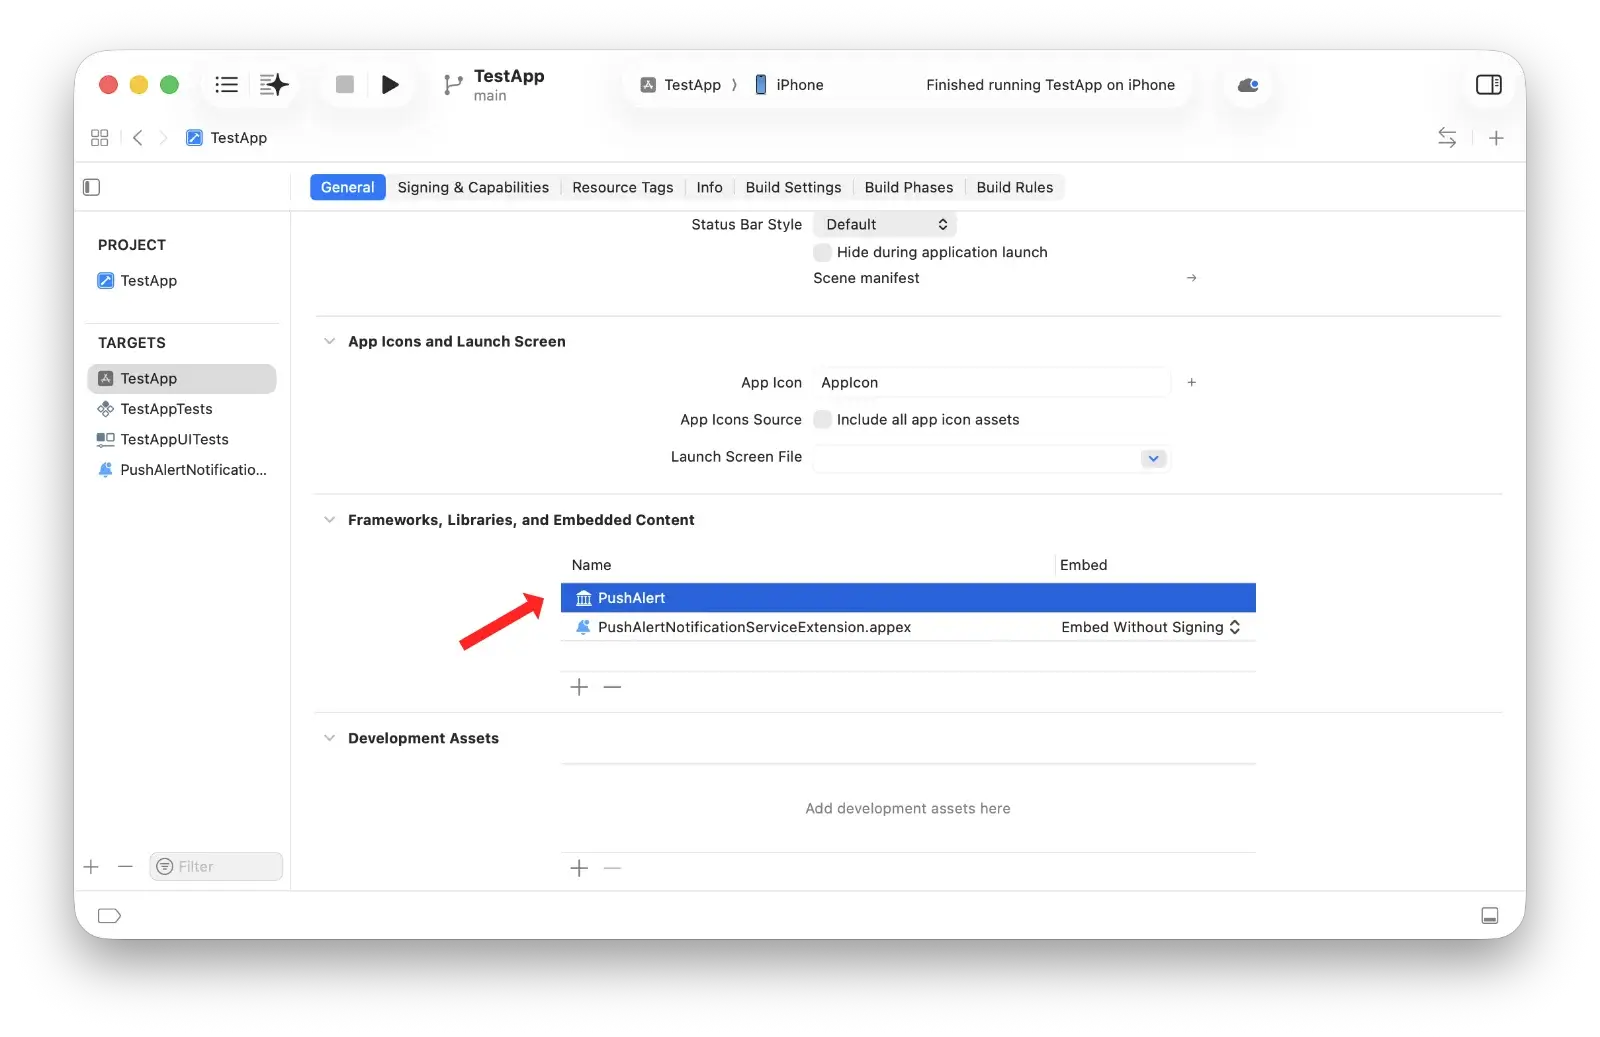
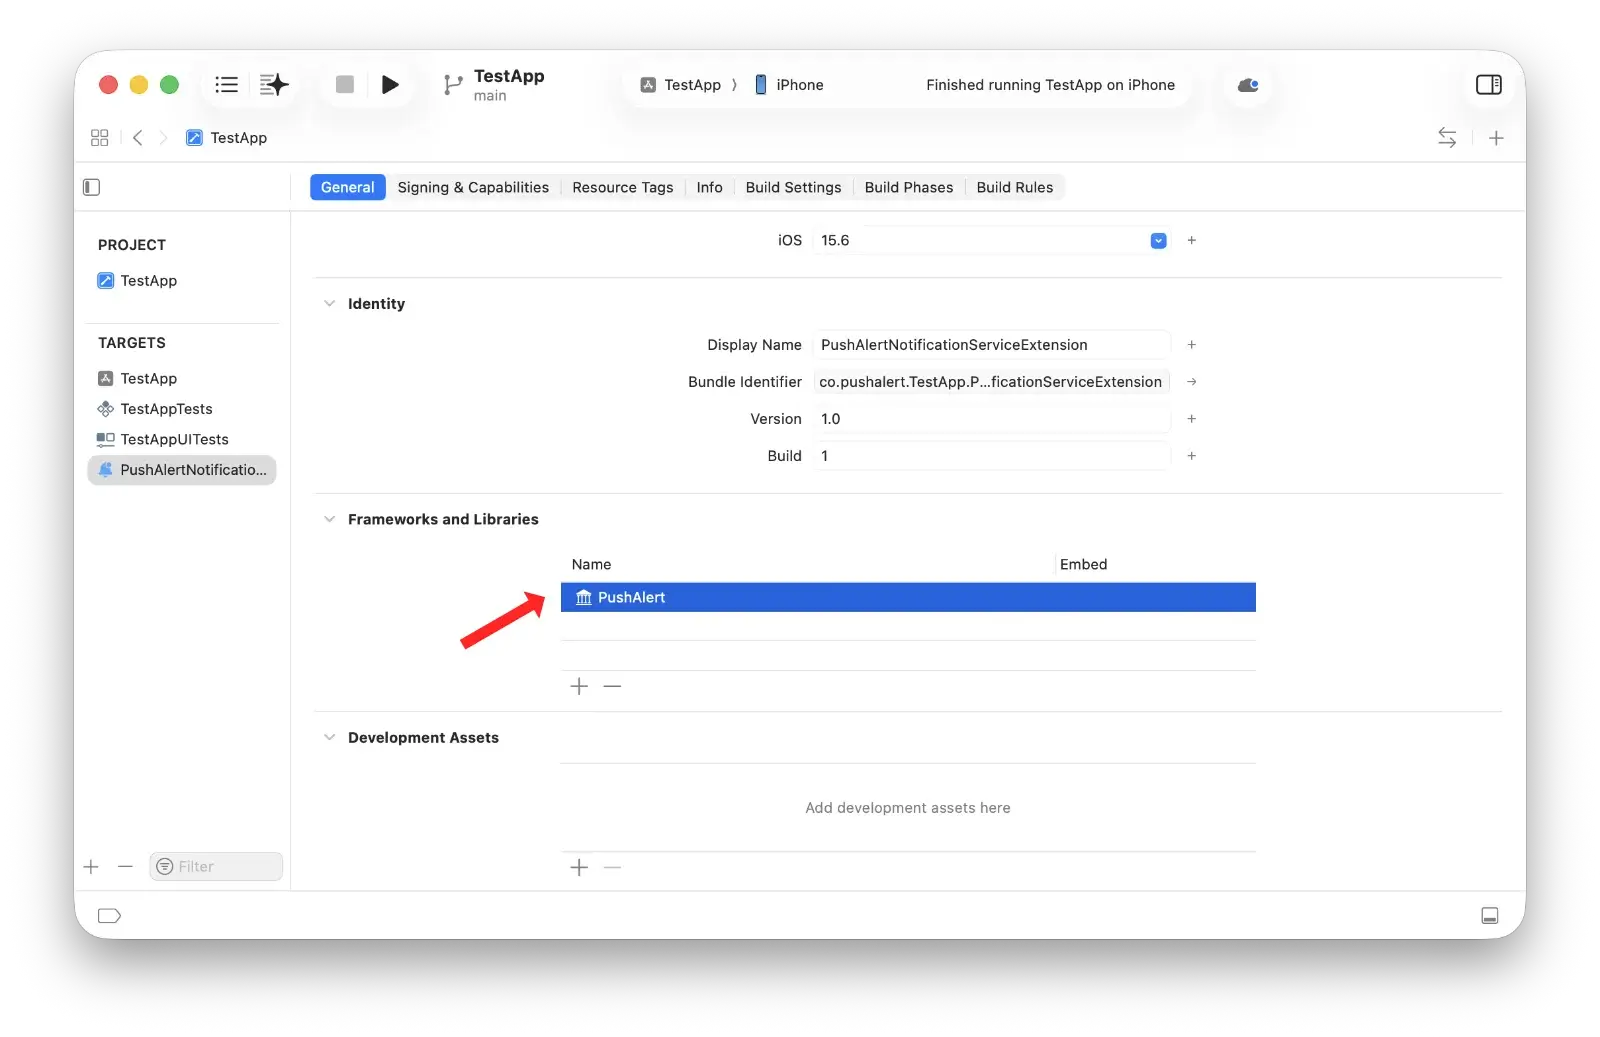
-
Important: Add the PushAlert to both your App Target and Notification Service Extension Target.
2. Initialize SDK
For SwiftUI interface, open your <APP_NAME>App.swift file and initialize PushAlert iOS SDK using the provided initialization methods.
Replace PUSHALERT_APP_ID with your PushAlert App ID, which you can find in your PushAlert Dashboard Settings App.
import SwiftUI
import PushAlert

@main
struct APP_NAMEApp: App {
    static let isRunningOnIpad = UIDevice.current.userInterfaceIdiom == .pad ? true : false
    @UIApplicationDelegateAdaptor(AppDelegate.self) var appDelegate

    var body: some Scene {
        WindowGroup {
            ContentView()
        }
    }
}

class AppDelegate: NSObject, UIApplicationDelegate, UNUserNotificationCenterDelegate{

    func application(_ application: UIApplication, didFinishLaunchingWithOptions launchOptions: [UIApplication.LaunchOptionsKey : Any]? = nil) -> Bool {
        //print("PushAlert SDK")
        let paSettings:[String : Any] = ["auto_prompt": true, "provisional_auth": false, "delay": 5, "in_app_behaviour": PAInAppBehaviour.NOTIFICATION]
        PushAlert.enableDebug(enable: true)
        PushAlert.initialize(app_id: "PUSHALERT_APP_ID", application: application, settings: paSettings)
        PushAlert.setOpenURLBehaviour(openURLBehaviour: PAOpenURLBehaviour.EXTERNAL_BROWSER)

        return true
    }


    func application(_ application: UIApplication, didRegisterForRemoteNotificationsWithDeviceToken deviceToken: Data) {
        PushAlert.handleToken(token: deviceToken)
    }
}Step 3: Run Your App and Send Your First Notification
Once everything is integrated, test to verify push notifcations and subscription registration.
- Run your app on a real device or the emulator
- The push permission prompt should appear if your configuration has auto_prompt set to true.
- Before permission is granted, check the PushAlert dashboard Analytics Subscriber Information. You'll find no subscriber here.
- Tap Allow in the prompt.
- Refresh the page, you'll see a subscriber in the list. Also total numbers of subscribers on dashboard will increase by one.
- Head to Send Notification Send/Schedule and send your first notification.